|
|
Post by bowman on Jan 19, 2013 18:43:38 GMT
I'm going to struggle to add anything to the back of the wheel, as the hydraulic brake drum is already there. However, I will investigate the possibilities of filling in between the brake drum and the wheel.
I was thinking of making a number of two part moulds in silicon rubber - wheel, wheels without brake drum (for the spare) and tyre. I think that if I make two moulds for each, it may be possible to cast quite a few at a time... There speaks someone who has never poured resin in his life!
Any tips VERY gratefully received....
Steve
|
|
|
|
Post by okdoky on Jan 19, 2013 19:11:21 GMT
I am led to believe there is a need to plan well ahead as the materials go off very quickly and you don't want to make to big a batch if you need to fiddle around with individual molds to use up the quantities mixed.
You could end up with a lot of waste in the mixing bowl !!!!!
But I will be watching over to see how you do it so I can do all the exact same mistakes with my first !!!!!!! Ha ha ha !!!!!!!!!!!
Nige
|
|
|
|
Post by rgriffs on Jan 20, 2013 11:46:48 GMT
just look on you tube, there are lots of tutorials, the biggest problems with casting are not mixing resin to the recommended ratio's, buy a cheap digital kitchen scales (£10.00 from asda), and putting vent holes in the top of the mould to allow air to escape. other than that, it's learn as you go. for me, it's the biggest advance ever in my modelling. oh and use rubber gloves, pink marigolds are better than surgical type.
|
|
|
|
Post by bowman on Jan 20, 2013 13:32:33 GMT
Many thanks for the tips on mould making and casting - I will be YouTubing this evening and have already downloaded some useful guides from the TOMPS website. Following some advice from Nige Bisset (a.k.a. OkDoky), I've raided my nieces' Lego box and have built a moulding box, which I will fix to a sheet of 2mm thick plastic with mastic, which will also be used to seal the inner face of the box. 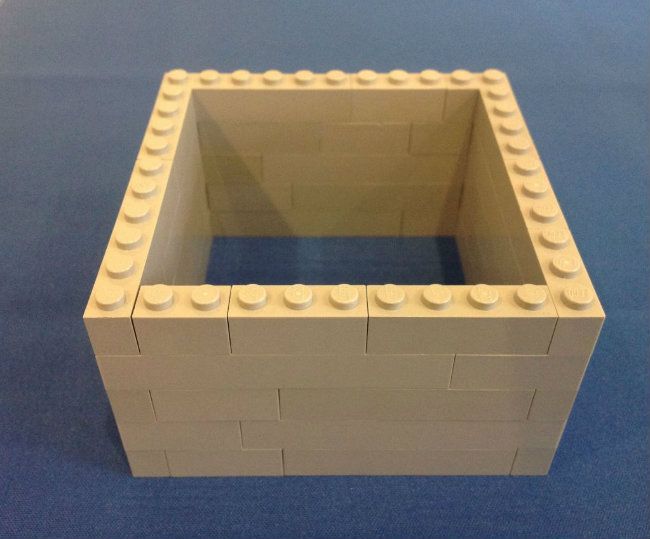 I've allowed at least 20mm around the component 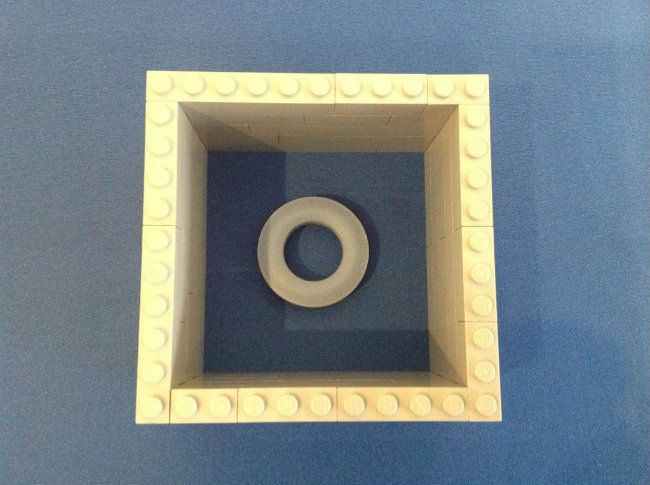 I've now got to work out how to position pouring holes and vent holes and the like, but hopefully YouTube will provide most of the answers this evening... More to follow. Steve |
|
|
|
Post by okdoky on Jan 20, 2013 16:43:27 GMT
I suppose you could glue the tyre temporarily to the side of the box at the half way pour !!!!!!!!!
Leave the lego off above that point to let you see the pour level for the first half in the mid tread and include your four locating plugs in the corners to allow for mating the two mold halfs !!!!!!!
Let it all set and pull out your mating plugs !!!!! Add a layer of vaseline to the first half of the mold !!!!!!
Build up the mold box up to finished height and pour second half !!!!!!!!!!
From my understanding, you should then have a two part mold with the pouring point on an edge and the only needing a de-bonding agent and then clamped together for the pouring resin !!!!!!!!
|
|
|
|
Post by Harriet on Jan 20, 2013 16:45:10 GMT
If it's like Cast Iron, then I think you worry about them afterwards, make the mould from your patterns, then put holes through for the risers and pourers. I do realise that it's easier in sand and there might be a different way of doing it with rubber!
|
|
|
|
Post by bowman on Jan 21, 2013 10:10:14 GMT
Having spent most of yesterday evening watching YouTube videos on moulding and casting (some of these guys really could bore for NATO....) I have started again with the mould box 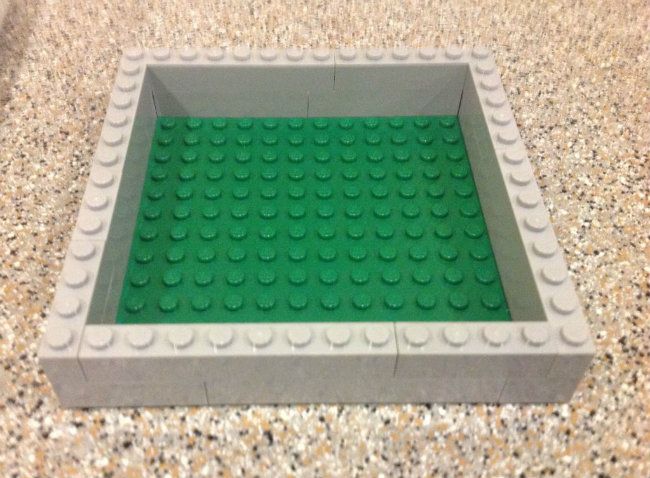 I then got out the trusty plasticine (not the kiddies variety) 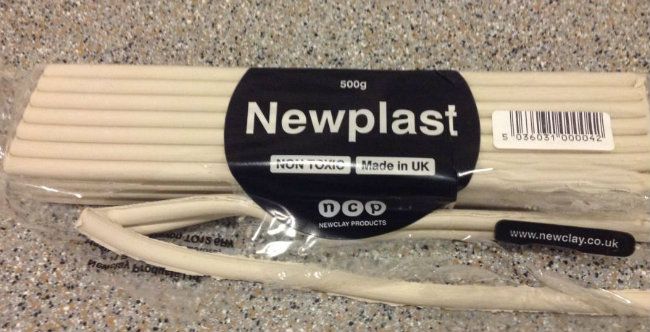 and started to fill the mould box in layers about 5 mm thick, smoothing each layer down 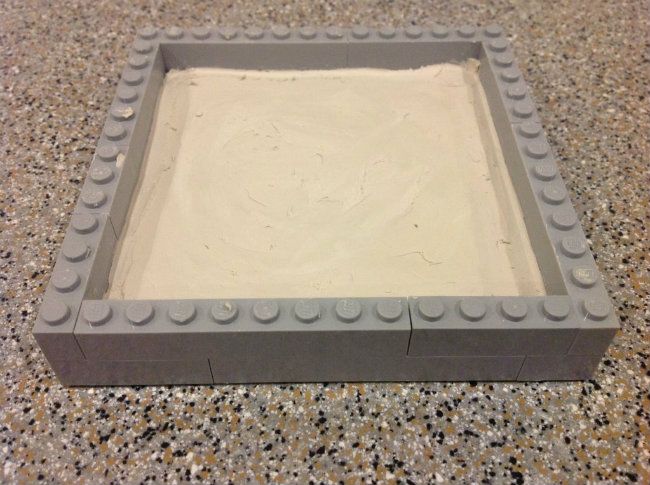 until I had the box almost full 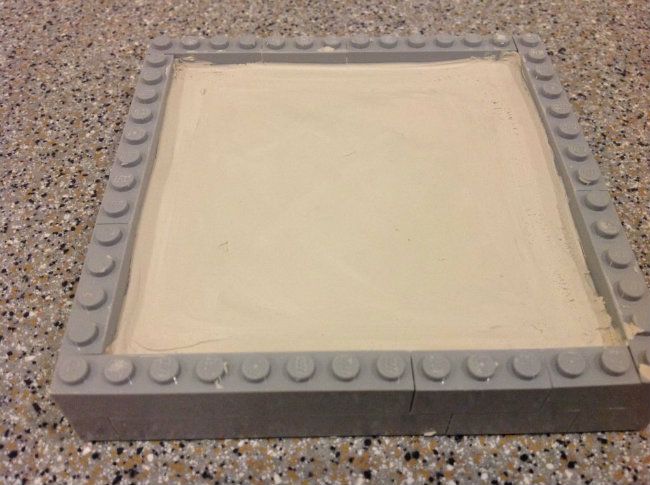 Now came the difficult bit - embedding the masters in the plasticine to the right depth and making sure that none of the detail was obscured. 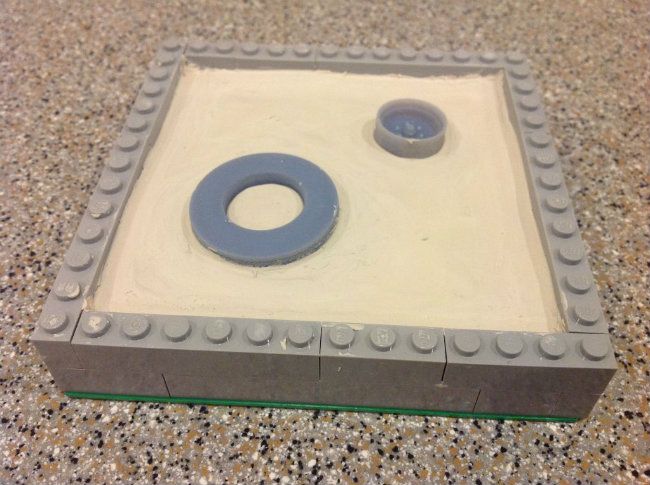 This evenings task will be cleaning any stray plasticine from the masters, fitting pouring "tubes" and vents and fitting the mould mating plugs to the corners of the mould box. More to follow.... Steve |
|
Deleted
Deleted Member
Posts: 0
|
Post by Deleted on Jan 21, 2013 10:56:24 GMT
... and there might be a different way of doing it with rubber! Harriet ... headmasters room this instant!    |
|
|
|
Post by Harriet on Jan 21, 2013 13:47:29 GMT
... and there might be a different way of doing it with rubber! Harriet ... headmasters room this instant! Oooops!  |
|
|
|
Post by bowman on Jan 21, 2013 19:56:13 GMT
Nice one Harriet! Completed this evening's tasks and now off to melt some Vaseline for use as the release agent (no comments please Nick) and then tomorrow I can start messing about with chemicals.... 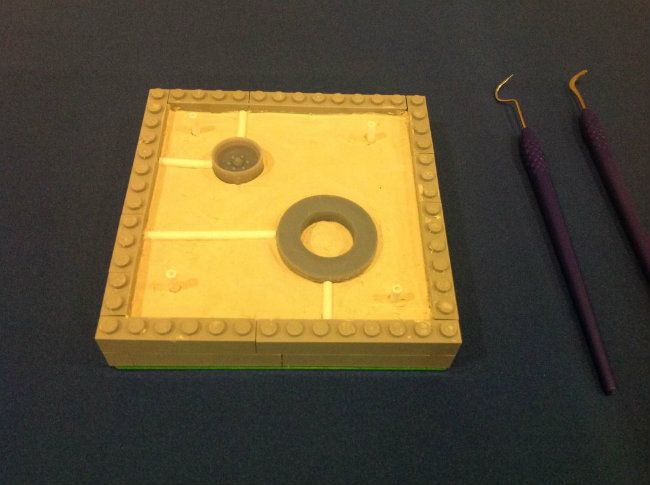 I've also added a few extra rows to my mould box in readiness for the RTV Silicon. 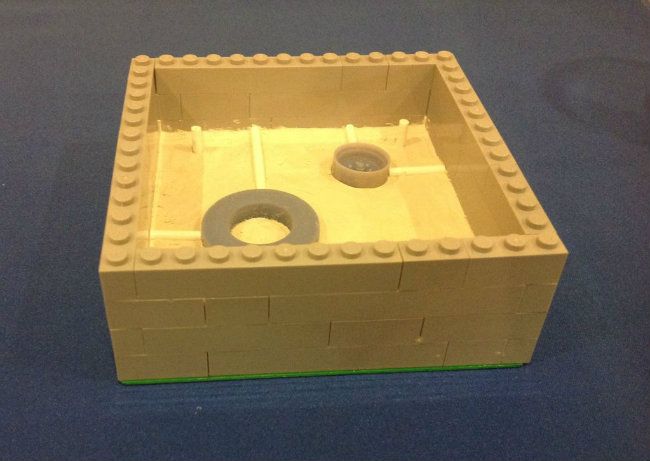 Cheers Steve |
|
|
|
Post by rgriffs on Jan 22, 2013 10:57:10 GMT
[url 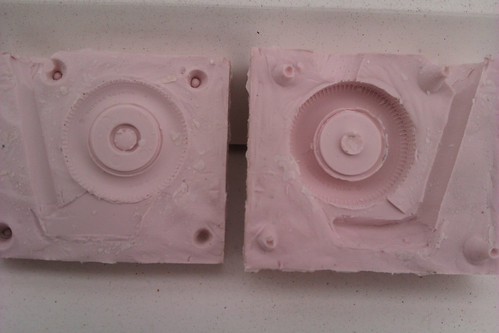 IMAG0237 IMAG0237 by rgriffs, on Flickr][/url] here is a photo of a tyre mould that i use, as you can see it has tapered location pins, this makes the pins easier to engage, also the bigger the diameter will stop the mould halves from moving. the two halves are sandwiched between two pieces of plywood, bound with elastic bands. the resin is poured through a feeder, this stops the majority of bubbles and the air is then vented out through the highest point of the tyre in the mould. air takes a bit of teasing out but good rates of success are acheived using this method. i don't wish to tell you how to suck eggs, but it works for me. i have a scan of a magazine article about casting, if you would like it please send a personal message. |
|
|
|
Post by bowman on Jan 22, 2013 12:11:41 GMT
Your mould makes more sense than mine on many different levels. I'm going back to the drawing board before I start messing about with expensive chemicals. PM is on it's way, and thanks for your offer of help.
Cheers
Steve
|
|
|
|
Post by bowman on Jan 28, 2013 9:38:46 GMT
Right, latest version of the mould (version 3), and this one has actually got to the stage of having RTV Silicon poured into it, so that must be progress  I've learned many things over the past few days about moulds, silicon and the like. I was trying to find a cheap source of disposable containers in which I could measure out small volumes of silicon catalyst (typically 10 ml for 200g of Silicon). SWMBO came up with the brilliant idea of using the foil pots that Ikea tea lights come in. I think we paid a couple of pounds for a bag of a hundred of these, and the candle bit is still usable if you are careful (remember elfin safety). These are also a useful size for holding CA, mixing paint and epoxy, and holding small parts. The mould box was again prepared using Lego and a plasticine base, with plastic rod and card being used for the channel that will be used for the resin pour.  I used a slow cure catalyst with the RTV (room temperature vulcanising) silicon, which stays workable in the mixing pot for 40 minutes and takes 24 hours to cure before you can demould. 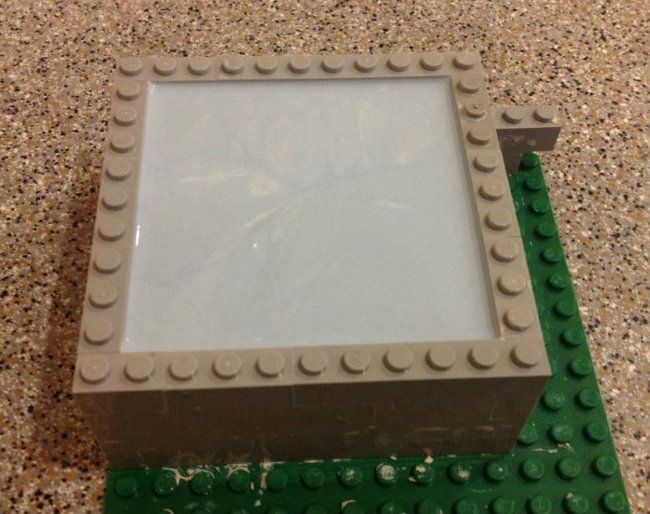 Once the cure time had elapsed it was time to strip the mould box down (the joys of Lego!) and peel away the plasticine to leave the bottom part of the mould 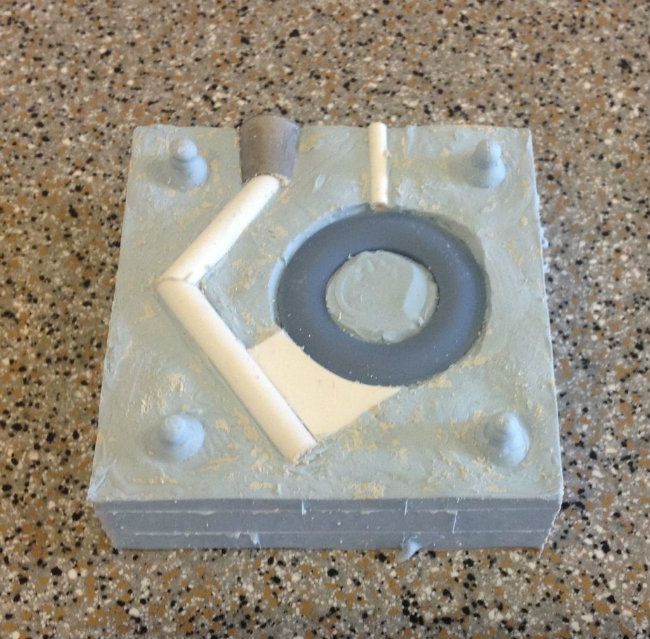 I then rebuilt the mould box around the bottom of the mould and covered the silicon (but NOT the tyre former) with melted, liquid vaseline 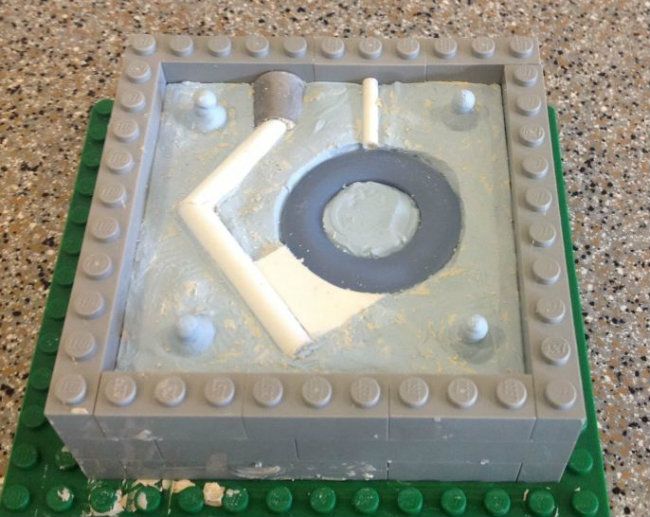 Once completed, the mould box was built up enough to allow for the top layer of silicon, which was then poured in. The mould was stripped down this morning whilst getting ready to head off for work (photo to follow this evening). Steve |
|
|
|
Post by rgriffs on Jan 28, 2013 11:25:49 GMT
i think you have it cracked, mould is spot on. just a couple of points, don't strip the mould box down, be caerefull, leave it intact, it will keep it sealed on the sides then no silicon will escape downwards from the second pour. consider buying a digital scales, keep it clean in clear food bags, you will get your mixing ratios with silicon and then resin spot on every time. lots less waste, and less frustration when the product does go off every time. i use yoghurt pots to mix, we only throw them away don't we.
|
|
|
|
Post by bowman on Jan 28, 2013 11:52:17 GMT
Hi Richie,
It's only thanks to your very good advice that the mould is (finally) in a usable state. I pinched the digital kitchen scales for the measuring this weekend, but was watched like a hawk by SWMBO. Your idea of putting them in a clear food bag has got to be a winner! I bought a spray on release agent from TOMPS Casting Supplies:
"Cilchem (Chemical Industries) Aerosol Mould Release System. A very quick and easy to use system, recommended for Latex and RTV Silicones. Very little build up, low silicone content for easy painting of your cast, simply spray on, allow the solvent to evapourate and you have left a micro thin coating to both protect your mould and ease release.
CIL Release 1711E is designed specifically for the release of epoxy resins, millable gums and polyester."
Do you have any experience of using this type of agent?
Steve
|
|
 Members' Forum")