kitspackman
Kit Basher
 Me and 'My' Canberra...
Posts: 97
|
Post by kitspackman on Jan 6, 2009 13:40:27 GMT
Dennis, I may have asked this elsewhere, in which case I'm sorry in advance. Do you know why the starboard fin attachment lug on any Canberra's fin was twice the width, right to left, than the other two? Actually the lugs are on the stub fin that's part of the fuselage, and the wooden bit of the main fin slots over the lugs I'm talking about. Someone else asked me this some time back, and at first I questioned if it was even right, but it turns out it is. Of course Colin will now have to cut off his PR9's fin, build the lugs to scale and replace the fin.......... We'll know they're there Colin, never fear.  |
|
|
|
Post by martinhale on Jan 6, 2009 14:42:46 GMT
Good thinking Martin. Unfortunately that panel was the Main Equipment hatch which opened into the bay of the same name. It contained, on shelves (two or three I think), various pieces of radio and electrical equipment on which the various technicians performed their magic arts with wiggly amps and things. The panel itself was hinged at the top and opened by means of a single retractable handle. As I recall it was then supported by one or two struts which were clipped to the inside of the door when not in use.  The bay was behind the rear pressure bulkhead, on which the pilots seat was mounted and so opening up the hatch on the model would not let much light in. - in fact having finally got around to looking at the kit, Airfix have done a pretty good job of simulating the cramped conditions in the PR9. Even with the large canopy, the pilots position was quite crowded and the least said about the navigators slot the better. Dennis Naggers! I thought I had a plan there but your picture clearly shows that its not on. Thanks for replying anyway. Martin |
|
|
|
Post by sloegin57 on Jan 7, 2009 0:15:49 GMT
Dennis, I may have asked this elsewhere, in which case I'm sorry in advance. Do you know why the starboard fin attachment lug on any Canberra's fin was twice the width, right to left, than the other two? Actually the lugs are on the stub fin that's part of the fuselage, and the wooden bit of the main fin slots over the lugs I'm talking about. Someone else asked me this some time back, and at first I questioned if it was even right, but it turns out it is. Of course Colin will now have to cut off his PR9's fin, build the lugs to scale and replace the fin.......... We'll know they're there Colin, never fear. Actually, I seem to recall answering this self same question possibly to somebody else a while back. Simple answer is - I have no idea. Never got that far on the brief times I was in ASF at Luqa or at SAFI, ( the RAF in the shape of W/O Waddington thought that I might get bored wandering around taking pictures of visitors all day whilst "my" Valetta was away.) The nearest that I ever got to "heavy metal" on the PR9 was remove/refit wing tanks; remove/refit tip tanks plus a few mods at the back end assisting the Electricians trying to overcome the runaway tailplane trim actuator problems that plagued the fleet although according to my diary, I did a Dew Point check on the Oxy system on 133 in August 67. I've noted that the regulators were "Mk.12's", ones that I had never come across before and that they were cleared for use up to 100,000 feet......... But thats going off topic and if I carry on Southsix One will send me to the naughty room.  ;D |
|
kitspackman
Kit Basher
Me and 'My' Canberra...
Posts: 97
|
Post by kitspackman on Jan 7, 2009 13:29:34 GMT
Dennis,
Thanks anyway, it looks like this is one of those 'run and run' questions that will turn up time after time.
|
|
|
|
Post by COLIN SHIPTON-KNIGHT on Jan 9, 2009 21:16:32 GMT
Little bit of progress.... Have filed the port wing vortex generators down to a more liveable size, although looking at the photo you might not think so... Before.  After.  I think I am going to do this for both wings, as my attempts to recreate the vortex generators, on a smaller scale, from plastic profile proved very difficult to do. Mostly from the point of view that there are so many of them to arrange in a straight line. So my recommendation would be, carefully file down what the kit already has.... Unless you are supremely confident that you can replace them with card cut to the correct size and shape... More coming up this weekend... |
|
|
|
Post by COLIN SHIPTON-KNIGHT on Jan 9, 2009 21:26:30 GMT
Kit and Dennis, Fin duly modified regarding lugs. Had a lot of luck in disguising the joint line afterwards........  After reading comments, I suspect answer is... Have I got this correct? Wooden upper fin attached to metal lower fin? Wooden structure is less consistent in strength than metal, hence enlarging lugs to spread forces involved over a larger area. Well known principle in wooden structures, much bigger joints than in metal structures..... In my limited experience of wooden structures, joints/lugs/assemblies always as big as airframe would accommodate.... Well that's my version, and I defy you to spot my work...... Colin |
|
|
|
Post by sloegin57 on Jan 9, 2009 23:52:56 GMT
Colin,
my only comment would be that the fin/rudder tip is a bit too rounded (see previous drawings)
It's a minor point - carry on - I'm following you - stage by stage.
Vortex gennrators ! I'll maill you later - remember --Rizla
Dennis
|
|
|
|
Post by johnsheehan on Jan 11, 2009 15:03:25 GMT
Hi Colin
It's looking fantastic!! I've dropped out of PR.9 production for now I'm on with a SAAF B.(I)12 But I think when I do re start the PR.9 it will be a very early one may be one of the two proto types perhaps.
|
|
kitspackman
Kit Basher
Me and 'My' Canberra...
Posts: 97
|
Post by kitspackman on Jan 11, 2009 20:42:49 GMT
Colin, Kit and Dennis, Fin duly modified regarding lugs. Had a lot of luck in disguising the joint line afterwards........ Excellent work, well done. But you tapped the lugs BSF and they should be BSW.......  The lugs are asymmetrical, port and starboard, on the real thing. The front one is about level with the foremost panel line on your fin, and mounted on the sloping panel line that juust misses the vortex generators. The two aft lugs are about level with the slanting panel line on the fin itself, and also on the sloping panel line. The weird thing is starboard aft lug is twice the thickness of the port one, which in turn is the same thickness as the forward one. Quite why this should be so is a total mystery. |
|
|
|
Post by COLIN SHIPTON-KNIGHT on Jan 15, 2009 20:56:21 GMT
A bit further on... Wingtips have proved difficult, well more difficult than I first thought. You have to bear in mind that I am doing XH134 in the retirement scheme, and of course it has the slightly modified wing tips with the 'new' RWR (Radar Warning Receivers), which means you have to change the kits wing tip. Photo shows where I am going, also the vortex generators under the wing that Dennis referred to. Also black aerial on wing leading edge for the ILS, that has replaced the aerials on the fin. Notice also that the wing tip light is now a different shape with a small light added on extreme tip.  Another view, although small, shows something of the subtle shape I am heading for.  The start is to cut the tip along a convenient panel line and glue a strip of plastic card in its place, and then sand it down. This is what proved difficult. The thickness of the tip at this point ends up being around 1mm scale wise, and then you have to shape the backwards projecting receiver, which is thicker than the rest of the tip. See here, although the white plastic does not allow you to see much detail of the shape. Primer should show this better. 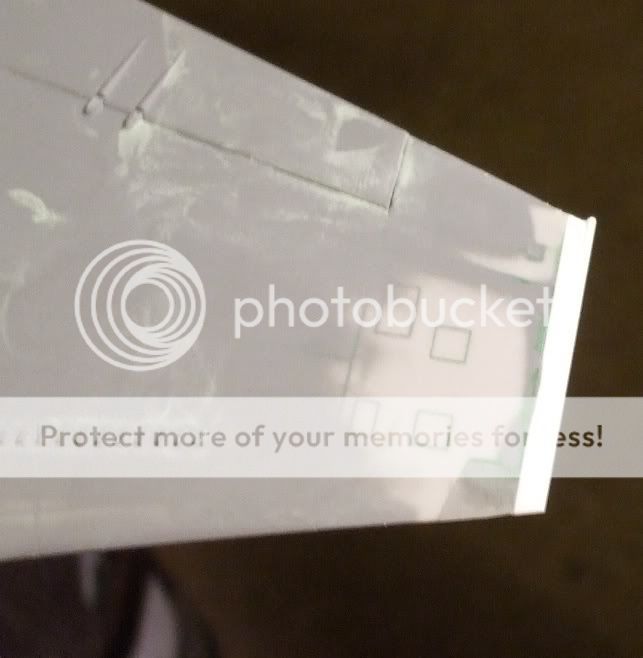 Till next episode... |
|
|
|
Post by COLIN SHIPTON-KNIGHT on Jan 18, 2009 16:28:34 GMT
Just got a new photo of the wing tips on the later variants, courtesy of John Sheehan. 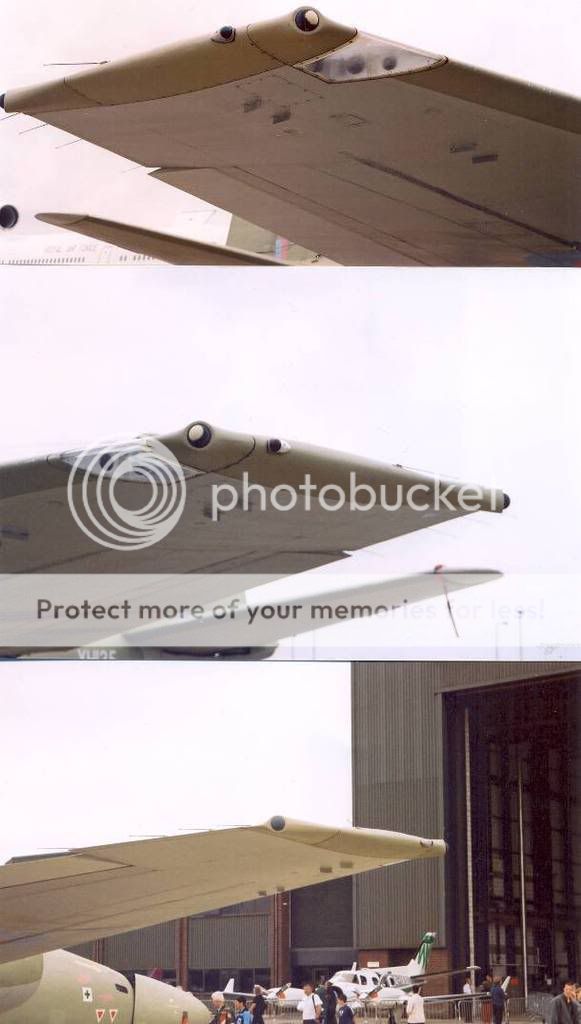 |
|
|
|
Post by bigredzed on Jan 19, 2009 11:21:38 GMT
Hi All,
New to the site after looking for info on my new PR9 kit!
My dad was with 13 Sqn at Wyton when I was a kid and I love the Canberra (actually recce aicraft in general!)
My kit will be a present for the old fella when its completed so I want it to be right! I cant believe the amount of work Im gonna have to put in with all these mods. My main problem is that I am looking for some 13 Sqn Decals, any ideas gents. I have been out of the modelling scene for a while so I'm not up to speed on suppliers and where to look, any help appreciated. Whilst on the subject of Recce, my next Project is a 1/48 Revell Phantom FGR-2 2AC Sqn at Laarbruch (lived their as well), my old fella was in the RIC. I have only ever used Humbrol paints and dont do the mixy thing!!! Even on the revell kit they suggest mixing paints to get the right colour, can anyone point me in the right direction for Humbrol colours for this kit?
Some very useful info on this thread, !!
Thanks
Frazer
|
|
chrismac60
Sprue Cutter
IPMS Farnborough
Posts: 15
|
Post by chrismac60 on Jan 25, 2009 16:21:57 GMT
Great work Colin, I'm hooked on every word
Chris
|
|
|
|
Post by COLIN SHIPTON-KNIGHT on Jan 25, 2009 19:15:00 GMT
Dear All,
Sorry for lack of updates of last week or so, the 'other life' has been getting in the way.......
More is coming soon.......
Colin
|
|
|
|
Post by COLIN SHIPTON-KNIGHT on Jan 29, 2009 18:45:38 GMT
Dear All, Still sticking things on and priming the 'Beasts', there are two in production...... Now I am going to be making XH134 in the retirement scheme and XH131 in the ARTF scheme. The third model I am unsure of as yet, it may be in Grey/Green or Silver scheme. However over the last 12 months I have obtained as many decal sheets as I could in preparation for this, and I have all the decals I need for my models. However this leaves quite a few 'spares', that I am quite happy to give to others that may be looking for an alternative scheme. Have a look at the photo, there is plenty of choice left.  Including full sets of Model Alliance stencils for 'modern' and 'early' variants, 'pale' roundels, for any one not happy with the shades that come with the kit. Virtually all the variations of squadron badges are still available, and a couple of 'Gulf' schemes. Any way, if any one is interested in any of them? They are Free... Just contact me at, decalbank@googlemail.com Colin |
|
 Members' Forum")


