|
|
Post by ollieholmes on Mar 5, 2009 21:57:43 GMT
A realy nice job you have done there.
|
|
kitspackman
Kit Basher
 Me and 'My' Canberra...
Posts: 97
|
Post by kitspackman on Mar 5, 2009 23:43:25 GMT
Colin, Takes me back to Kemble on 'The Last Canberra Day'........  Excelllent work, and even better as we got see it step by step. Ak, Say hello to my youngerst daughter when you get to Odiham, she's in the Tower there.  You can't miss her, she's the tallest person in the place!! |
|
|
|
Post by johnsheehan on Mar 6, 2009 18:31:01 GMT
Fantastic Colin,well done!!
|
|
|
|
Post by reccephreak on Mar 8, 2009 3:53:31 GMT
Fantastic job!!  You have set the "standard", which I will strive for, when I finally get around to starting on my 2 kits. Larry |
|
|
|
Post by seangb on Mar 8, 2009 12:25:22 GMT
Superb work Colin ..great build up thread and a superb model well done
|
|
|
|
Post by COLIN SHIPTON-KNIGHT on Mar 17, 2009 19:32:30 GMT
Number two.... XH131, to be finished in ARTF. Sat there next to the first one, and the Halfords primer almost looks the right colour, 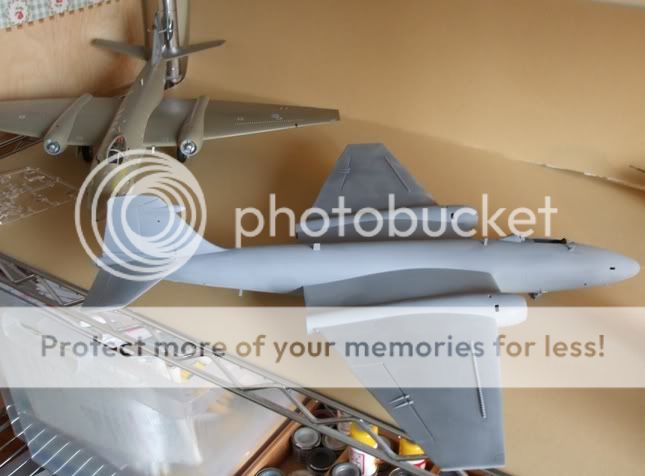 Because the colour scheme I hope to recreate is one of ARTF, painted over the more usual scheme of Hemp over Light Aircraft Grey, have to first paint that scheme, well over the leading edges of the wing and engines anyway. Started by spraying bottom of wing in light aircraft grey, 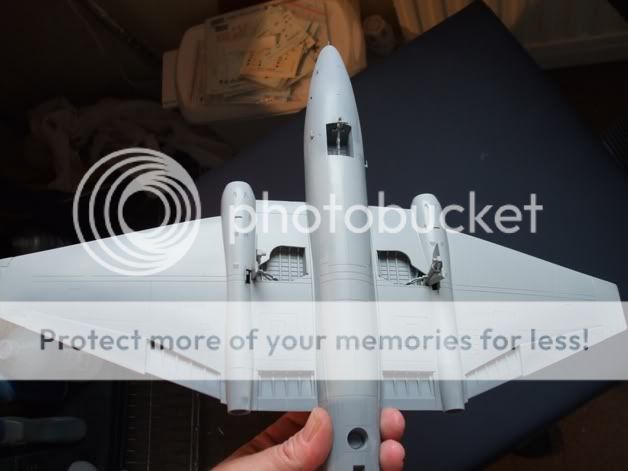 Then masked up the leading edges as per the first model, XH134. 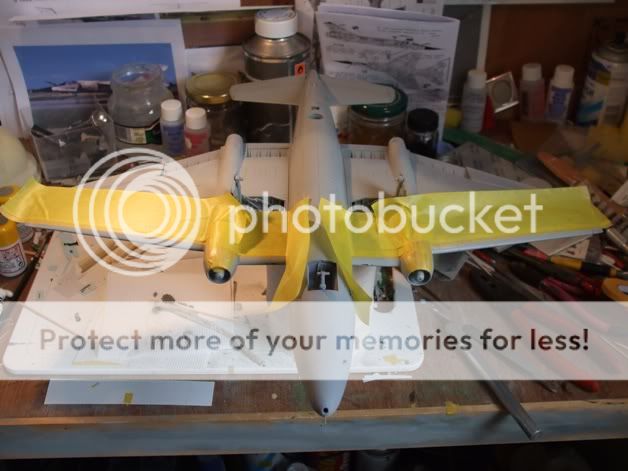 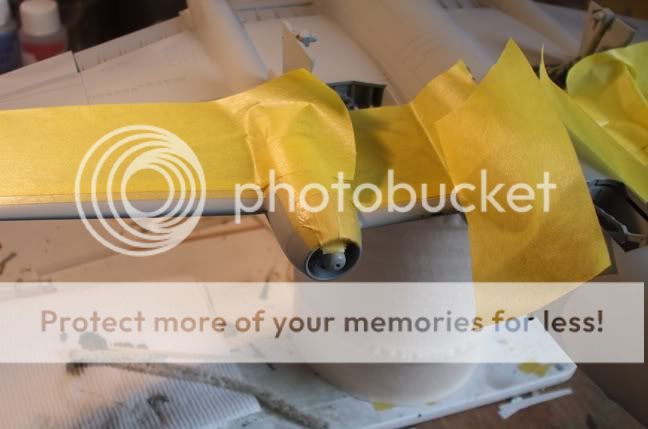 Before spraying Hemp on the lower and upper leading surfaces. 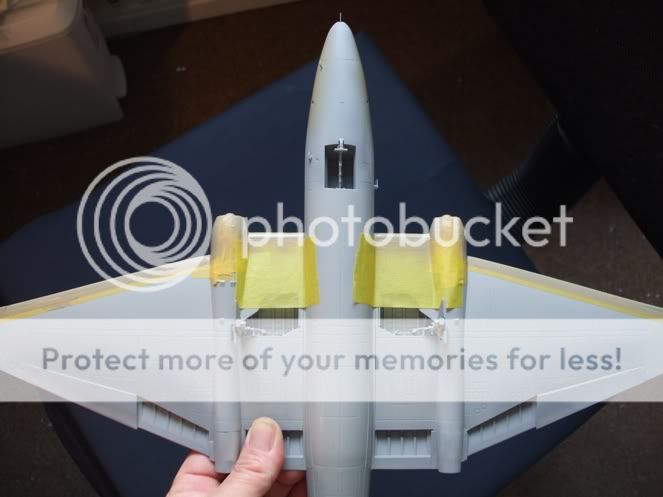 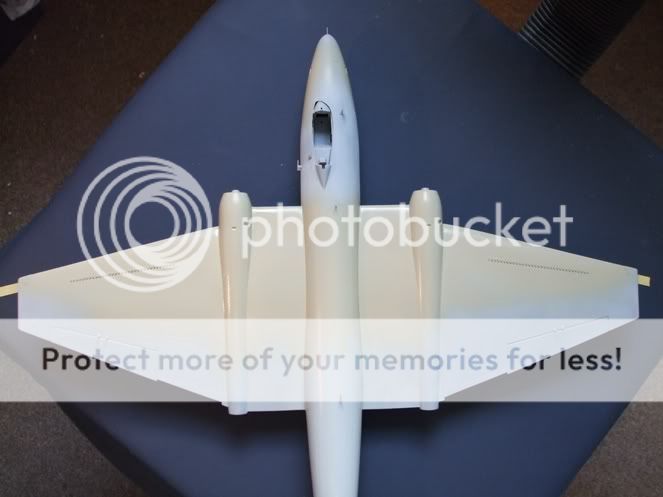 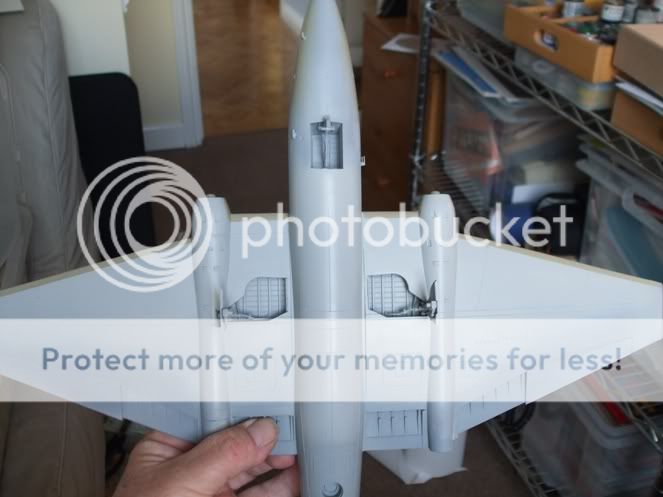  Now in the mean time I had a bit of an experiment. The colour I had chosen to use, to recreate the ARTF, was Camouflage (Barley) Grey, so sprayed the rear of the model to have a look at what it looked like. 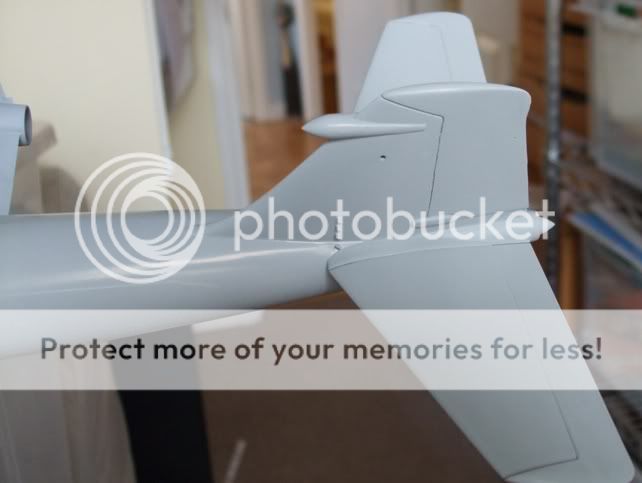 Having let it dry and comparing the look against photos of the aircraft I wish to portray. XH131, nearest.... 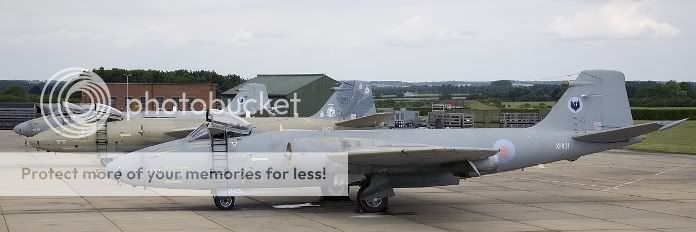 I am not quite happy with the paint, as the colour that I am hoping to portray, is of an aircraft outside, and taking on a 'bluer' appearance than the paint gives. After all that is often the image that people have in their minds, from the photos... So out comes the Royal Blue,  And I add 6 droplets, from an insulin syringe, which is not a lot of Blue... Then spray the mixed paint over the model, leaving the leading edges and part of the engine covers with the Hemp/Light Aircraft Grey showing through, although it is not hugely obvious from the photos.  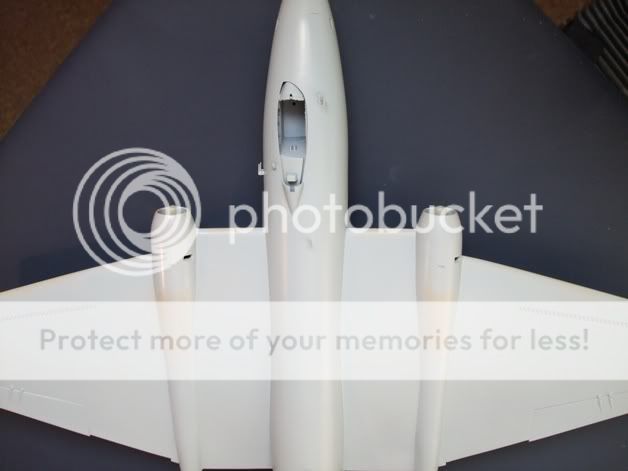 When dry started the process of detailing, first decal being, the navigators hatch above his seat. To give a sense of the hatch and depth, sprayed a decal sheet, and cut out to shape of hatch, before applying.  More progress since, but am saving photos until I can add a decent progression... More soon. Colin |
|
|
|
Post by popeye on Mar 17, 2009 22:10:43 GMT
Hello Colin.
good going - very impressive !
You are aiming for sort of a indefinable look of grey with a kind of partially weathered and bleached look with irregular areas with more or less blueish hues - are you?
Why don't you try "filter" technique, i.e. misting irregular patches on with thinner/water (depending on enamel or acrylic) with just very very little "body" of blue / blue-grey?
By varying the (minimal) amount of blue and maybe even adding more or less matting agent in different patches you should arrive at the irregular look of that original pic.
When misting on you should not be seeing a real difference of hue on the first go.
Recommend experimenting on scrap plastic primed with your grey first.
If using acrylics for "filtering" on top of a coat of cured Klear you will even be able to wash your filter off with water & some detergent or windex after drying - without washing off the Klear coat if you don't rub too hard - the cured Klear acts as kind of a "barrier coat"
If you don't trust Klear use Mr Metal Primer as barrier coat.
To get the feel for this treat also experiment with grey & white - stop when you can just see the effect.
Hope this is of some help - good trying out
Rolf
|
|
|
|
Post by COLIN SHIPTON-KNIGHT on Mar 19, 2009 20:29:18 GMT
Rolf,
Good tip's and idea's.... Pity I have moved on any way.... Will try on another model... Maybe the silver one? Dennis, confirm which one you are doing? Don't want to duplicate efforts....
Have done something similar to what you suggested.
Results looking good to me.
XH131 is looking good, hoping to finish in 48 hours, and post photos...
Have just finished 'box' today for the PR9's to travel to Switzerland, and back.
Colin
|
|
|
|
Post by sloegin57 on Mar 19, 2009 21:14:09 GMT
Rolf, Good tip's and idea's.... Pity I have moved on any way.... Will try on another model... Maybe the silver one? Dennis, confirm which one you are doing? Don't want to duplicate efforts.... Have done something similar to what you suggested. Results looking good to me. XH131 is looking good, hoping to finish in 48 hours, and post photos... Have just finished 'box' today for the PR9's to travel to Switzerland, and back. Colin Colin, I will be doing a 13 Squadron aircraft with the short lived nose code plus XH167 the first camo aircraft. Both will have the "proper tanks". Once I have moulded a few tanks - I'll send you samples in resin to peruse and maybe fit - ? Attached - trial fit  DR |
|
|
|
Post by COLIN SHIPTON-KNIGHT on Mar 20, 2009 20:53:23 GMT
Dennis,
Was at first going to do one in high speed silver... Still would love to, the thought is quite appealing...... especially without the 'trenches' that Airfix give you for panel lines. Hell upon reflection, I may purchase number 4.......
Both of my 'modern' ones look so much better for panel lines being filled. Hopefully photos of model of XH131 will be appearing in next 24 hours, it's looking good. If I say so myself....
Changed mind, and going to do one in Grey/Green with Red/Blue roundels.
You, and John seem to have the 'earlier' colour schemes covered...
Would like to do one with wing tip tanks, would be nice to see contrast. Good work with the tanks.....
Maybe we are going to have to ammend the list for SMW 2009...?
Have you seen my post about a Canberra SIG..?
Would be nice if some one would take the idea on.............?
Colin
|
|
kitspackman
Kit Basher
Me and 'My' Canberra...
Posts: 97
|
Post by kitspackman on Mar 21, 2009 11:50:38 GMT
Colin, I can see I'll have to build you a 1/48 scale version of the hydraulic sampling valve I installed in XH131 back in 1973!  Talking to the guys at Kemble on the 'Last Canberra Day' in 2006 I think they've moved the valve's position since our original installation, so I have no idea where it is now, but it used to be in the main camera bay, just aft of the wing centre section. |
|
|
|
Post by COLIN SHIPTON-KNIGHT on Mar 21, 2009 19:59:08 GMT
Dear All, Number two. XH131 in ARTF, it seemed to fight back at times.... Admittedly me managing to put a superglue finger print in the middle of a wing didn't help. Here it is for your delectation, comments and criticisms. I have tried to present XH131 as seen in photos of it around the retirement dates, as the aircraft looked, having returned from the Gulf, with it's distinctive 'worn' appearance.   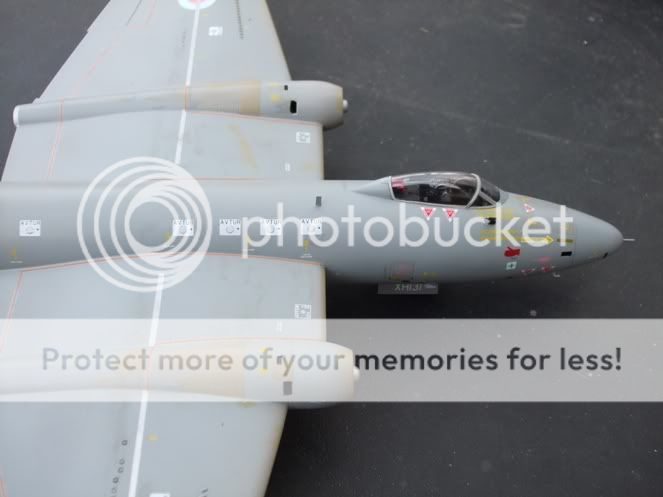 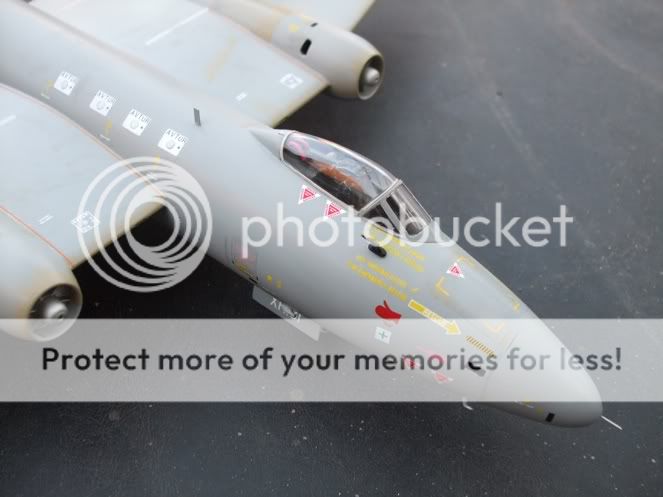   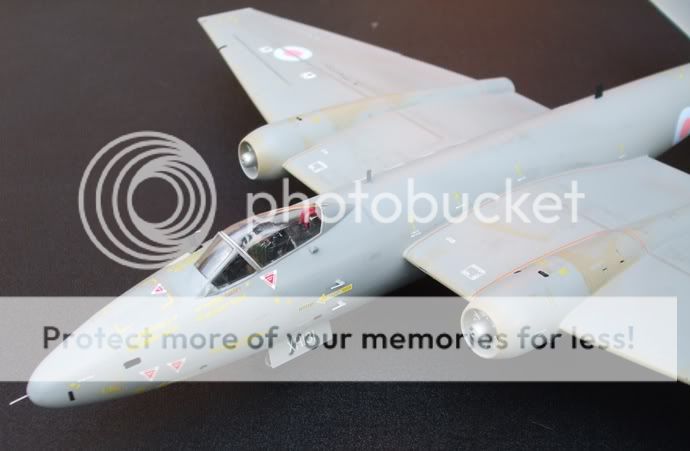   It is essentially complete, only a few things to do, the Camera Windows and Nav's windows, and to replace the 'HF' aerial, it went 'twang' when I put it down to take these photos.... Many thanks to John Sheehan for sending me some Lycra thread..... To good to miss the photo opportunity, here is XH134 and XH131 together for the first time..... 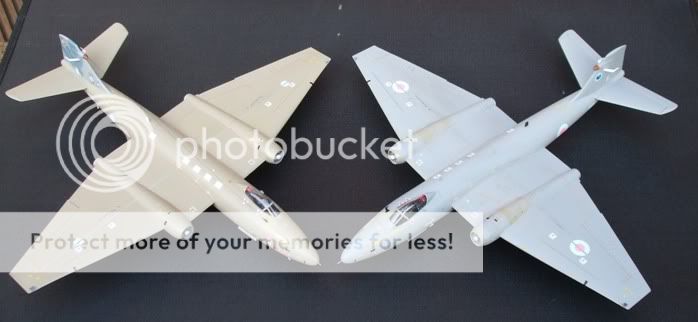 The 'PR' Canberra brood grows.... here they are with the PR 3 I did a couple of years ago.  Well that's it.... they go back into their box, ready to travel 1800 miles in the back of my car, to The Swiss nationals and back, before their appearance at SMW 2009. Just out of curiosity, I include a photo of my packing method. If previous experience is anything to go by, some people are more interested in this than the models... Believe me, you can literally shake the box, and nothing moves or gets broken. Fingers crossed. 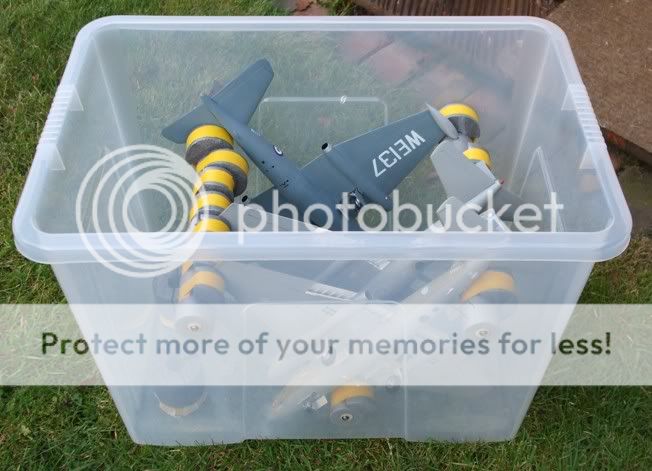 Well that's me done.... Don't want too look at a Canberra model for a while...... Rolf, thanks for the 'tips', partially used on this model, look forward to experimenting further, having only really made 'pristine' models before. Worn look was fun to do, but challenging... Just got to finish the other models for Switzerland.... Colin |
|
|
|
Post by barksdale on Mar 22, 2009 19:03:32 GMT
I have just had a look at your latest creation.And very nice it is as well.I must get mine on the go at some point this year.
Jim.
|
|
|
|
Post by popeye on Mar 23, 2009 18:12:08 GMT
Wow - just smashing to say the least - congrats Colin !
Only just found the post when taking a bit more time to trawl the forum this evening - weekend was primarily family event !
Already on tenterhooks to be able to see them in the flesh in May....
BTW: if you don't want to take shelves you can have my perspex shelf you may remember from Kirchberg 2007 - size 35 x 130 cm.
Let me know - might even buy a second for me......
Rolf
|
|
|
|
Post by COLIN SHIPTON-KNIGHT on Mar 23, 2009 20:43:37 GMT
Rolf,
Thanks for that, they do look nice even if I say so myself.
Have to say that I am planning on 'no shelves', taken your thoughts about photography to heart...
Planning on filling two tables at least, with plenty of 'elbow room' for models, Hell 1/48 models do fill space, but am bringing enough for three tables, without using shelves, have the photo prints from Mick to fill space...
Looking forward to it..........
Colin
|
|
 Members' Forum")


 You can't miss her, she's the tallest person in the place!!