|
|
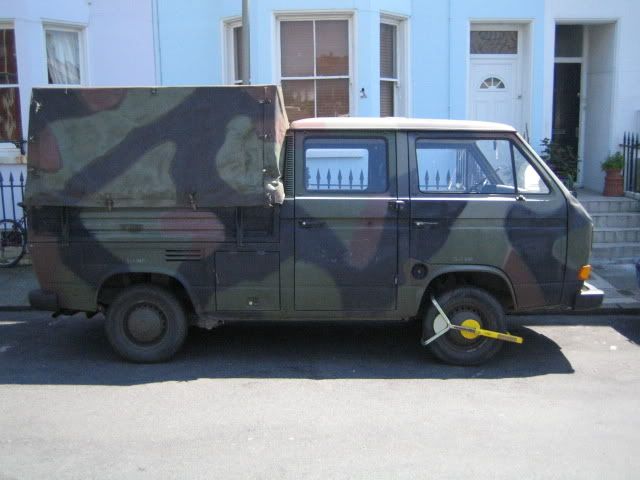
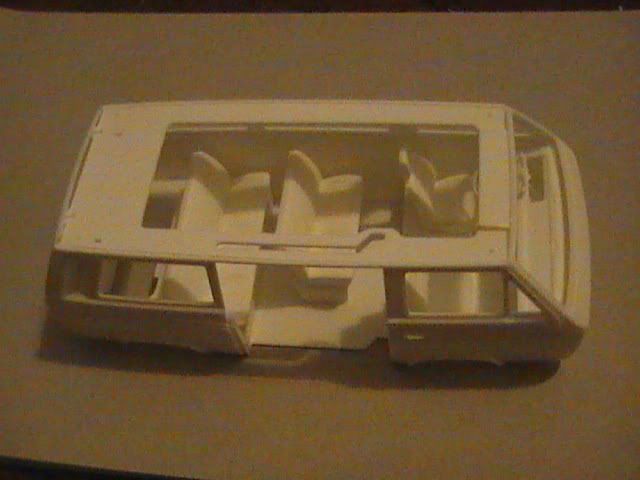
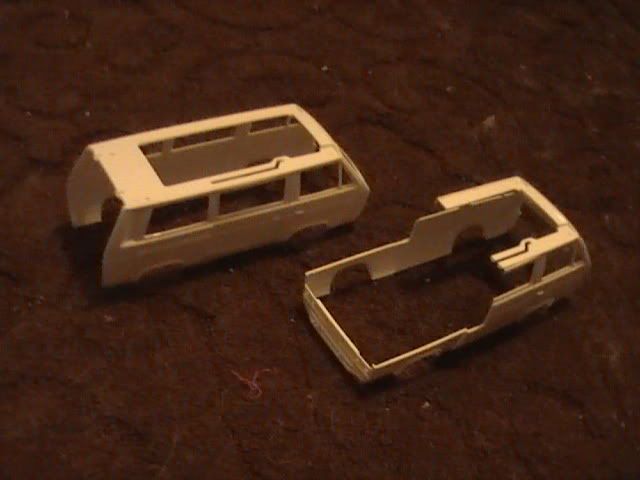
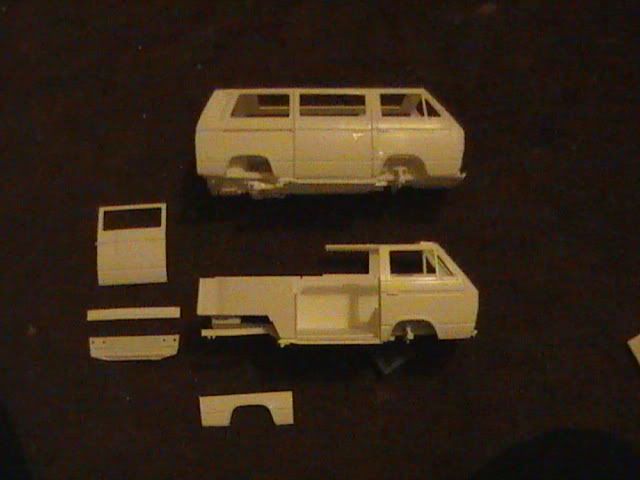
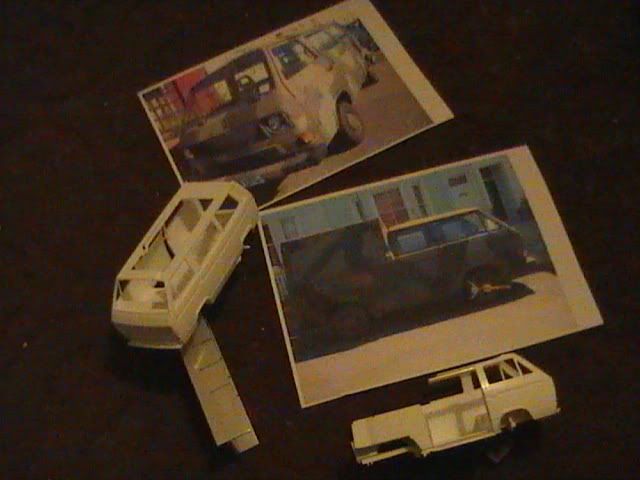
Post by okdoky on Mar 30, 2008 16:11:26 GMT
|
|
Deleted
Deleted Member
Posts: 0
|
Post by Deleted on Mar 30, 2008 16:53:44 GMT
Nice conversion Nige!
|
|
Lonewolf
Moderator  Gods Country
Posts: 2,551
|
Post by Lonewolf on Mar 30, 2008 21:28:01 GMT
These are gonna look good..
|
|
|
|
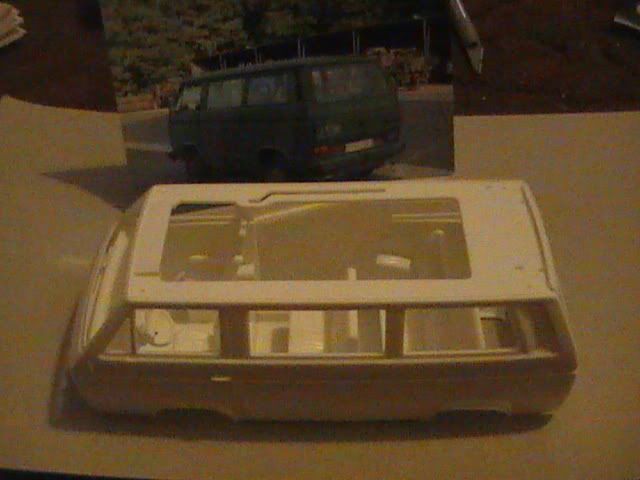
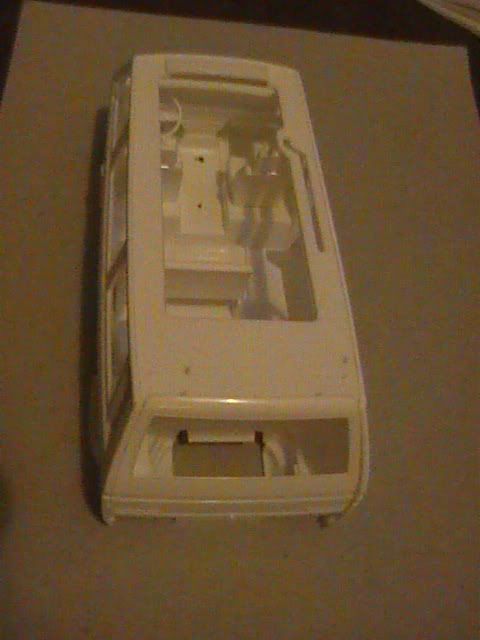
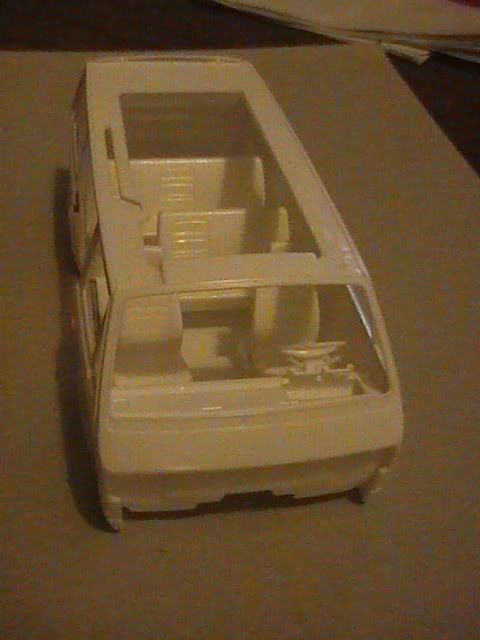
Post by okdoky on Jun 12, 2008 0:37:31 GMT
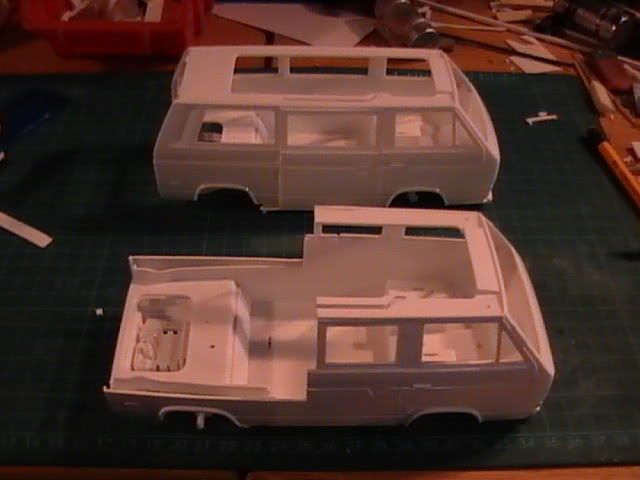
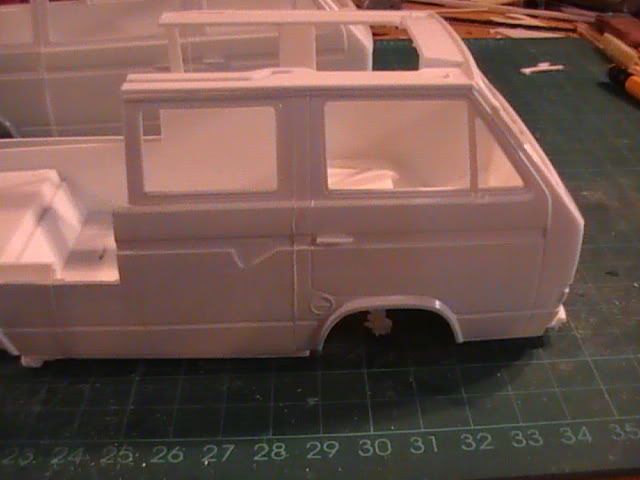
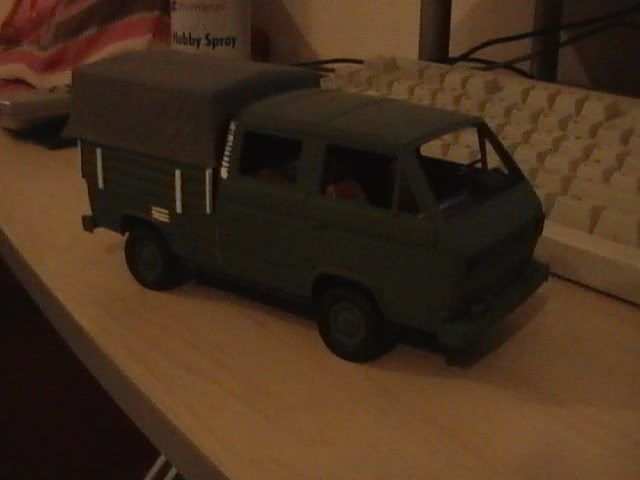
Sorry for the lack of updates Finally got round to trying out my vac form machine and decided to try forming a cover for the cargo body plus the rear panel of the shortened crew cab. I used up about 7 sheets to get the practice in most of the trouble was getting the heat and timing just right. I was trying to push the former through too early when the plastic was not flexible enough. Finally got this after a ten minute heat time. 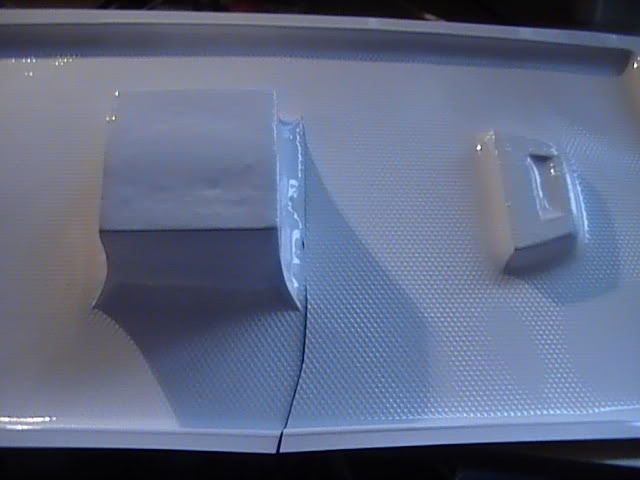 I still got webbing effect as the pull was quite deep though I might be able to either apply heat locally to square off the excess, or leave the rear of the cover slightly flappy looking where the ends might be loosely tied to the cover frame. 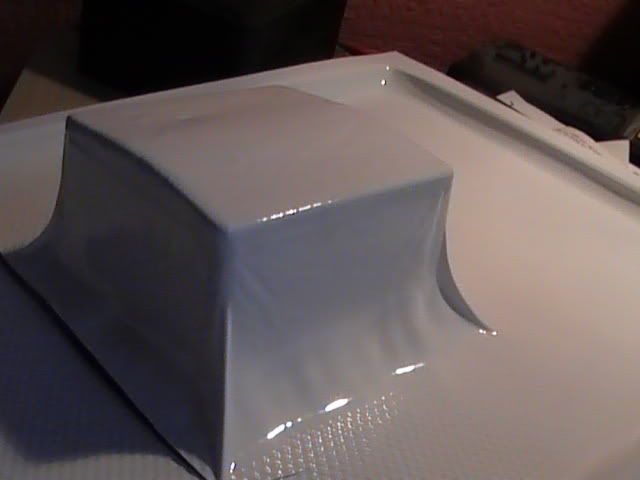 The vac formed rear of the cab is glued in place and the floor of the load area is placed on the cut down bodywork for the moment to get an idea of sizes 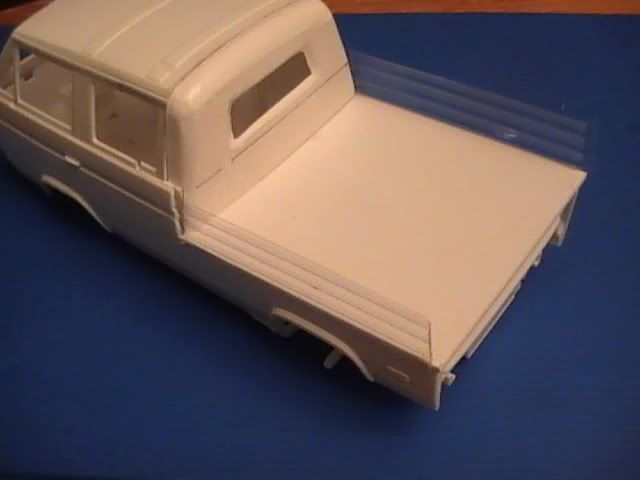 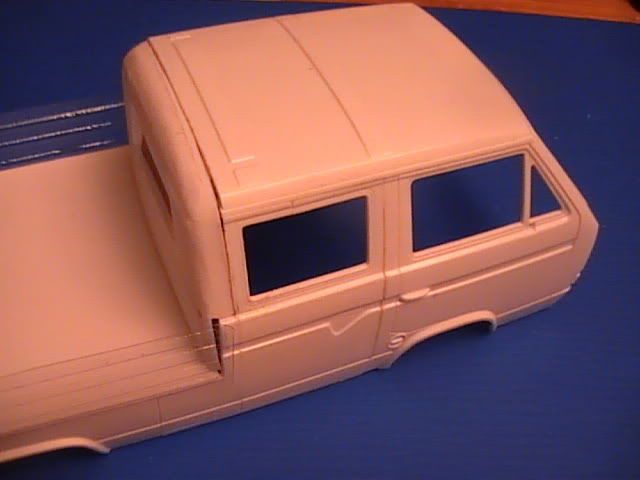 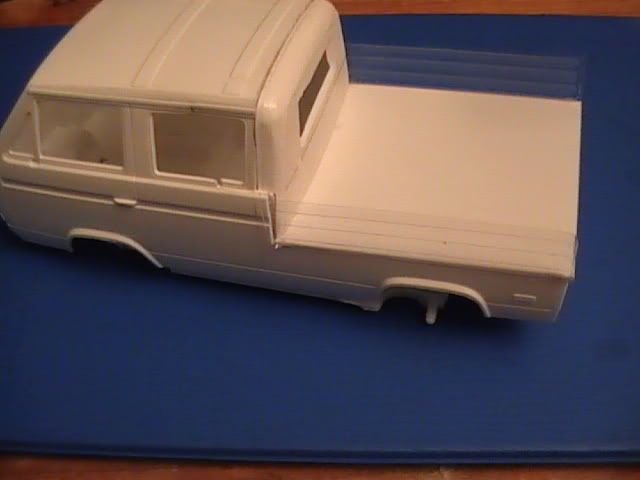 The side panels are something that I held onto from Xmas after nicking the kids chocolates (bad daddy again) thinking they might have a use sometime. The kids got loads of selection boxes form Grannies and Granpas, and not wanting to spoil their lovely teeth I confiscated several. The clear plastic trays the chocolate bars sit in are vac formed too and are an ideal shape of ribbed pattern. 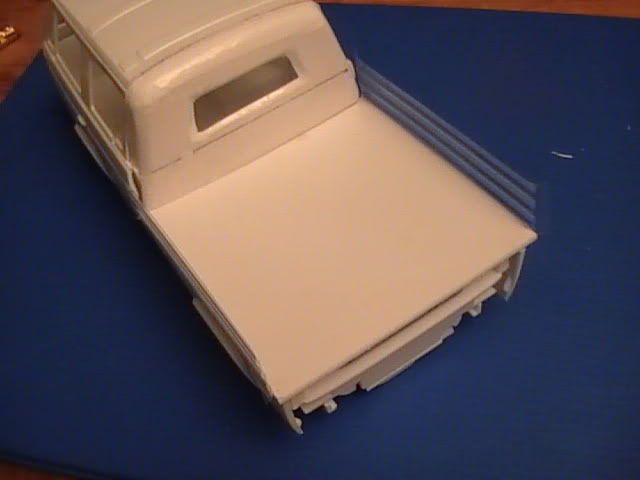 This is how the load bay cover looks dry fitted temporarily. I used thich balsa wood sheet and formed a box of the same shape, then sanded the tent like profile and added creases into all the sides by carving into the balsa. In hind sight I could maybe have done with exagerating the depth of the creases to allow for the loss of depth by the thickness of the plastic itself. 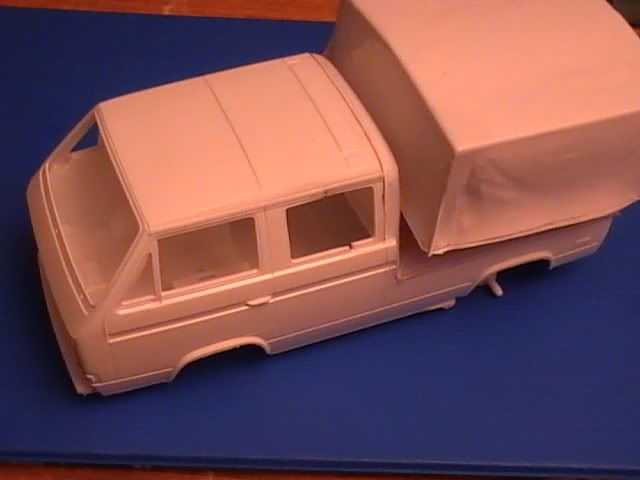 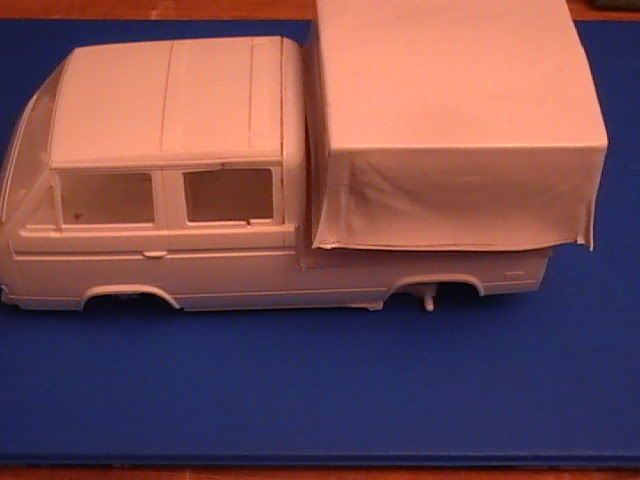 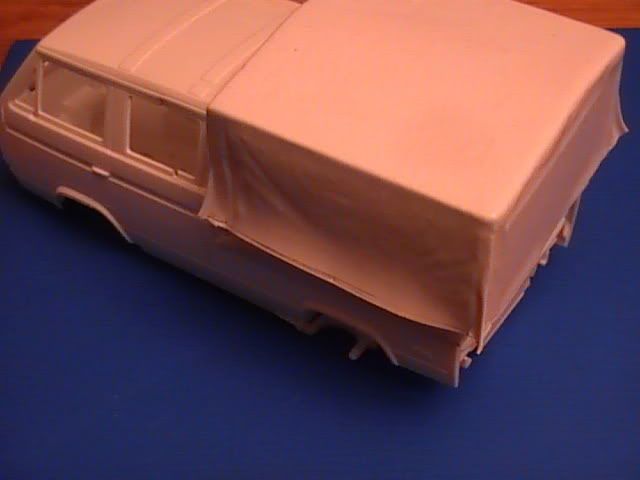 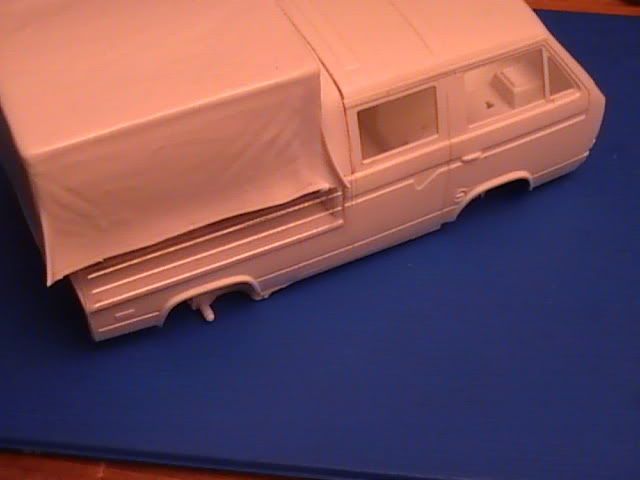 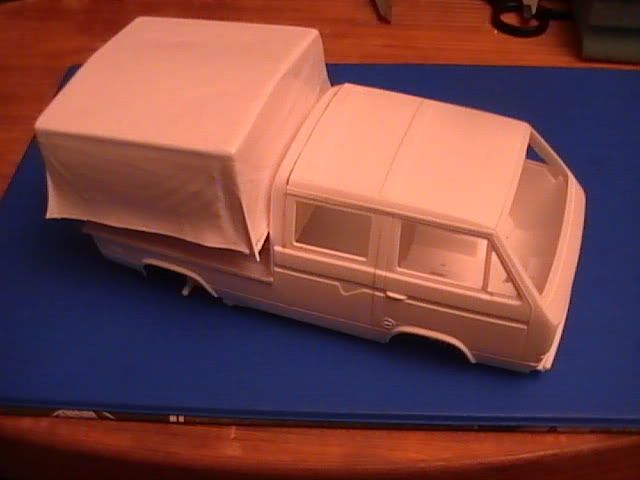 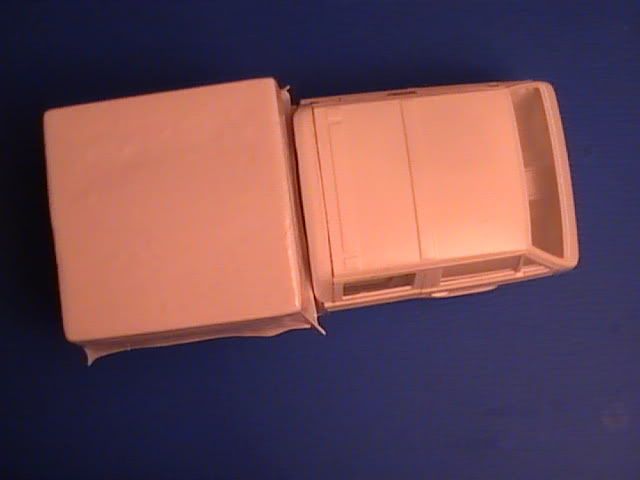 At least I know that I can make use of the vac former. I just need a bit more practice at making the molds. Hope to get some more work on this soon. Nige |
|
|
|
Post by okdoky on Oct 8, 2008 12:30:43 GMT
Have been out of touch with everybody on here as I have been working on a one to one project (house extension) so only just getting back to doing a tiny bit of modelling on the VW.
Will do an update soon once I resite my PC and get it plugged into the net again. Using work PC to see how folks models are doing.
Hope everyone is well
Chat soon
Nige
|
|
|
|
Post by okdoky on Oct 20, 2008 23:52:01 GMT
Hi folks,,,,,,,,,,,,,,,,,,,,,, long time no been on here! Got away to the caravan for a week and took the VW's with me to do a wee bit of work on them while my girls played at the beach. Smoothed off the rear of the chopped crew cab with a combination of squadron putty and tipex with sanding down  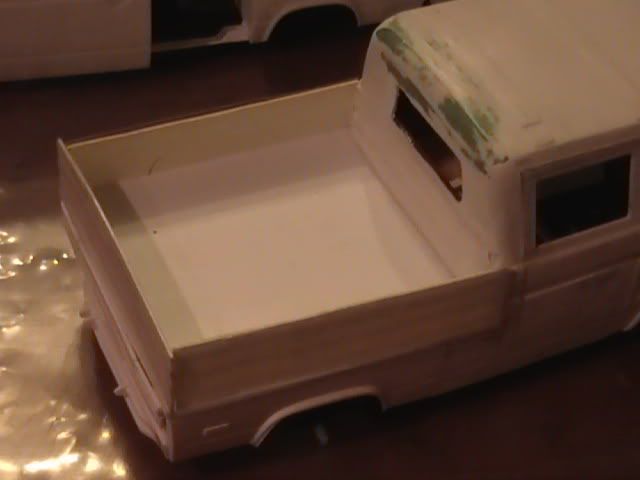 Had to delete the handle for the sliding door that will now be a the hinged door 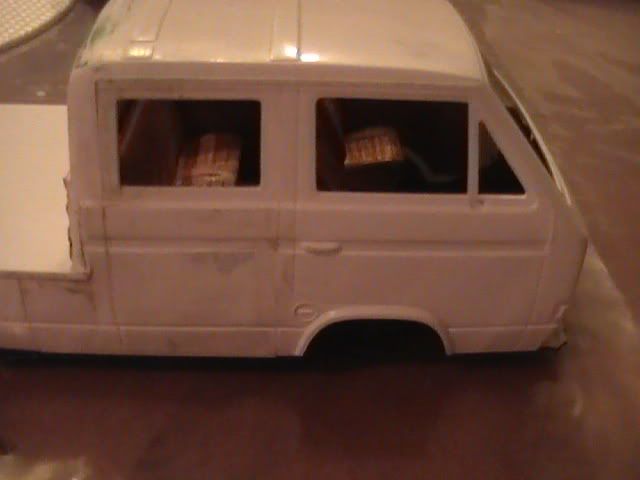 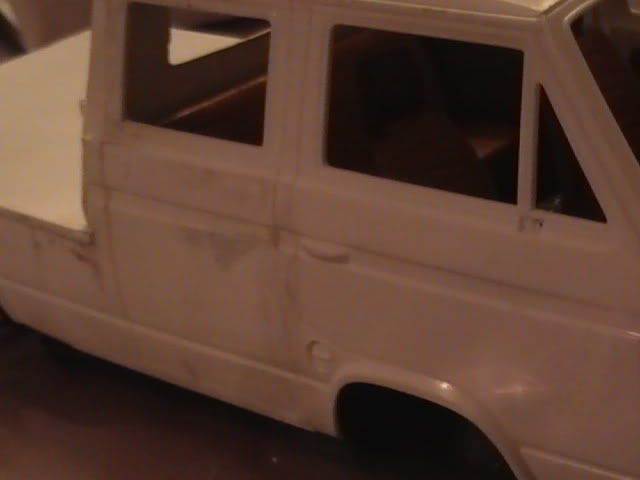 After a coat of Humbrol dark green 30 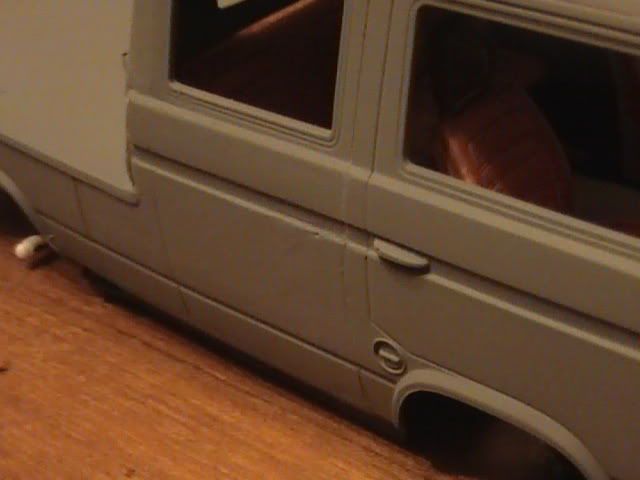 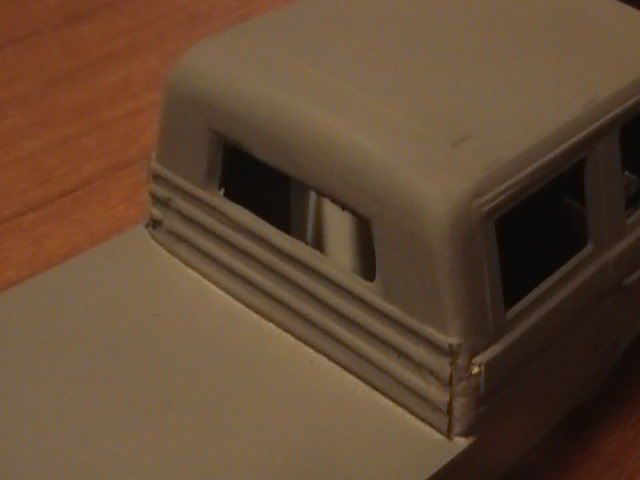 With the cargo area side panels dry fitted 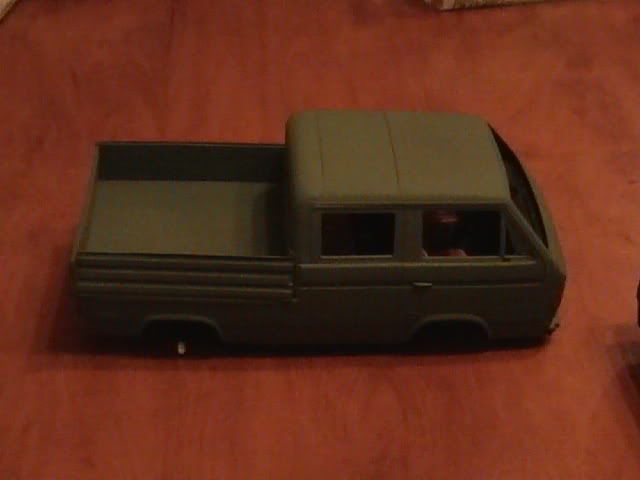  It is good to be back to modelling |
|
|
|
Post by okdoky on Oct 21, 2008 2:28:50 GMT
|
|
|
|
Post by okdoky on Nov 30, 2008 21:30:24 GMT
Hi folks Finally got round to doing something to the models,,,,,,,,,,,,,,,,,,,,, OK not an amazing amount but is keeping me a wee bit sane!!!!! I have added tie down points to the front windscreens and lights for the covers to reduce risk of glare from reflections on glass and reflectors. Very thin wire used. 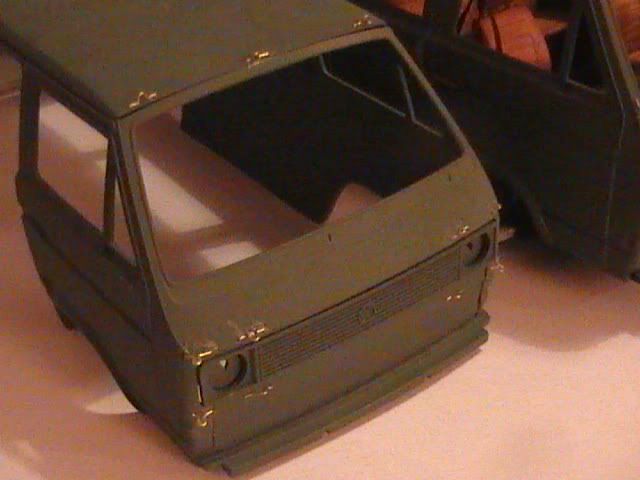 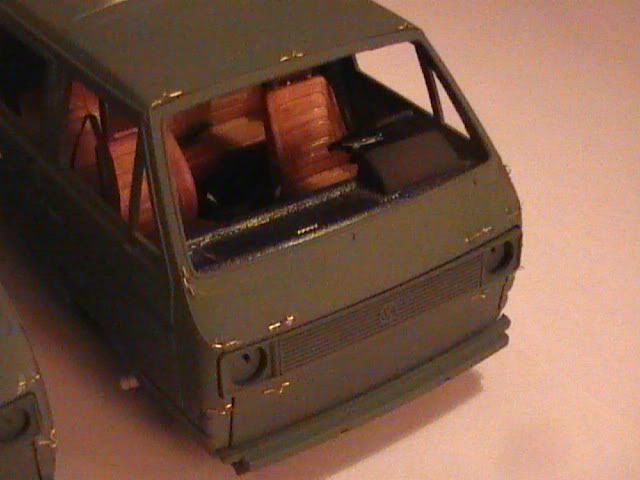 Also got round to scribing the lockers and engine cooling vents under the load bay of the transporter  And added the new door handle to the crew cab rear door  Seat belts were added using black painted ribbon (Though I can't fix the top connections to the window pillers because the body work has no glass added yet and will be imposible to add once the glass is fitted) 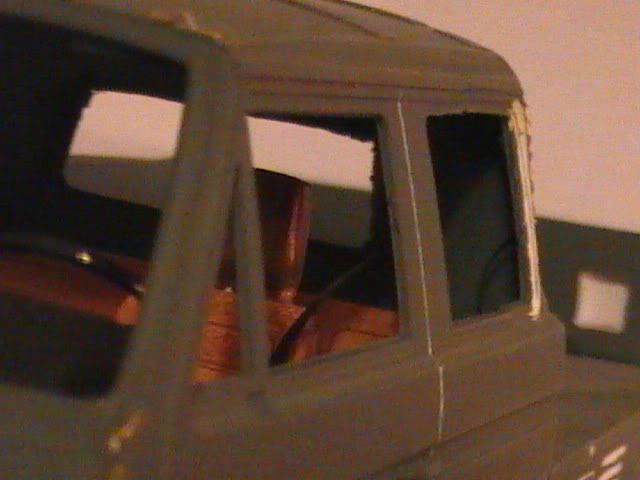 Anybody got ideas how to get them to sit in position on the window piller? Still got all the side windows and rear windows to make tie down points. Fidely and tough getting the superglue to hold but will get there in the end. Hope to get round to more work soon Nige |
|
Deleted
Deleted Member
Posts: 0
|
Post by Deleted on Nov 30, 2008 22:52:14 GMT
Interesting build Nige and it's certainly taking shape. Have you thought about using tissue over wire hoops for the canvas tilt?
|
|
|
|
Post by okdoky on Nov 30, 2008 23:34:39 GMT
Hi there
I hadn't,,,,,,,,,,,,,,,,,,, but I have a wee bit concern that the edges of the vac-form tarp are flapping in the brease where they should be flat. I know why this webbing happens in vac forming but I was going to overlook it for the time being.
Will maybe make up a wire frame and try the tissue method. I also have thin material I was going to try out on my Bedford that I might check out too.
Nige
|
|
|
|
Post by brianthemodeller on Dec 1, 2008 10:47:07 GMT
Don't know if this is any help, but I made the curtain body on this model from solartex over a metal frame...  Solartex is the stuff used by RC aircraft modellers for fuselage and wing coverings etc. Dead flexible and can be glued with superglue, epoxy etc. Can be bought at most RC model shops or mail order from www.kitformservices.comBrian Brian |
|
|
|
Post by okdoky on Dec 22, 2008 23:33:20 GMT
Hi Brian
Thanks for the ideas. By the way saw your model in TMW. The combination looks really neat and great paint job.
I am still doing wee bits to the VW's but now Xmas prep for the kids getting in the way. Have two weeks off so maybe set some time aside for myself and the models.
All the best
Nige
|
|
|
|
Post by okdoky on Dec 31, 2008 2:15:57 GMT
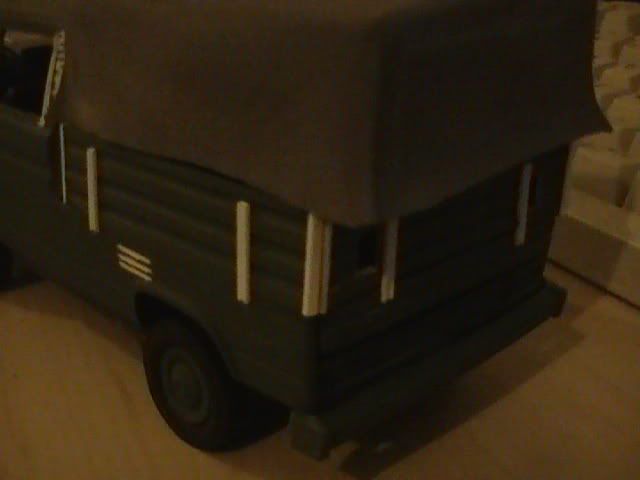
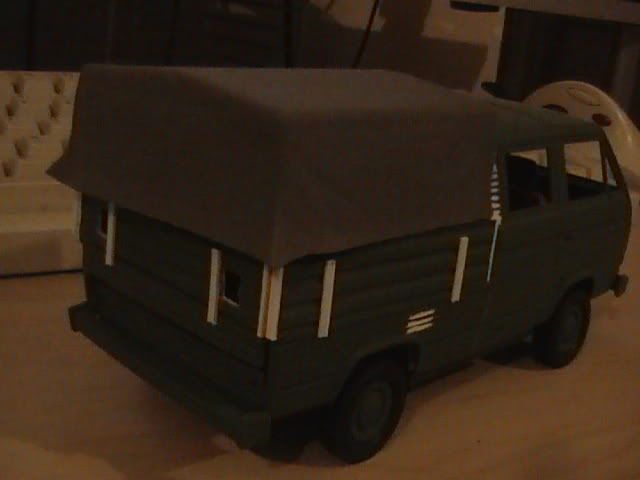
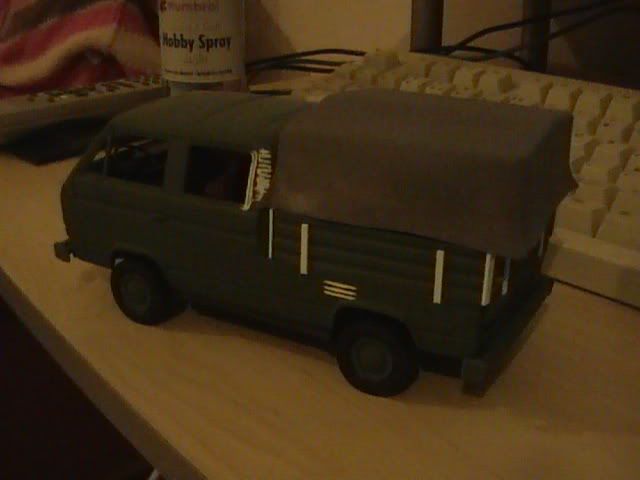
Hi there,,,, finally got some time to myself to do a wee bit! Had a stab at forming a canvas cover with proper frame support instead of the vac-form version. Comments and ideas welcome to improve on it. Still got to lash the sides down properly but that would be after I have finished the bodywork and painting. The plastic fabric is the stuff that nurses use to hold utensils in/on when visiting to do home surgery. @  aquired it after nurse finished dressing wifes wounds. 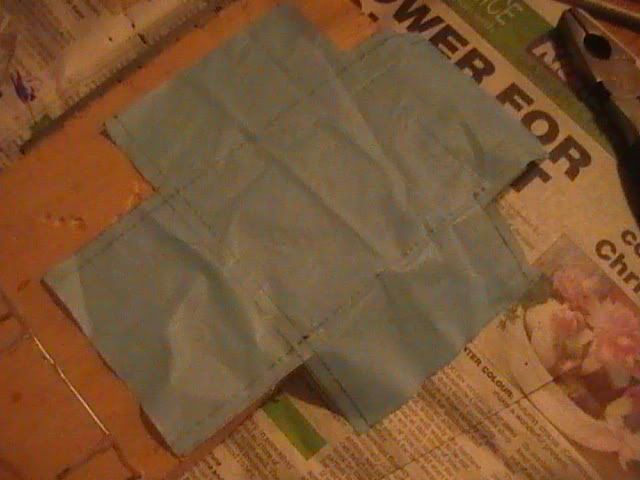 Wire frame made out of thick stuff that held our kids toys in the packaging |  always takes ages to get out and end up with miles of it |  Wire held in place by holes drilled in the wood. 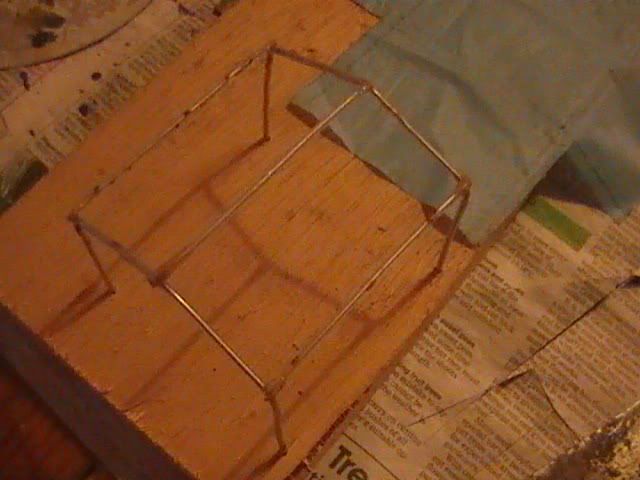 The fabric has a nice texture to it that I quite like and has a little bit of flex to it. 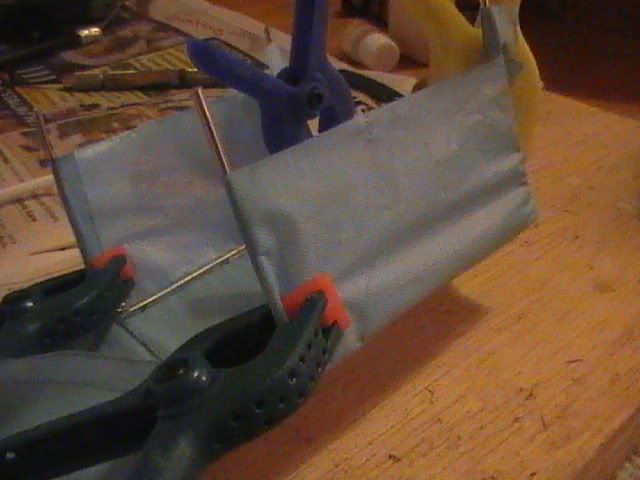 The finished product for now. 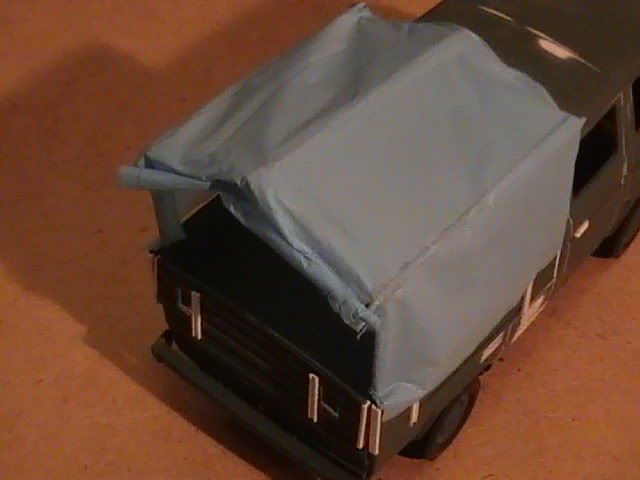 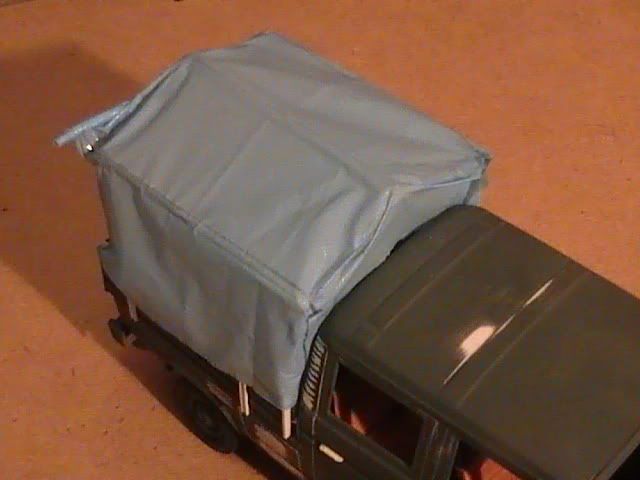 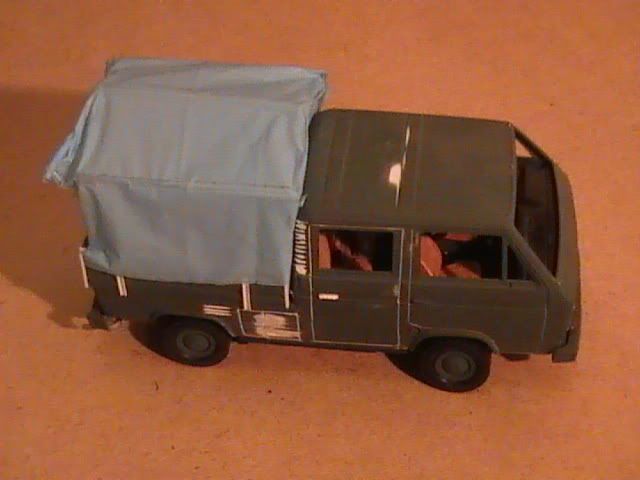 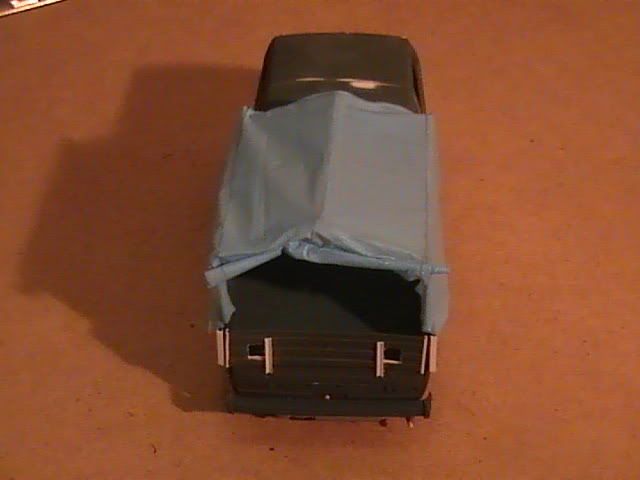  I would be interested to hear what you think about preference of vac-form to this attempt. All the very best Nige You'll be avin a drink on me now won't yas? C[ ] C[ ] C[ ] Go on! Go on! Goon! |
|
|
|
Post by brianthemodeller on Dec 31, 2008 8:11:14 GMT
That look far better than the vac form version. The fabric shows the folds and seams much more realistically. I will be interested to see the fabric once it has been painted.
Brian
ps have a good New Year!
|
|
|
|
Post by okdoky on Dec 31, 2008 18:58:48 GMT
Hi there Brian
I am going to keep going with with both fabric and vac versions for now as i can easily swap to what I think is the better. The fabric can still be stressed in the right points if I tie down the side flaps, and having the rear tied up would allow me to show something in the load bay.
I thought about tissue paper but I think it would turn out a bit rougher than the modern canvas types. So we will see where it goes from here on.
Happy new year to you and all on here!!!!!!
Nige
|
|
 Members' Forum")


 aquired it after nurse finished dressing wifes wounds.
 Wire held in place by holes drilled in the wood.