|
|
Post by seangb on Aug 9, 2009 9:14:03 GMT
Lower wishbone is wrong the kit one is far too straight and not triangular in shape , and the bit you haven't put on yet that goes to the chassis will be to the right of the round thing not to the left , the wheel hub holder is flat and not hollowed out ;D Oh and the kit parts are too clean  |
|
Deleted
Deleted Member
Posts: 0
|
Post by Deleted on Aug 9, 2009 9:33:24 GMT
Lower wishbone is wrong the kit one is far too straight and not triangular in shape , and the bit you haven't put on yet that goes to the chassis will be to the right of the round thing not to the left , the wheel hub holder is flat and not hollowed out ;D Oh and the kit parts are too clean Sean, you're far too hyperactive this morning. No, none of the above apart from they're far too clean, but that's for a later stage, the answer is much simpler than that. |
|
|
|
Post by cosmosman on Aug 9, 2009 12:59:42 GMT
Is the bump stop bracket too wide and fouling the suspension ?
|
|
Deleted
Deleted Member
Posts: 0
|
Post by Deleted on Aug 9, 2009 15:17:31 GMT
Is the bump stop bracket too wide and fouling the suspension ? Spot on Mike, but before I go any further, Trumpeter have got it wrong with their interpretation of the bracket. The ultimate solution would be to remove the moulded detail completely and scratch build a new set, it just depends on how accurate you want to depict the model, what your skill level is and how far you want to go. I opted for a simple solution in two steps. Step 1 - drill the ends of the beam ... 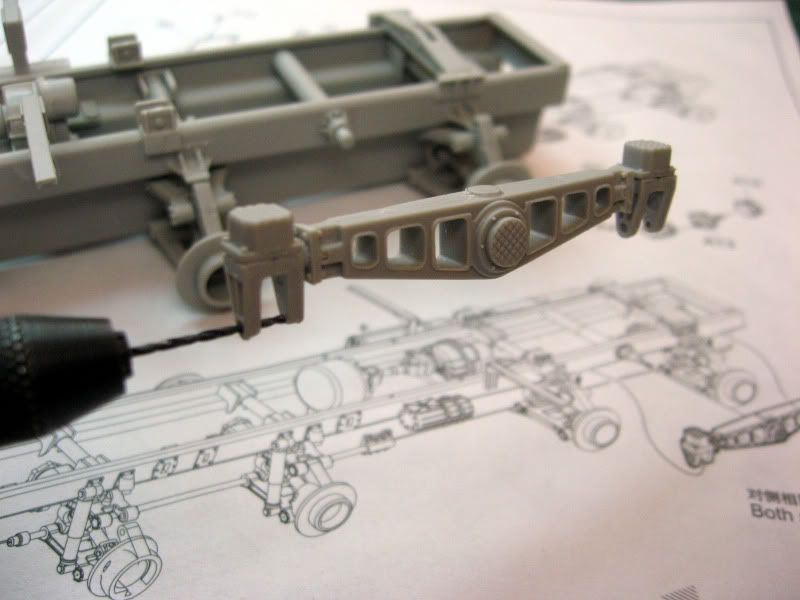 Step 2 - remove the flat extensions from the brackets on the chassis ... 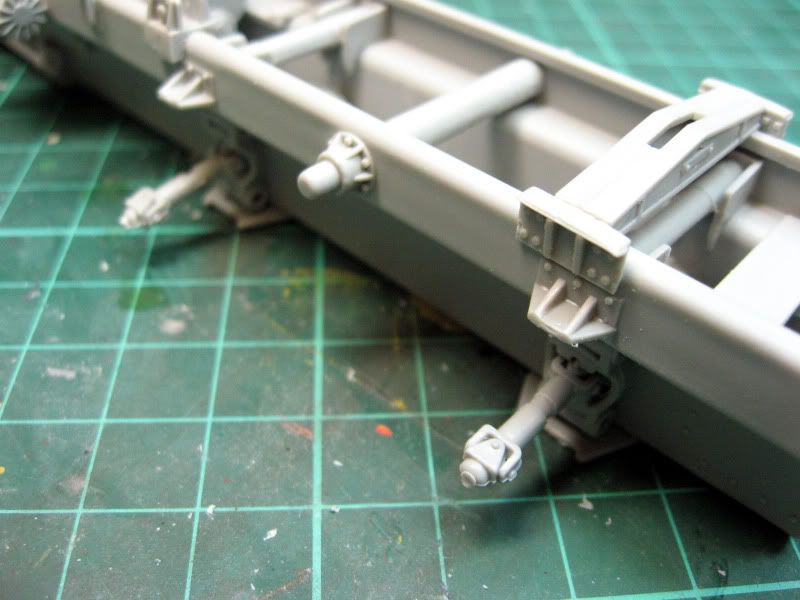 ... that allows the walking beam to clear the bracket, and when the beam is placed onto the locating point on the chassis ... 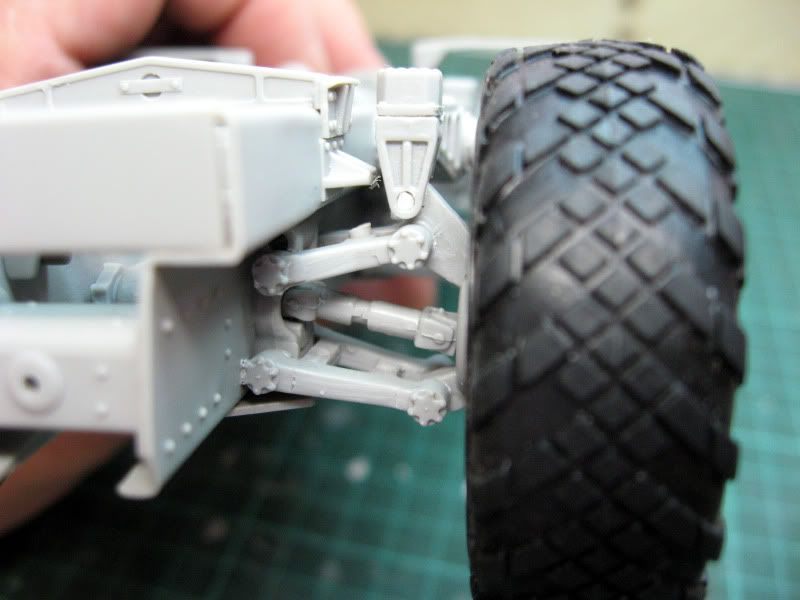 ... secure the beam to the upper lugs of the hubs with a length of solid rod, crimp to suit and there you have it, a simple fix, not exactly correct, but when the chassis is painted and weathered, it'll be hard to spot the difference, unless you know it's been modified. A quick fit of the wheels just to check that the whole thing is straight and level, and we're back into the build again. |
|
Deleted
Deleted Member
Posts: 0
|
Post by Deleted on Aug 9, 2009 15:35:51 GMT
I thought that whilst we're at the rolling chassis stage, I'd mention a little trick I've used before with rubber tyres. First of all take two sheets of kitchen towel, now cut each sheet into 4, you should now have 8 pieces. Take one of the quarters ... 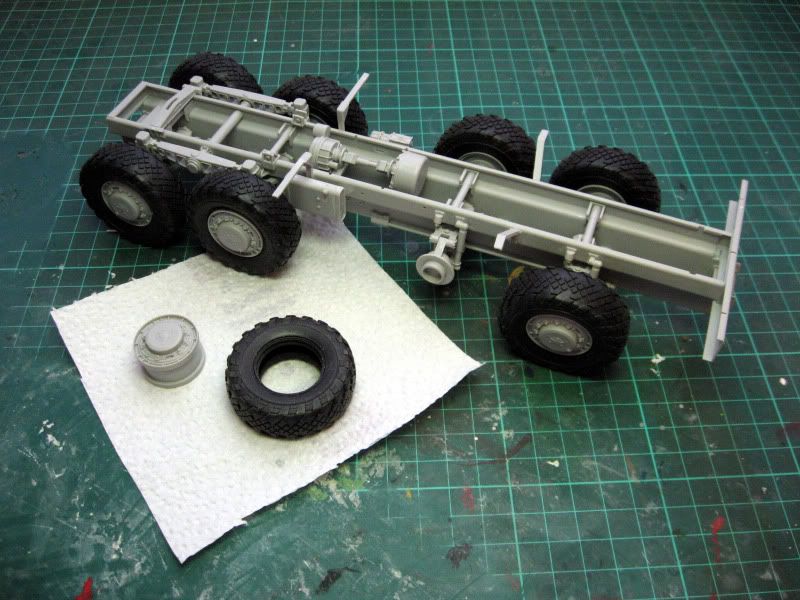 ... and roll it into a sausage, now stuff it into the tyre ... 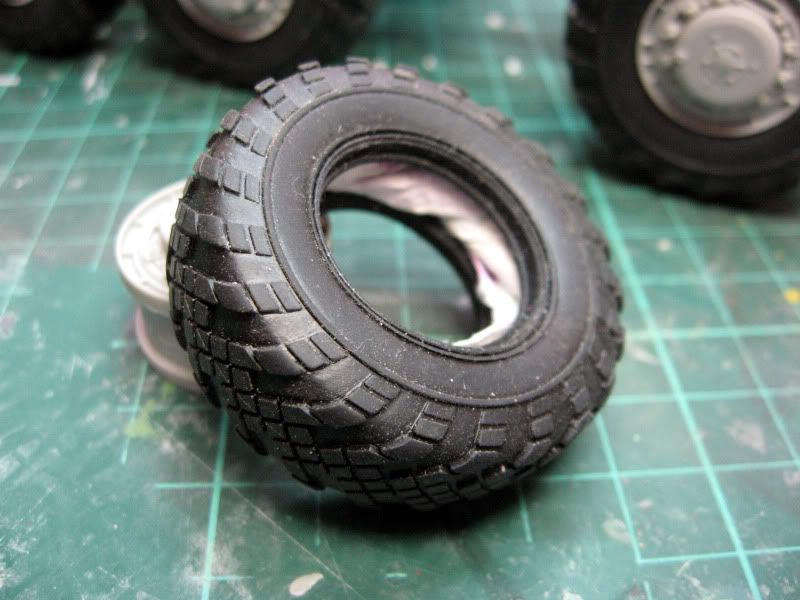 So why fill the tyres with kitchen towel? It fills out the tyre and makes it look more realistic, it also helps the tyre to sit properly. 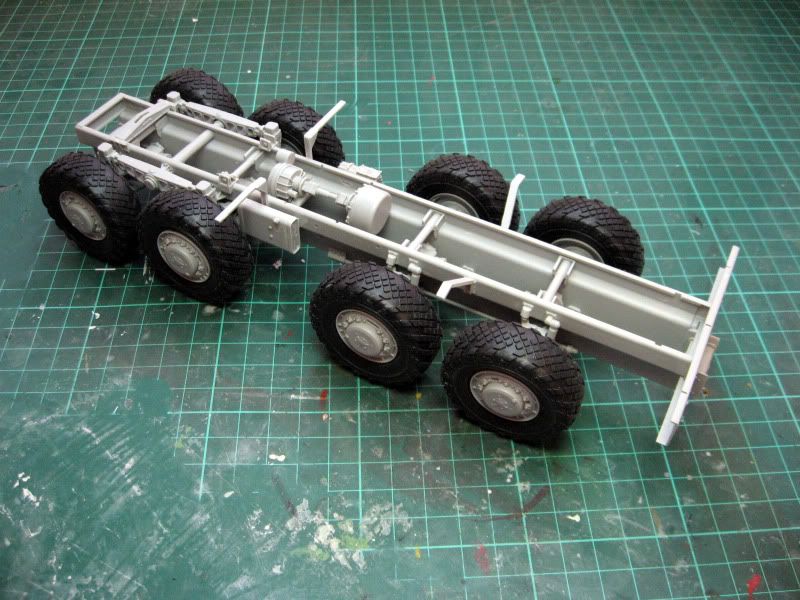 Now we have a rolling chassis once more. |
|
Deleted
Deleted Member
Posts: 0
|
Post by Deleted on Aug 10, 2009 10:54:25 GMT
Back on with this today, I'm playing catchup with all the associated bits and pieces which complete the chassis. Hopefully, the first coat of paint can be applied shortly, photos later.
|
|
|
|
Post by seangb on Aug 10, 2009 11:14:40 GMT
Good stuff Nick , I think I might have to start My build soon ;D
|
|
Deleted
Deleted Member
Posts: 0
|
Post by Deleted on Aug 10, 2009 11:28:35 GMT
Good stuff Nick , I think I might have to start My build soon ;D Start a blog off on here Sean, I'd be interested to see what colour scheme you use. I have to admit, I would have converted it as I have a book about Russian military vehicles in use as fire trucks, some of them are amazing, especially the conversion of the scud launchers into telescopic booms for fighting fire in oil storage depots. Looking through the Tankograd book about the MAZ, there's a superb wrecker / workshop variant, now that would make a very interesting conversion, or should I just wait until Trumpeter release it? ... if they release it? ... Dear Trumpeter ... |
|
Deleted
Deleted Member
Posts: 0
|
Post by Deleted on Aug 10, 2009 17:53:04 GMT
I added the last of the small components to the chassis today, then gave the whole chassis a coat of paint, Vallejo Model Air (71057) Black. After that had dried, I gave a scatter coat of Vallejo Model Air (023) Hemp followed by Vallejo Model Air (71056) Black Grey. This mixture gives a tonal range instead of pure black and also gives a good base for weathering. I mixed MIG (P034) Russian Earth with water to make a reasonably weak wash and painted it all over the chassis, making sure the wash entered inside the drive train. I force dried the wash and then used a reasonably stiff brush to rub off the excess which leaves just enough of the wash to make the chassis look as though it's been worked. I then loaded up the airbrush with a very thin mixture of Vallejo Model Air (71057) Black, approximately 75% water, and flashed the mixture across the chassis, just enough to take the starkness off the weathering. The next step is to add a light coating of rust to the whole chassis, concentrating on all the exposed metal work, rivets and bolts. I also added a quick wash to the wheels and forced dried them, then using the same technique as before, I removed the majority of the weathering effect ... 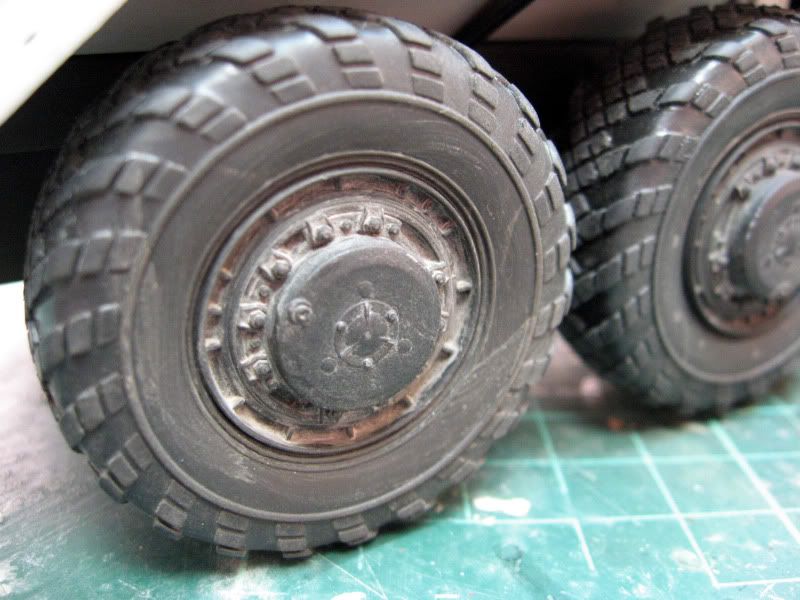 ... as you can see, there's a little bit of work to be done, especially adding a light coating of rust to the wheels. The tyres are still relatively shiny and will require a coat of matt varnish and slight weathering to the tread. As this vehicle will spend most of its life on concrete, suitable weathering will be found. I added the first coat of paint to the ballast box, Vallejo Model Air (71017) Russian Green. I'm not sure how to weather this as yet, I also need to know just what they term as ballast so that I can add a load to the ballast box. So here's the result for the day ... 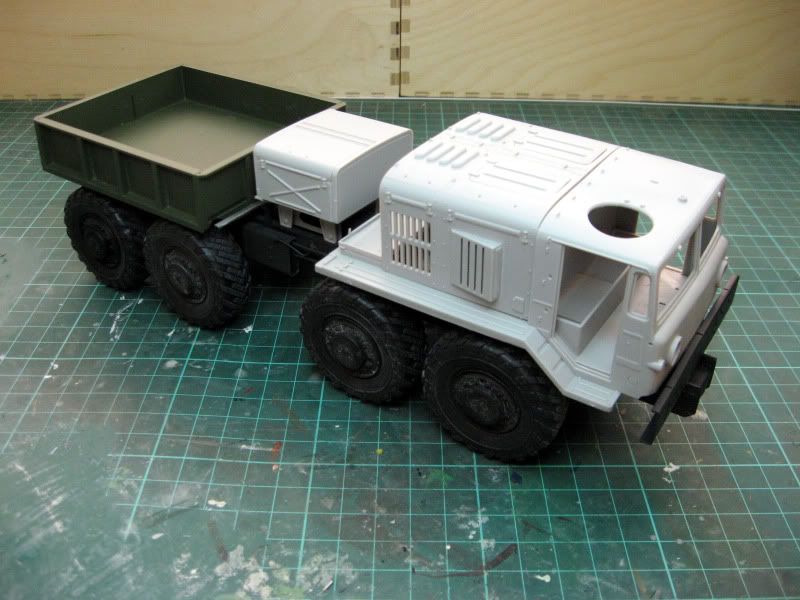 ... it's starting to look interesting. Before I can add paint to the cab, engine cover and winch housing (I'm opting for the twin camo scheme of Grey / Black and Light Blue), I need to add all that lovely PE ... oh deep joy! |
|
Deleted
Deleted Member
Posts: 0
|
Post by Deleted on Aug 11, 2009 9:00:53 GMT
As this is primarily an aircraft tug, and should therefore spend most of it's life on concrete, the weathering should follow suit, or should it? I've been going through the Tankograd reference photos and a couple of snaps of my own and perusing photos from t'interweb, and occasionally, they do go off road. So, I'm going to watch a couple of DVD's this morning which describe various weathering techniques, then it's time to indulge in a little alchemy.
|
|
|
|
Post by seangb on Aug 11, 2009 10:58:47 GMT
Nice looking stuff Nick , thing I like about this kit is all the suspension and drive shafts you have to support the model , unlike my one that has nothing , but the Russian green looks a nice colour
|
|
Deleted
Deleted Member
Posts: 0
|
Post by Deleted on Aug 11, 2009 11:26:03 GMT
Nice looking stuff Nick , thing I like about this kit is all the suspension and drive shafts ... Yea, until one of the little critters comes loose and drops out of the hub, and then you have to find a way to get it back in again ... snazznfrazzn! Yes it is, it'll be better when it's weathered though. The front end will be painted in the two tone scheme of Grey / Black and Light Blue ... 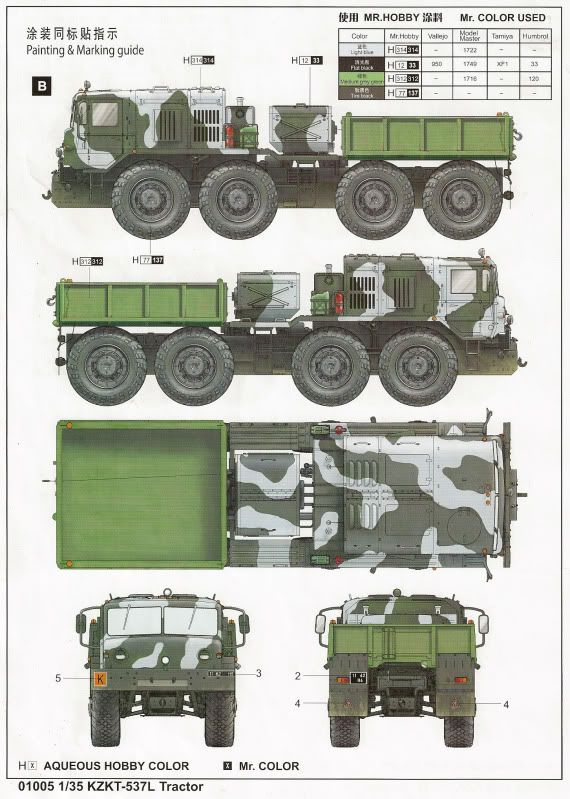 ... pretty, isn't it? |
|
|
|
Post by brianthemodeller on Aug 11, 2009 12:27:00 GMT
If this an aircraft tug what on earth did it pull???
|
|
Deleted
Deleted Member
Posts: 0
|
Post by Deleted on Aug 11, 2009 12:50:36 GMT
If this an aircraft tug what on earth did it pull??? Up to 200 tonnes Brian, speed approximately 20kmh on hard ground, 5kmh on soft ground., so I would imagine it assisted maneuvering of heavy transports on military bases. It's also equipped with a heavy winch, so there's probably a multi-role there somewhere. |
|
Deleted
Deleted Member
Posts: 0
|
Post by Deleted on Aug 11, 2009 20:21:51 GMT
Ive been practicing my weathering skills this afternoon, attempting to replicate dirt and dust. First of all, have a look at what's been done so far ... 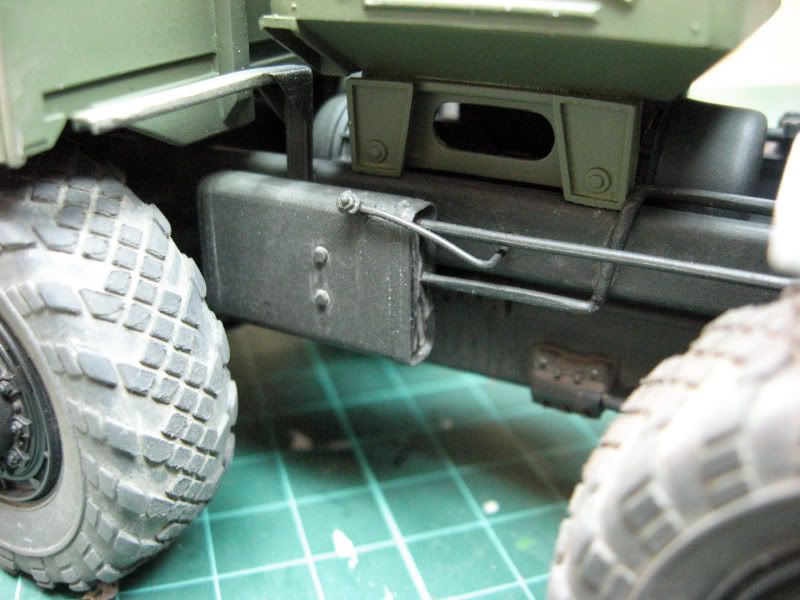 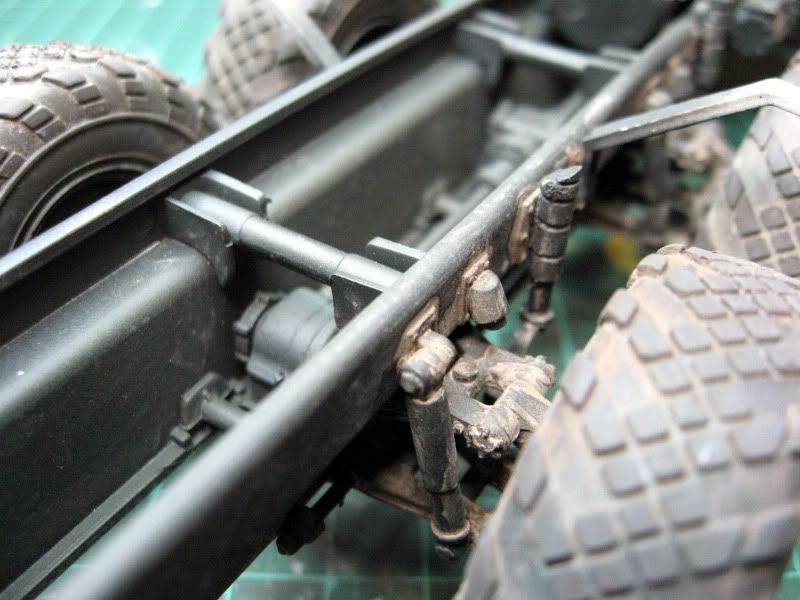 ... with a combination of Vallejo paints and MIG powders, I've added light and dark mud stains, and also rain streaks, unfortunately, the photos don't do the process any justice. I started by adding a thin wash of Vallejo Russian Earth, dabbing off the excess and then force drying. Once this process was finished, I added a thin over spray of Vallejo Black, this dulls the process and allows the effect to be built up over a series of passes. The tyres required dulling before any effect was added, and I tried several different solutions including thinned matte varnish, on no account try this, it makes the tyre very sticky, but you don't know until you try. I had a quick rummage through my collection of weathering powders and pastels, and came across a concoction of my own which I used some years ago. Using artists pastels, I ground down white, black and brown and mixed them all together. If I remember correctly, this mixture was originally used to dull down a set of very sticky Revell Unimog rubber tyres. I decided to use this concoction again, the tyre I had matte varnished was saved, so I applied the mixture to the remaining 7 tyres of this build ... 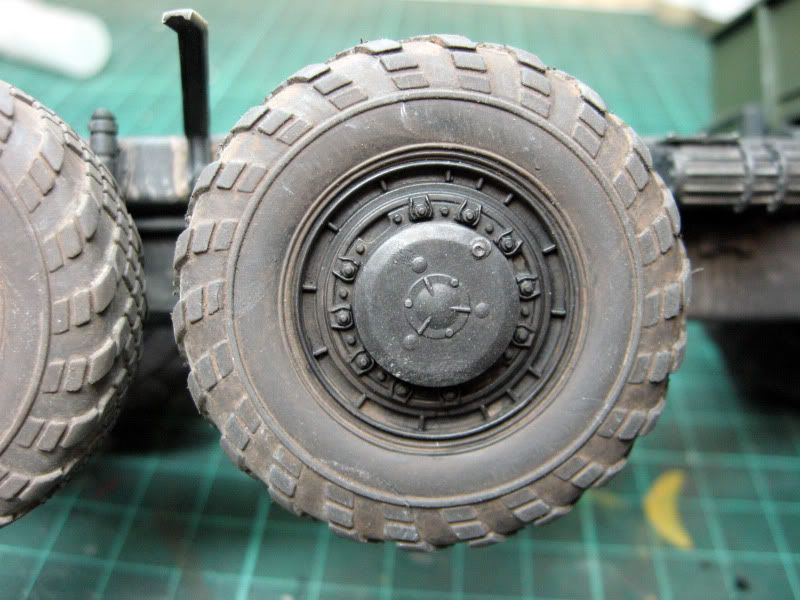 ... the result is a dull grey tyre, it also gives a surface for the application of mud. I'll continue the experiments and photograph the results. |
|
 Members' Forum")