|
|
Post by papasmurf on Feb 24, 2011 11:30:58 GMT
She's coming on Nige,
the tilt got posted this morning so should be with you early next week fingers crossed.
Regards Dave
|
|
|
|
Post by okdoky on Feb 24, 2011 18:36:59 GMT
Dave
Many many thanks and appreciated. Will look out for it arriving and pop you a note when it is here.
Also Cosmos
Thanks for looking in !!!!!!
Cheers for that
Nige
|
|
|
|
Post by okdoky on Feb 25, 2011 18:37:49 GMT
She's coming on Nige, the tilt got posted this morning so should be with you early next week fingers crossed. Regards Dave Hi Dave Arrived safe and sound in the post. Greatly appreciated !!!!!!!! Give a shout if there is anything specifically you are looking for so I can recipricate sometime. PM inbound too regarding pics. Folks on here and the other sites I use always great with assistance. Thanks Dave |
|
|
|
Post by papasmurf on Feb 25, 2011 19:10:00 GMT
Hat's off to the post office that was quick as the box doesn't get emptied until 5:30 pm,
Dave
|
|
|
|
Post by okdoky on Feb 27, 2011 14:26:15 GMT
Hat's off to the post office that was quick as the box doesn't get emptied until 5:30 pm, Dave Thanks to Dave and a speedy Royal Mail I now have the tilt for the lightweight. 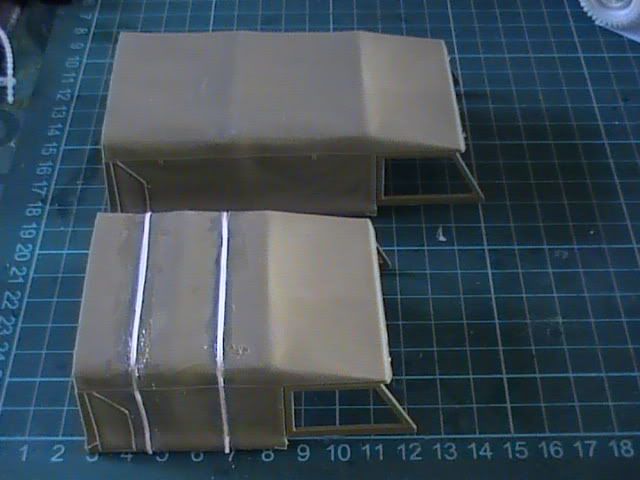 A little cut and shut to get the middle tilt bow placed correctly for the short wheelbase. 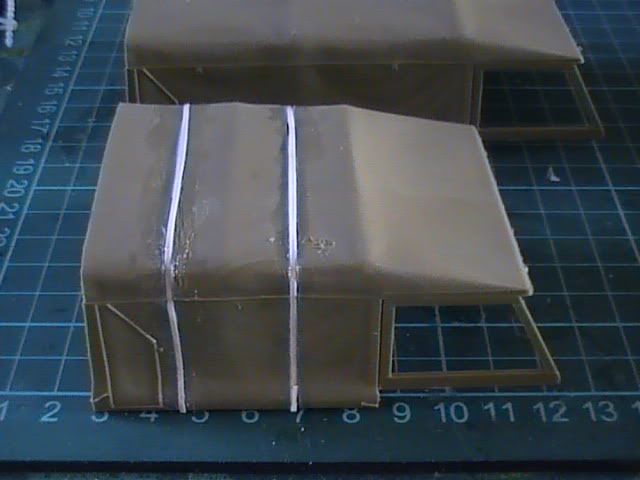 Still has a bit of refinement to do blending in the joints. 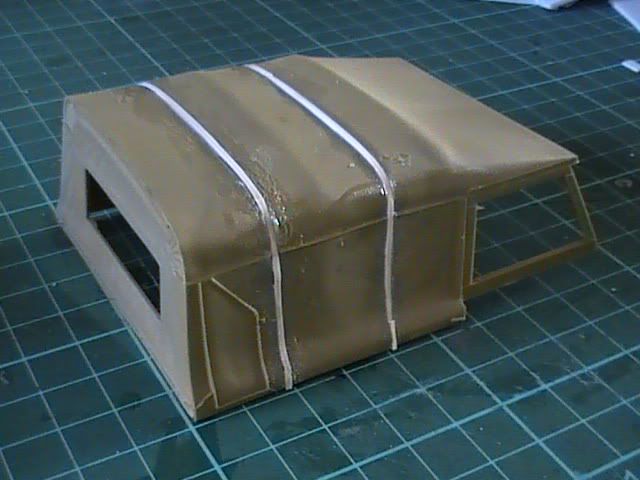 Also added the rough axles and leaf spring U bolts. 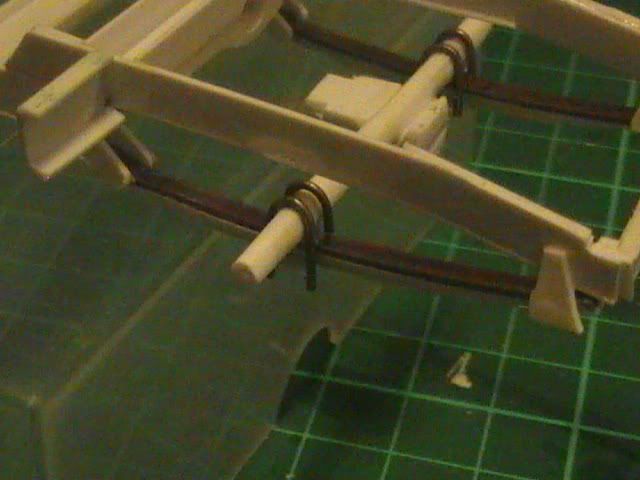 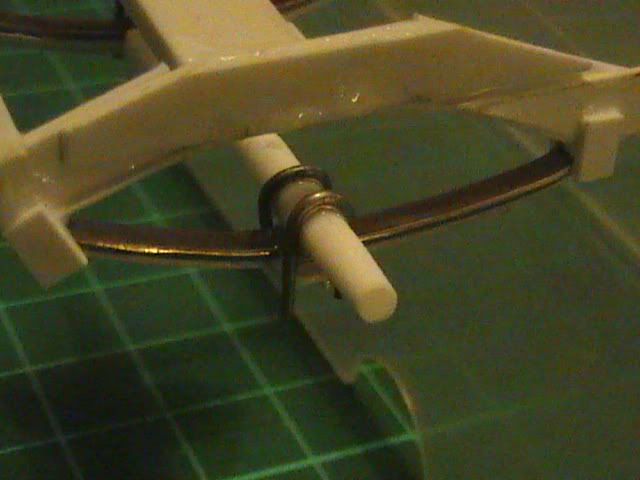 Thanks again Dave for the tilt. Nige |
|
|
|
Post by okdoky on Feb 27, 2011 21:29:36 GMT
Thanks Cosmo A rub down to smooth off the damaged detailing. 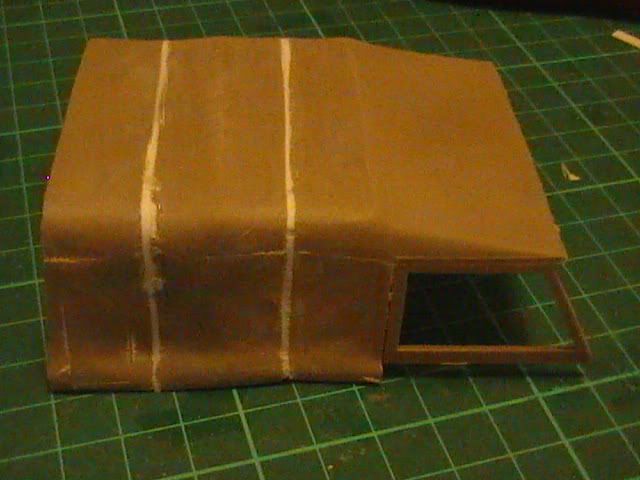 Stretched sprue, wire and tin foil to put the detailing back on. 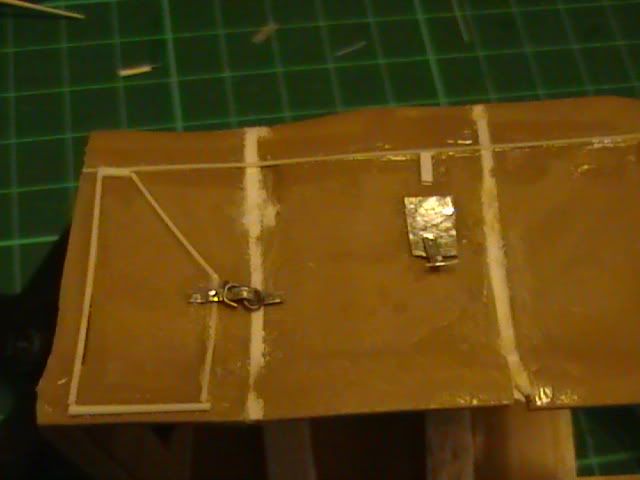 Nige |
|
Deleted
Deleted Member
Posts: 0
|
Post by Deleted on Feb 27, 2011 21:45:14 GMT
This is looking so good Nige, can't wait to see it at Perth.
|
|
|
|
Post by okdoky on Feb 28, 2011 0:20:15 GMT
Hi Nick The deadline for completion for this is the Perth Show so am going to be grabbing as much time on this as I can. Added a NATO style hitch using a necklace clasp. 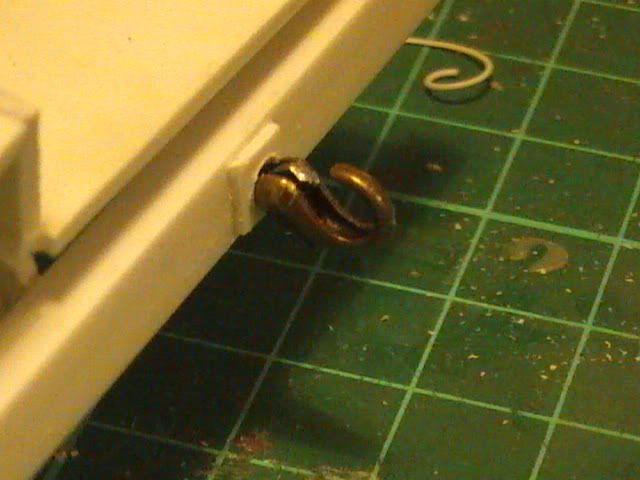 Also formed the cargo bed. 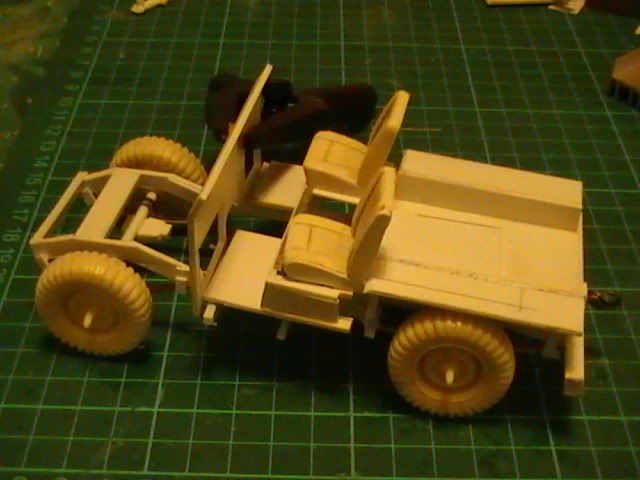 Tilt added to check proportions 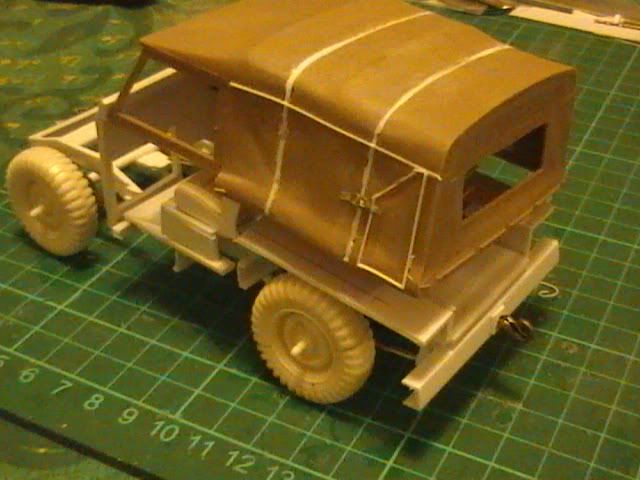 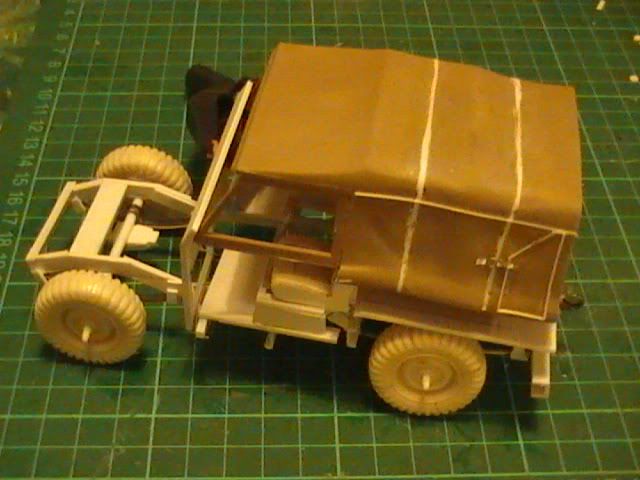 Nige |
|
|
|
Post by papasmurf on Feb 28, 2011 10:12:48 GMT
High Nige you don't hang about do you!!!!
Looking good, what's the finished colour scheme going to be?
Dave
P.S. thanks for computer lessons.
|
|
|
|
Post by okdoky on Feb 28, 2011 13:09:36 GMT
Dave
Any time regards PC help. If I can I will try, but even I often have to defer to a man who can !!!
Regards the colour scheme, I am probably going to opt for the simple option on this one as shown in the pic of the real landy at the begining of the blog with black chassis, a faded green body and more faded tilt. I am hoping that this will give a little bit of contrast to the sanky trailer with its green and black camo.
I will be doing a couple of other landy 109's with at least one in the typical green/black camo. Maybe have them done by Perth if I work at it.
Nige
|
|
|
|
Post by okdoky on Mar 3, 2011 0:27:41 GMT
Hi Foxy A few questions if you don't mind  Any particular shade of brown paint And was the paint washable to revert back to the basic green or just repainted overall green again Was the paint added for exercise in UK or abroad Was the sand typical beech sand just thrown on the wet paint How was the Gimpy mounted Was it a Heath Robinson afair or a pucka mount made by the workshop unit Lastly ,,,,,,,,,,,,,,,,, any pics of the recce lightweights and these bits and bobs Thanks for looking in and the interest as usual ,,,,,,,,,,,,,, ALWAYS APPRECIATED !!!! Nige |
|
|
|
Post by foxy on Mar 3, 2011 0:43:38 GMT
Hi Nige.
To your first question on paint job.Light brown paint,wet, with sand from who knows where, but thrown on strait after painting to give rough effect.
This was to be the standard for vehicles at this time and applied to all soft skin(like the Land rover).
GPMG was a REME con-fig and standard for this mount, it consisted of a U shape with pin to hold Gimpy in place.
This was used with your type and short wheel based land rovers.
As for pictures, I can only remember from memory, but will check my photo's as I took many.
I might add this was a camo effect, so sand was only on light brown wavy effect as on green and black effect type camo.
Hope this makes sense.
|
|
|
|
Post by foxy on Mar 6, 2011 15:48:57 GMT
Hi Nige. Sorry I do not have a picture of the Landrover with cammo on CD so am unable to furnish you with some pictures. So maybe just do it green as you first suggested.  |
|
|
|
Post by okdoky on Mar 13, 2011 0:24:38 GMT
Hi Foxy
Thanks for looking for pics. Appreciated even though you could not find. I have seen some great pics on E-bay of all places of a totally restored lightweight. I reckon I am gonna go with the simple option on this one with green only. The tilt will be a contrasting brownish colour I think.
Only got a couple of fuel tanks roughed up at the moment to add to the chassis and will post pics tomorrow if I get a chance.
Nige
|
|
|
|
Post by okdoky on Mar 13, 2011 23:37:34 GMT
Kaz and the kids are all doing fantastic now and to look at Kaz you would not think she had been through the wars. Taken everything in her stride as usual. What a gall !!! Had a chance to do some little bits tonight. Fabricated two basic fuel tanks using this pic as reference 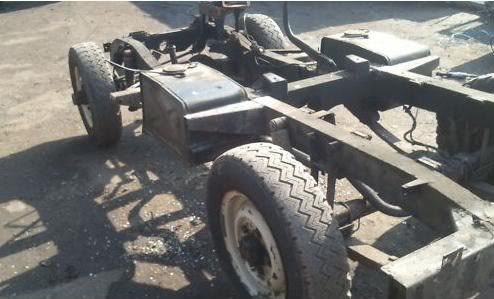 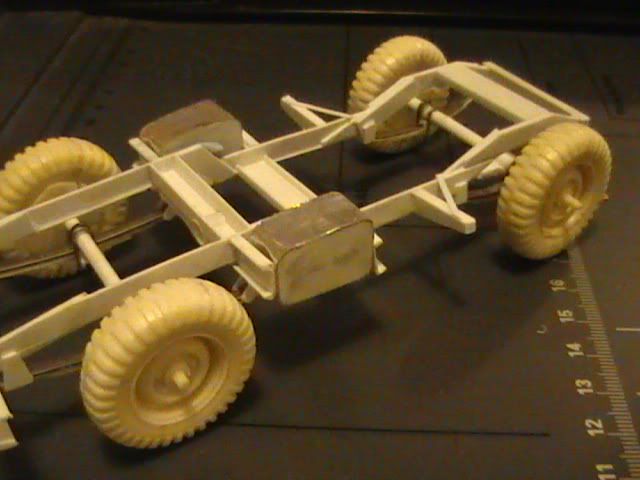 I cut four thick plastic pieces and temporarily glued them together to sand them to the shapes of the tanks profile. Then I added a section of square hollow section between two to give me the width. Then by cutting the tin foil to the width, I superglued the foil as a wrap around strip to form the tanks. 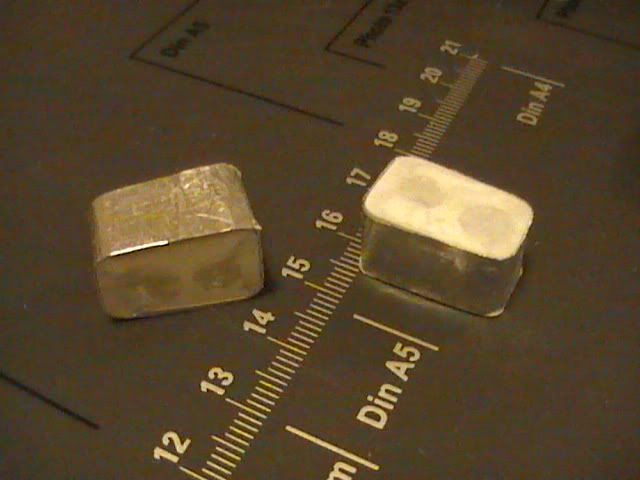 Still got the cross shaped indents to carve on the sides, fuel tank lids and pipework under the seats 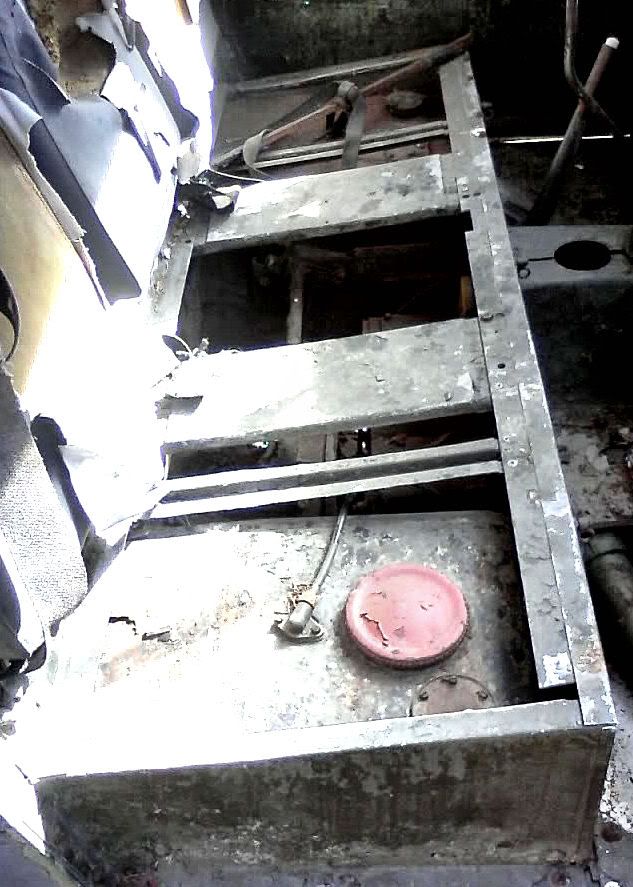 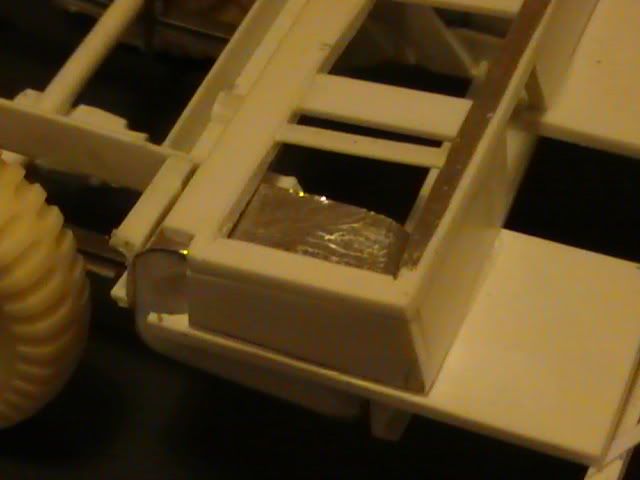 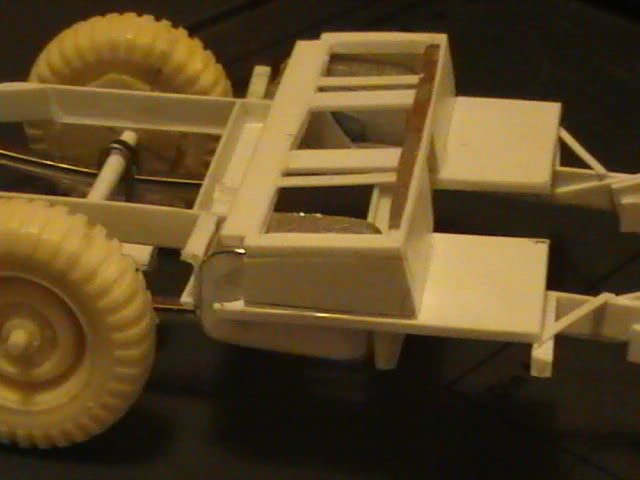 Nige |
|
 Members' Forum")


