|
|
Post by okdoky on Apr 8, 2011 17:36:48 GMT
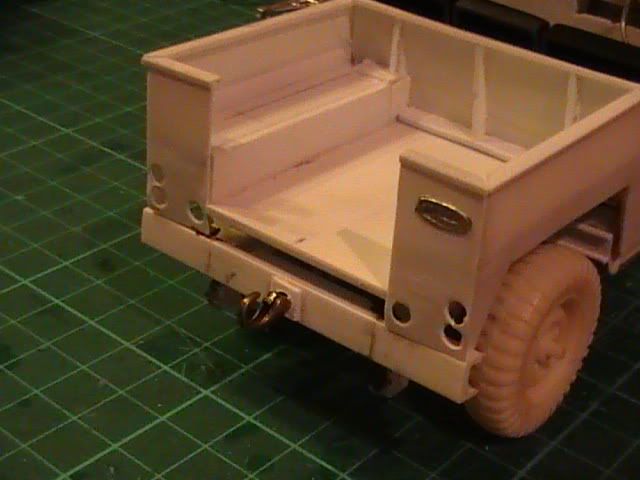
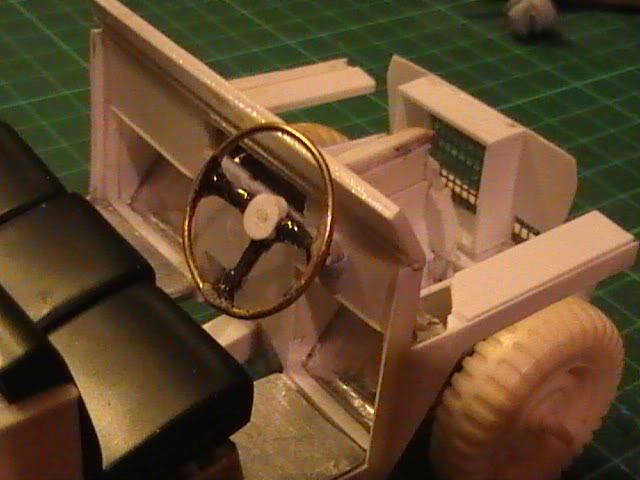
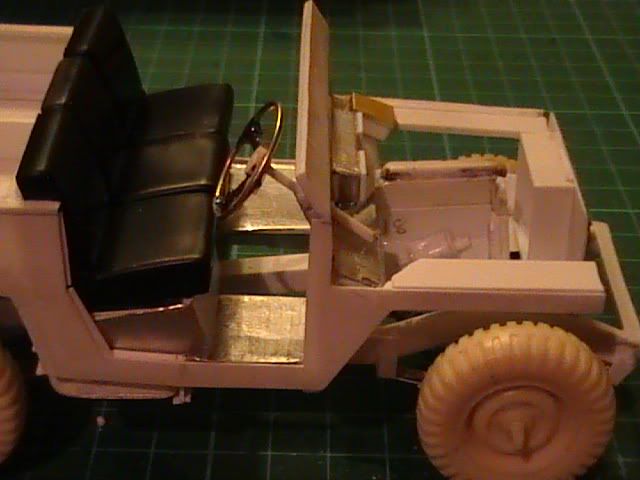
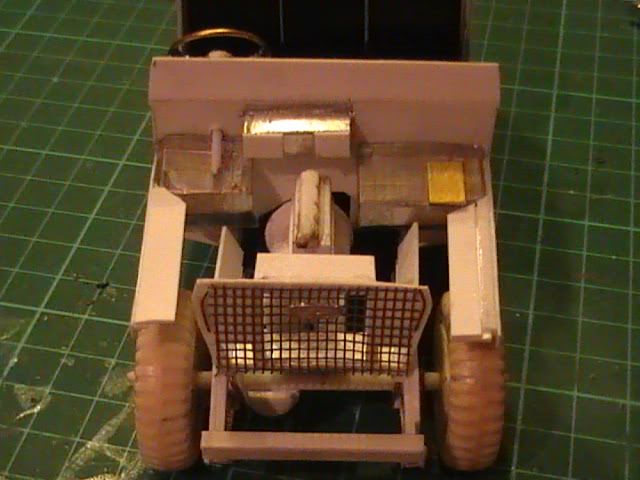
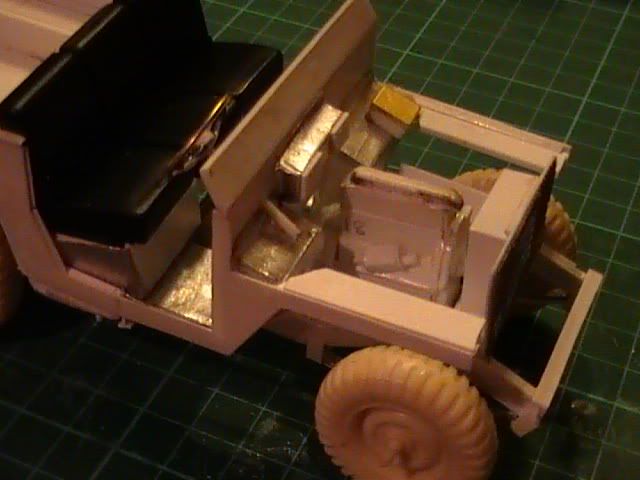
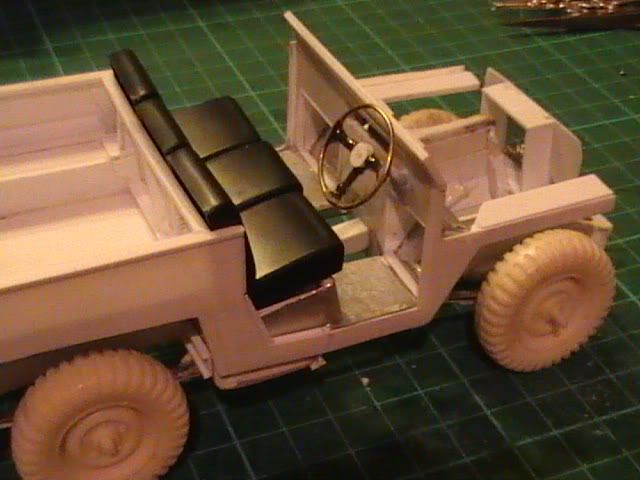
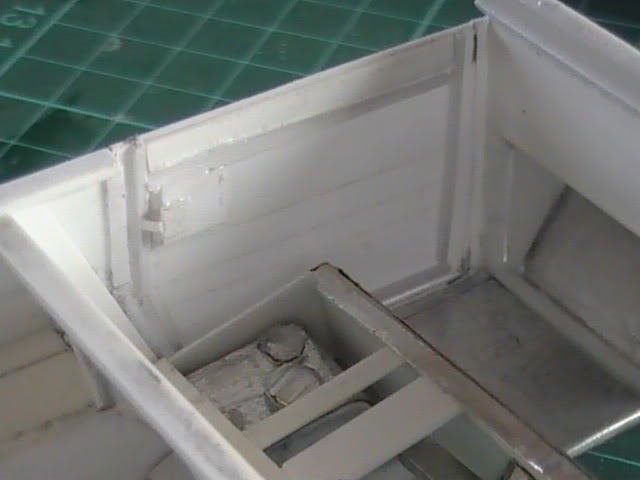
Thanks Foxy Had some peace from the kids and in-laws to get some work done today !!!!! Under the bonnet tool box out of square hollow section and capped off with tin foil from chocolate powder tin. 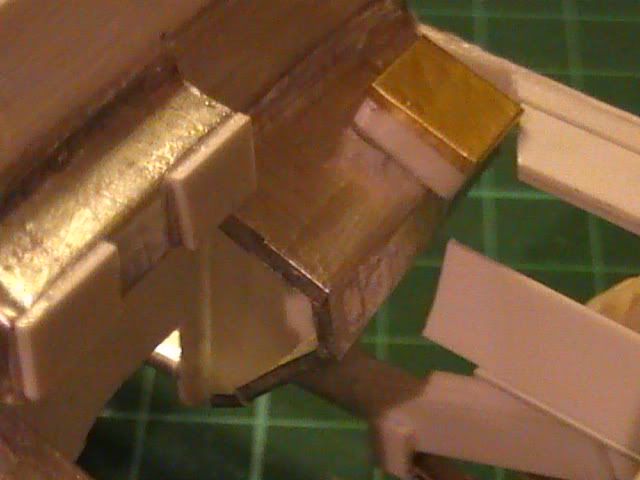 Floor panels from tin foil on top of a plastic frame 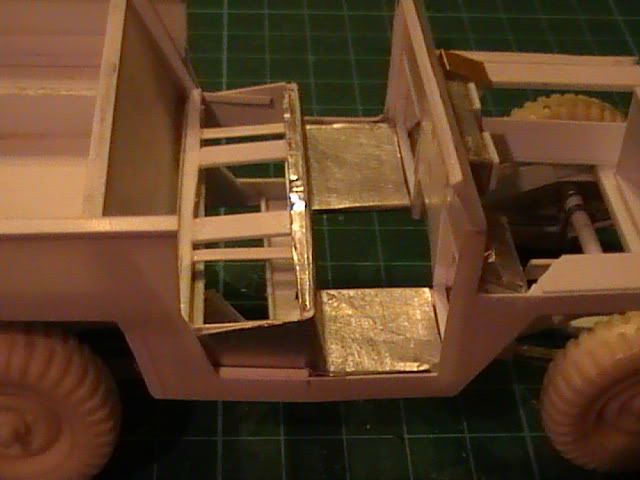 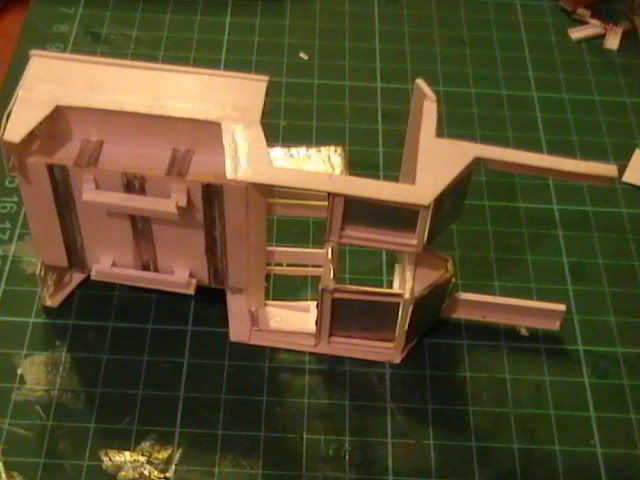 The doors cut out from the side panels were added to with door handle cut outs 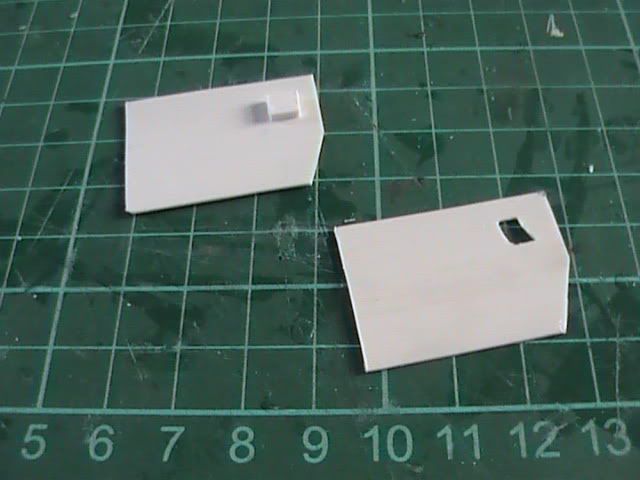 the door lock mechanism 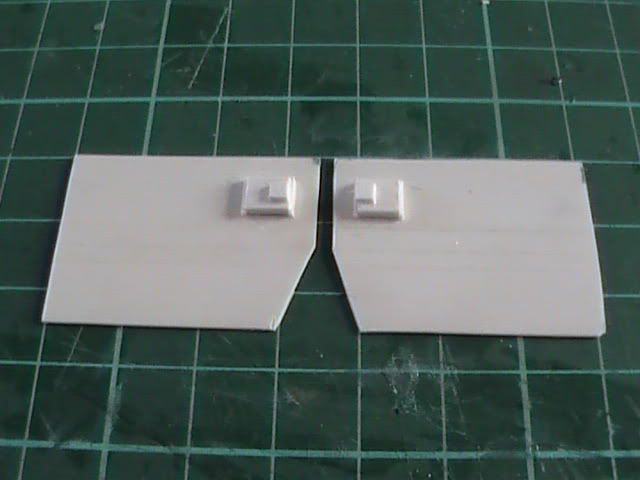 framing out (slightly inboard, but easier to make sure it fitted after forming up) 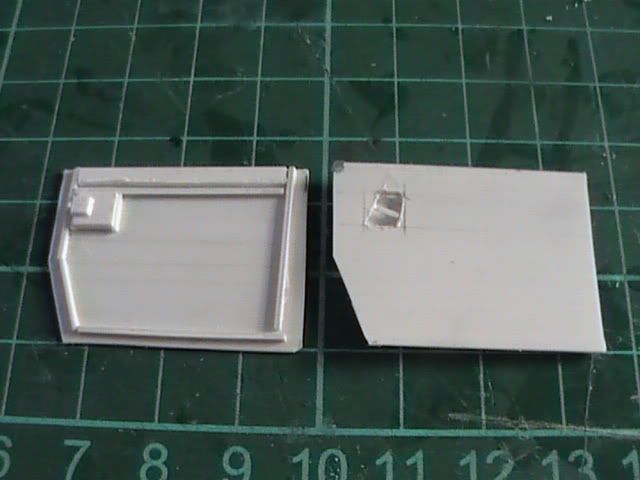 door handle in cut out 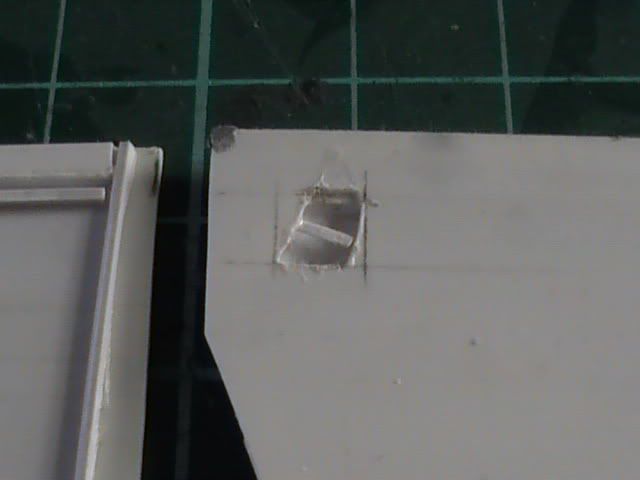 finished door lock 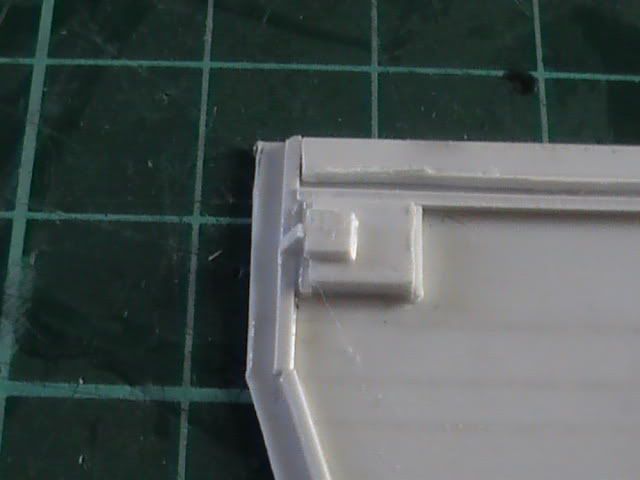 Nige |
|
|
|
Post by okdoky on Apr 8, 2011 17:48:29 GMT
|
|
|
|
Post by okdoky on Apr 10, 2011 0:02:33 GMT
Realised that the ESCI 109 kit has great seats to use as a guide for the scratchbuild lightweight seats. Gave me another correction to deal with as my placement of the seats backing sheet would have given the driver and passengers a more reclined position, more akin to an F16 fighter jet. A few cuts and repositioning. 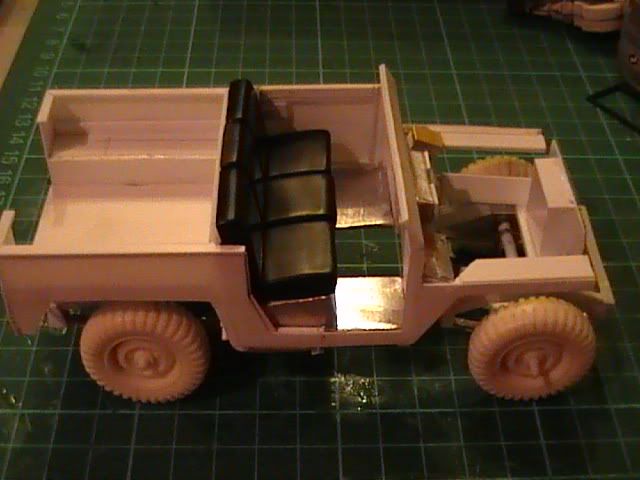 Also means a bit of patching of the holes left at the corners. Well my Landy needed lots of patching up to keeping it running, so I will put it down to damage by cargo or summit. 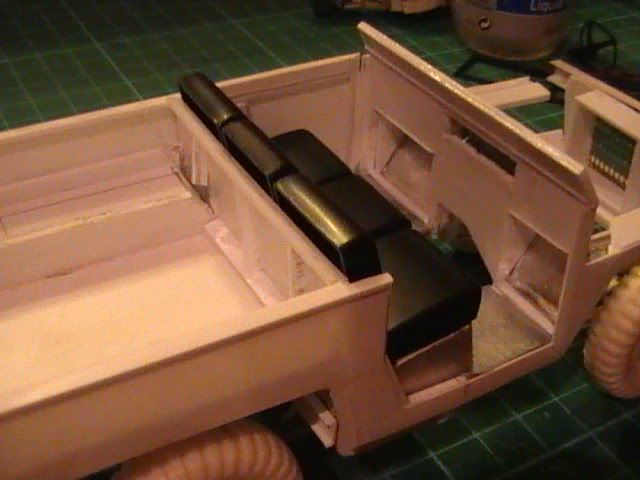 Placed the Monogram engine block and gearbox in the lightweight to see how it would look. Intension being to use this as a guide to scratch a basic engine to go under the hood. After all, will need the engine for the 88. 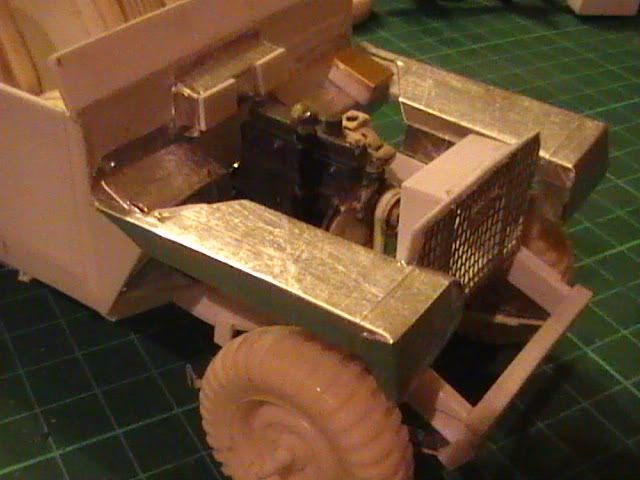 Surprised myself how easy it fitted in, though using the 88 chassis as my guide meant I had to be close, even with the slight bodywork differences. 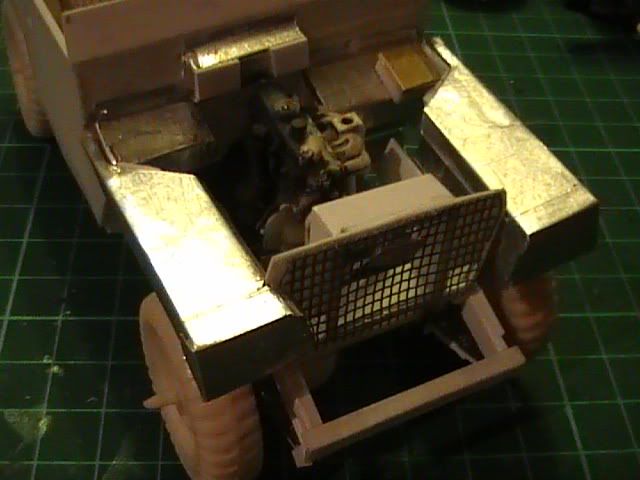 Made a start using large section rectangular hollow tube glued between sheet end pieces. The top is set in the narrow plane vertically, and the bottom with the narrow plane horizontally. 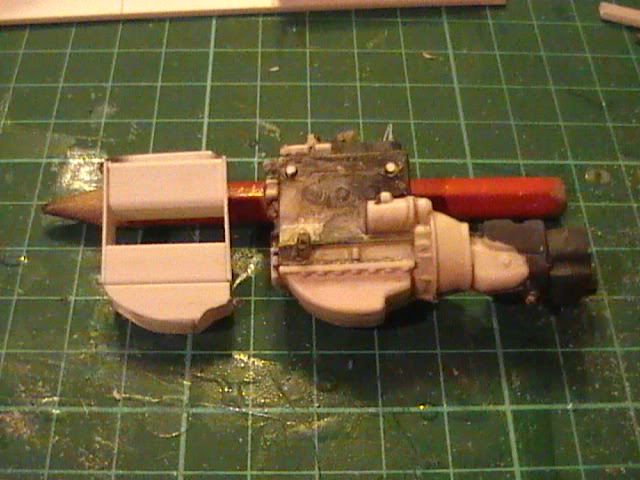  The space in between filled with thin sheet to place all the other componants on to build up the general shape. 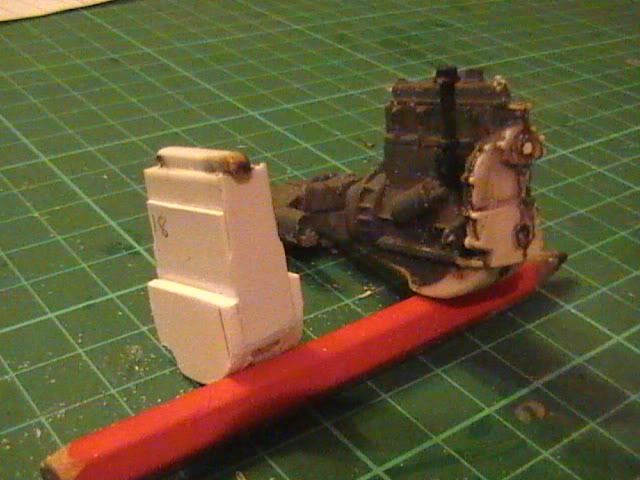 The sump is another section of the hollow tube, this time laminated with thick p/card to get the required width, then sanded to profile. More to follow when time allows Nige |
|
|
|
Post by foxy on Apr 10, 2011 8:28:30 GMT
Nice one Nige  . |
|
|
|
Post by Fatty on Apr 10, 2011 14:53:28 GMT
looking good there, one thing yo will need to do is change the hubs on the cast wheels. the light weight hubs were flat to keep the width to a minimun to fit into the 'drop' skid.
i shall dig out some pictures for you.
|
|
|
|
Post by Fatty on Apr 10, 2011 14:54:54 GMT
here you go, should look like this...  |
|
|
|
Post by okdoky on Apr 10, 2011 20:01:37 GMT
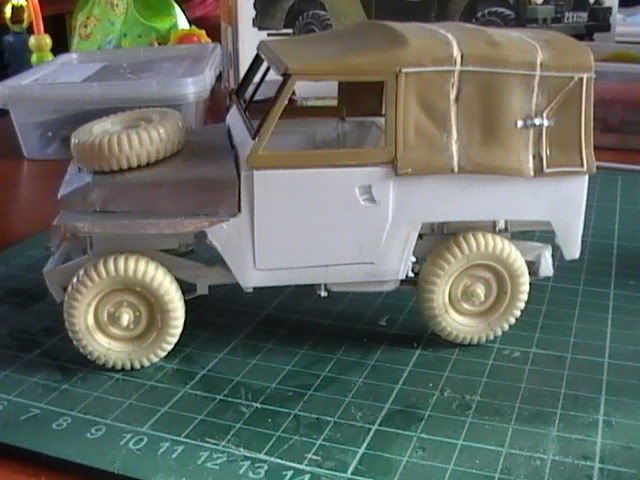
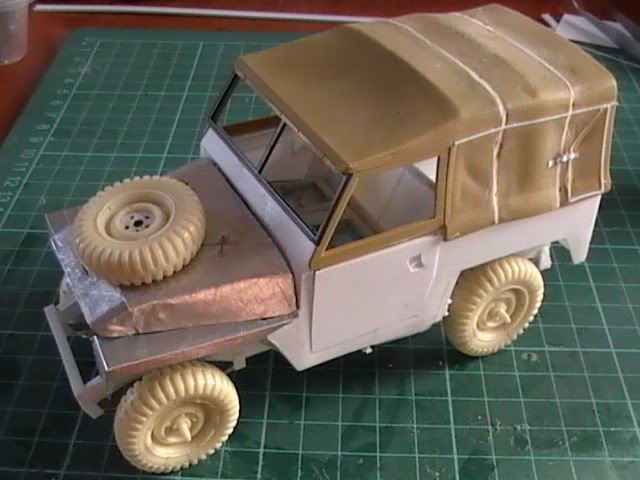
Hi Foxy, Hi Paul Thanks for the heads up on the on the wheel hubs. It shoud be a real easy fix to make with a cut and replace with thin discs and tiny bolt heads. Help always appreciated !!!!!!!!!!! Was glorious weather up here in Lossie so I took the opportunity to do some al-fresco model building. It only just got colder and breezy so gives me an excuse to post up some progress. 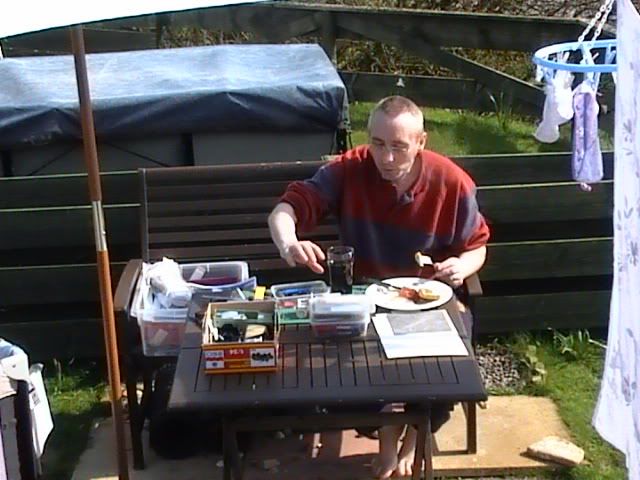 Carved thick sheet into the timing belt housing (I think) on the front of the engine block. The circles are to form the clutch housing. 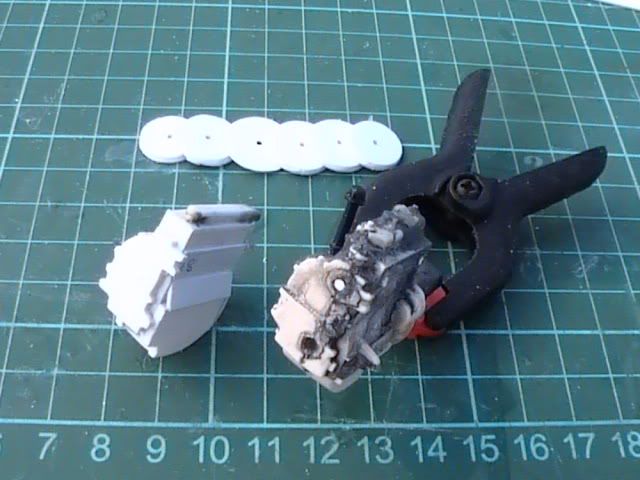 The circles were placed on the mini drill to glue up the laminations and then sand smooth. I found that I made an early start on the chamfering by scribing a larger circle on one side of the plastic, and by turning the sheet over, scribing a smaller circle. When pressed out, the plastic took the path of least resistance and left a natural chamfer. 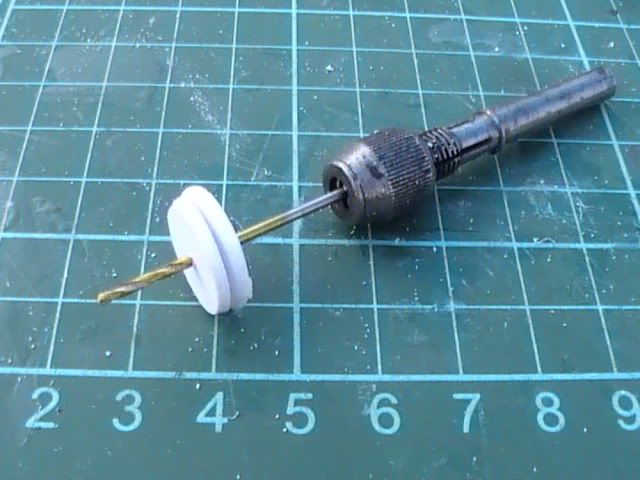 The clutch housing on for test fit 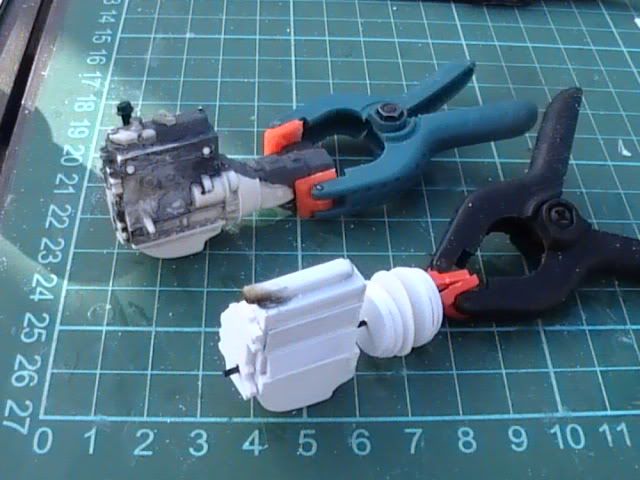 Added some thin plastic strips to mimic the reinforcement to the clutch housing 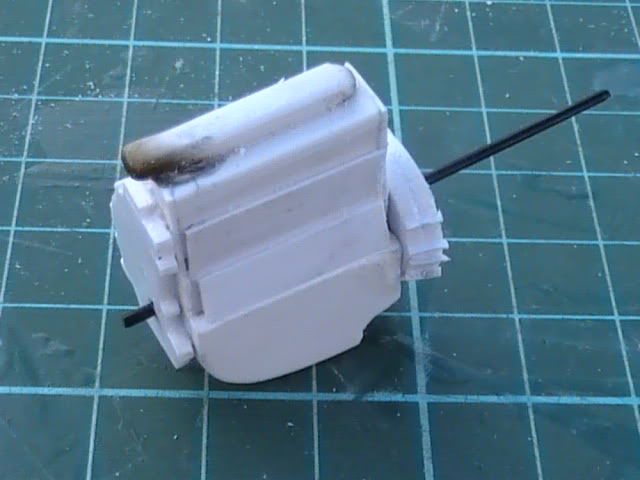 The same hollow rectangle section tubing used to form the basis of the gearbox and transfer box casings glued to the clutch. Will add on some light detailing after I have checked it can all still fit in on the lightweight. 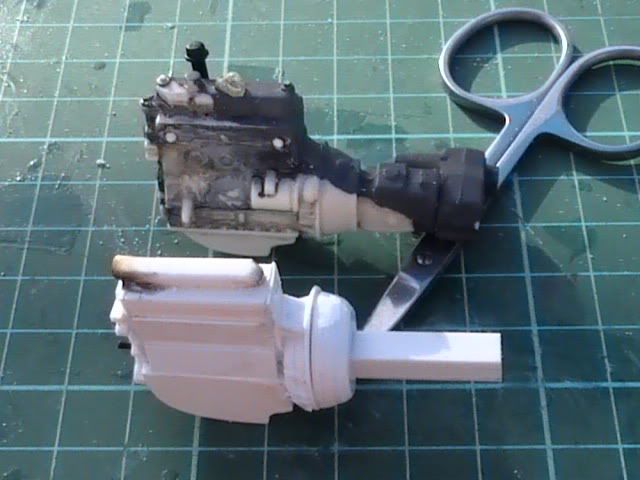 Copied the sump fixings 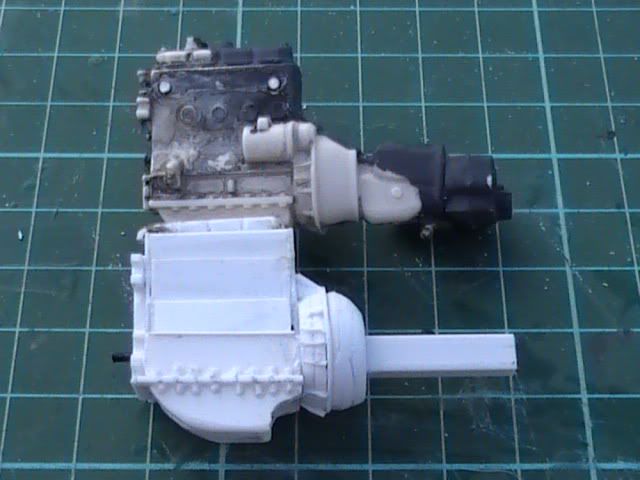 My lovely mum in law layed on a brunch fry up to keep me going  Karen decided that Arron needed some daddy time and he spent some time on my lap as I fettled away at the plastic, sometimes a bit shoogly. A good excuse for my inaccuracies. 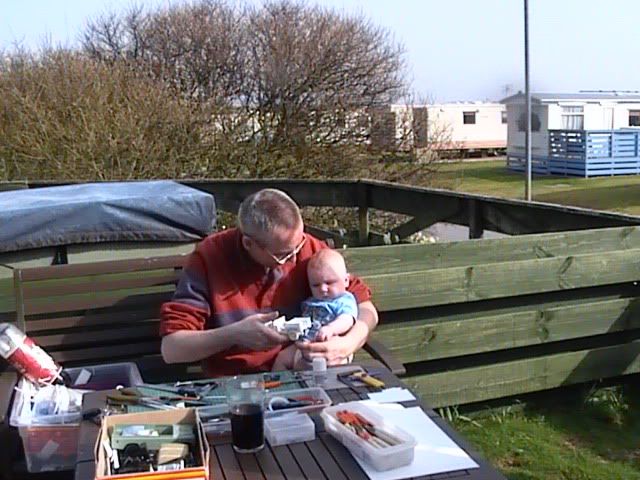  And Arron's thoughts on my work so far ,,,,,,,,,,,,,,,,,,,,,,,,,,,,,,,,,,,,,, !!!!!!!  All the best from a sunny Lossiemouth Nige |
|
|
|
Post by okdoky on Apr 13, 2011 1:16:06 GMT
|
|
|
|
Post by Fatty on Apr 13, 2011 6:54:05 GMT
looking good.
is it going to be a 12volt or the 24volt FFR (fitted for radio)?
if its going to be the 24 volt variant dont forget the batteries are located between the front two seats.
|
|
Deleted
Deleted Member
Posts: 0
|
Post by Deleted on Apr 13, 2011 7:54:24 GMT
Strewth Nige, model making on holiday and being fed, you've got it made matey! There's certainly a lot of TLC going into this build, looking forward to seeing the finished product at Perth. I'm off to my thread to fettle the dash on the Landrover Challenge build: ipmsuk.proboards.com/index.cgi?board=btbs&action=display&thread=8643&page=3 ... What's on the menu today then Nige? |
|
|
|
Post by okdoky on Apr 13, 2011 12:28:20 GMT
looking good. is it going to be a 12volt or the 24volt FFR (fitted for radio)? if its going to be the 24 volt variant dont forget the batteries are located between the front two seats. Hi Paul Not got a good photo of the batteries in the middle to work with, so not sure what the construction entails. I am of a mind to make it as a GS at first. Given that a lot of the FFR equipment is add on, I may try and make the radio gear and have the parts removeable to allow their placement. In one of the reference sites there is informationUnitary Radio Kit which could be lifted in and out of the lightweight and left in a location with the landy available as a runabout. www.land-rover-lightweight.co.uk/Images/Clansman/Fitting/Radio%20Table%20G.jpgMight make a nice little diversion to add at a much later time. Yes Nick I do get looked after quite well on my hols as it is a time that I can to recharge my own batteries. Hell will let loose when I am back at work as there is a new hotel that I will be overseeing, amongst other jobs, as well as my own DIY jobs still to be finished. Looking forward to seeing how your own Landy turns out as it is going to be quite a fine mud-plugger. Hope to catch up with all your other work when I see you both at Perth. Nige |
|
|
|
Post by foxy on Apr 13, 2011 15:26:44 GMT
Hi Nige. Well in my day with this LR, we had two radios across and behind the driver and passenger(commander). The batteries were stored in tandem under the radio's, the radio's were mounted on a perforated table from right to left of vehicle and radio's clipped to this. This would mean you only have to show a box under the radio's if fitted. The radio op had a seat ether side of the LR, thease were VHF Radio's and sometimes we had in some vehicles a third HF set. For a twelve volt version, same as Fatty's.  Hope this helps. |
|
|
|
Post by okdoky on Apr 13, 2011 20:29:49 GMT
Hi Foxy This method of fixing ?  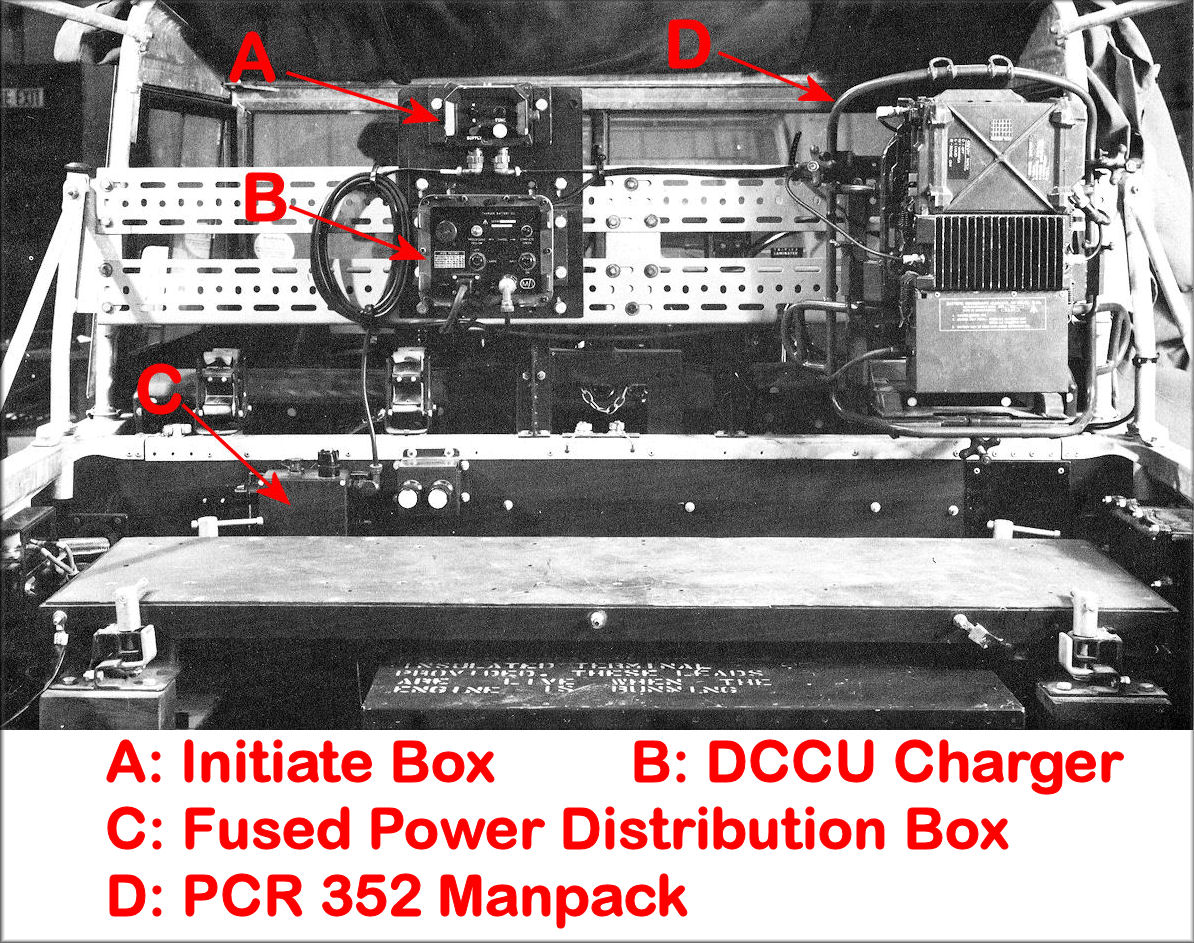 Is this how the 12V set up looks? If it is the 24V, what replaces the middle seat? Nige |
|
|
|
Post by foxy on Apr 14, 2011 10:15:41 GMT
Hi Nige.
Well those two pictures do not work.
As for the Battery box, well as I said the middle seat in my day was as you have it.
The batteries for twelve volt were stored under as I remember the centre seat for 12 V.
24 V we had them in the back next to the commander/driver and spare seat under the radio's at the back.
Fuel tanks were stored under driver and commanders seats again as I remember.
I only used them ,did not tinker with them.
What version are you making and for what purpose.
We used them for recce and run abouts, not for airborne ops.
|
|
|
|
Post by iansadler on Apr 19, 2011 17:41:51 GMT
Hi Noge , very good so far , I have a new way to make diamond chequer plate and I will show you at Perth cheers ian
|
|
 Members' Forum")


 .
.