Deleted
Deleted Member
Posts: 0
|
Post by Deleted on Jan 31, 2010 16:22:08 GMT
I've been wanting to start this particular project for a while, it's an American volunteer fire company water tanker. This is a two part build, the tractor unit and the tanker trailer. Tractor units for tanker work in rural areas are usually donated by businesses when they're updating their fleet, and donation of a vehicle is one way of supporting the community. I'm going to use a re-boxed Mack DM 600, not an ideal vehicle for tanker work, but if you're a small rural community and your fire department is looking for a replacement vehicle, it's something for nothing.
I had started the year wanting to bring one of several stalled projects out of the box, but Ive decided that I'm going to build a model from start to finish, no matter how long it takes. So, the chassis is coming along nicely and I'll put a few photos up later.
|
|
Deleted
Deleted Member
Posts: 0
|
Post by Deleted on Jan 31, 2010 21:35:40 GMT
Sorry folks, the photos won't be up tonight. I've had a brief panic here in the Allen household, the oven packed up half way through cooking lunch and I've been tinkering. Bad news is that it's terminal and I need to source a new one tomorrow, the good news is that we managed to have a lunch. I did manage an hour or so in the workshop though once the dust had settled and the chassis is just about constructed. The proposed colour scheme for the tractor unit is yellow and white for the cab, light grey chassis and white wheels, something different. I have a superb book written by John H. Rieth, published by Iconografix 'Firefighting Tanker Trucks and Tenders' ISBN 1-58388-138-7 ... 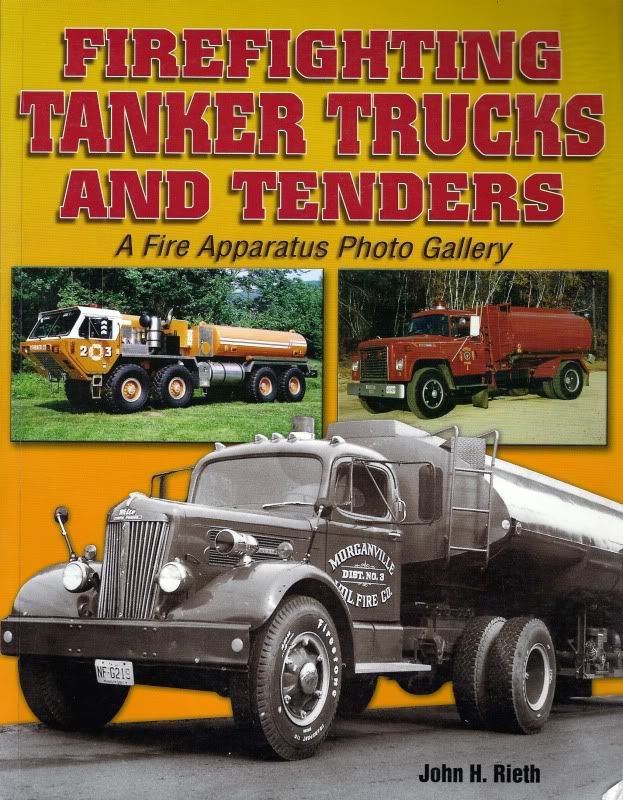 ... it's a superb book, loads of modelling ideas from the 30's to the present day including several Mack builds from a similar era to this build. I have several of the Iconografix books, excellent value for money with a wealth of ideas. More of this project just as soon as I can. |
|
Deleted
Deleted Member
Posts: 0
|
Post by Deleted on Feb 5, 2010 22:53:41 GMT
This weekend, carry on with the build or go to the Milton Keynes show? ... oh decisions!
|
|
Deleted
Deleted Member
Posts: 0
|
Post by Deleted on Feb 7, 2010 22:03:31 GMT
OK, I chose to have a day off and went to Milton Keynes. However, the trip was very useful as I managed to see a couple of folks who have been very helpful with ideas for this project. I have a possible source of miniature emergency lighting for the vehicle, and I also have a top bloke working on an original decal combination. I've chosen a name for my fire department, it's 'Pine Ridge Volunteer Fire Department' Illinois, and yes, there is a Pine Ridge in Illinois. It's about to have a water tanker built and after that, I may just build another rig, a Mack R600 c/w flat trailer and Cat D8, we'll see. But first, I've got to get back in the workshop and complete the chassis for the Mack DM.
|
|
|
|
Post by voyager on Feb 8, 2010 9:49:58 GMT
Like the name ;D Looking forward to this, 2 Macks and a CAT, heaven  |
|
Deleted
Deleted Member
Posts: 0
|
Post by Deleted on Feb 14, 2010 21:48:47 GMT
That's it, 'Dancing on Ice' versus the shed ... no contest. Here's the tractive power for the tanker ... 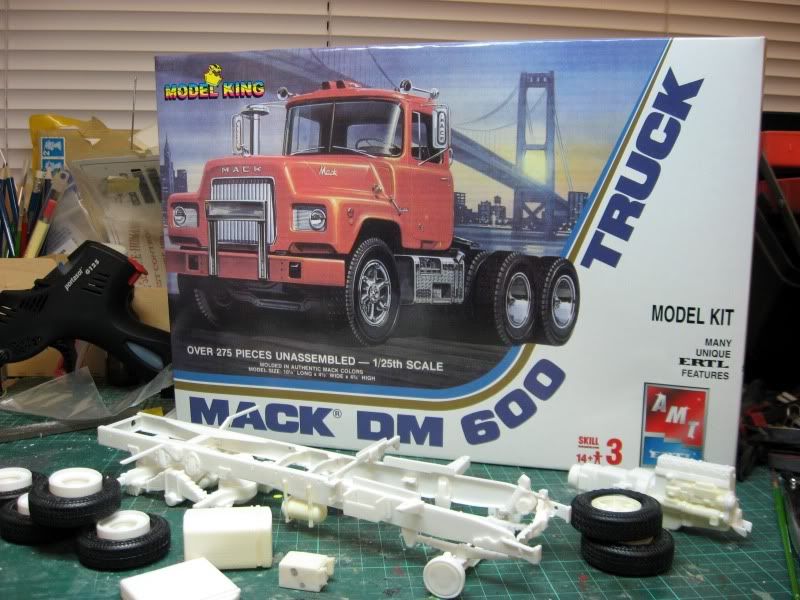 ... the Mack DM 600. As you can see I've made a start on the chassis, it's at the point where I want to be adding the plumbing, note to self ... contact Howard. As the truck will be in standard form, the chrome bits and pieces need to be stripped, and this was the first course of soup ...  ... wheels, air tanks and fuel tanks first, then a second brew with the rest of the chrome. More later. |
|
Deleted
Deleted Member
Posts: 0
|
Post by Deleted on Feb 15, 2010 22:09:17 GMT
I've been doing a spot more to the build this evening, mainly sticking halves together, and there's a lot of them including a second battery box, fuel tank, six air brake actuators and the outer wheel rims. The engine had a couple of new bits added and I've identified a few chrome bits which will hit the next bleach soup. I've made a note of the bits I need from Howard, they'll be ordered tomorrow. Hopefully, I may have something to show at Huddersfield. If anyone would like to see a couple of the projects I've decided on, come and have a chat at Huddersfield.
|
|
Deleted
Deleted Member
Posts: 0
|
Post by Deleted on Feb 16, 2010 19:58:57 GMT
I phoned Howard today and ordered a couple of sets of the plumbing bits and pieces, I was going to order the Scania CP28 cab as well but thought I'd better not, the car is due for taxing at the end of the month. Right then, I need a colour brochure of the DM 600 showing the chassis and the plumbing arrangements, has anyone got such a brochure tucked away somewhere or can anyone point me in the direction of a suitable vendor?
|
|
|
|
Post by voyager on Feb 17, 2010 8:43:03 GMT
|
|
Deleted
Deleted Member
Posts: 0
|
Post by Deleted on Feb 17, 2010 22:57:21 GMT
Cheers Andrew, there's a bit of reading there to keep me occupied for a while.
|
|
Deleted
Deleted Member
Posts: 0
|
Post by Deleted on Feb 18, 2010 13:10:03 GMT
There I was snoozing on the couch, I've taken the day off coz I got man flue! ... anyway, my parcel of plumbing bits arrived from Howard about ten minutes ago, it landed with such a wallop on the mat that it woke me up. I also received your contribution Brian, many thanks, now all I have to do is identify the various components and where they go. I'm sure Howard provided a drawing explanation in a previous edition of TMW, time for a firk in the workshop and find the edition concerned.
|
|
Deleted
Deleted Member
Posts: 0
|
Post by Deleted on Feb 21, 2010 12:05:13 GMT
Before I go any further with this project, I should really show you the sort of rig I'm proposing ... 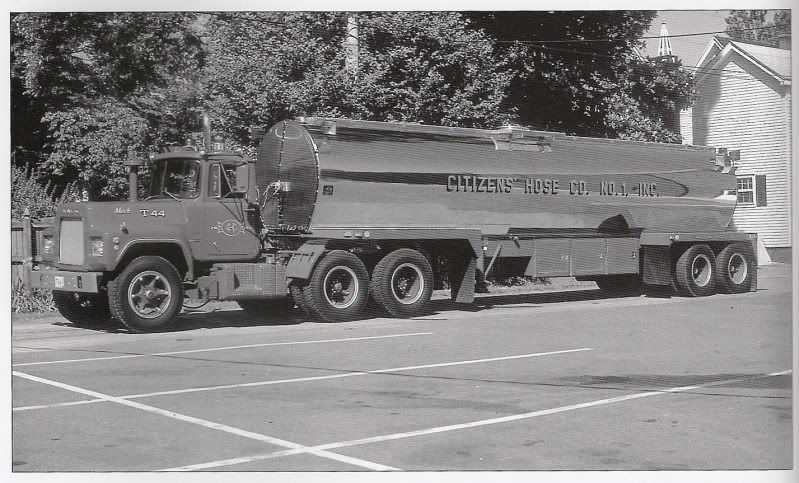 ... this is an R600 but the rig is similar. The tank will not be as the one shown, not decided exactly what to add to it as yet but it will carry a portable dam and a few lengths of hose to allow pumpers to fill directly from the tank or draft from the dam. I'll have a look at the tank today and get a shot of the box art. So, seeing as though the trip to Huddersfield is off for me, I'm out to the workshop to complete the chassis construction. |
|
Deleted
Deleted Member
Posts: 0
|
Post by Deleted on Feb 21, 2010 15:24:58 GMT
Grrrrrrr! so many two part modules to stick together and then clean up, ah well, I suppose it will be worth the effort when the truck is finished. I'm at the cab stage at the moment whilst some of the chassis parts harden off before I attach them. The cab is built from a few weird shaped bits and pieces, the instructions are rather vague so I'm fitting the bits and pieces using a bit of common sense but the cab is starting to go out of shape. I've tried matching the hood to the cab and it fits ... just! ... so when the cab is on the chassis, I may have a few adjustments to do because I don't want to lock the hood down.
|
|
Deleted
Deleted Member
Posts: 0
|
Post by Deleted on Feb 21, 2010 17:27:41 GMT
Right then, a break from sticking bits together, instead it's time for a quick helpful tip ...  I thought that I'd prepare the tyres, they come with a horrible raised band around the circumference and the moulding on the sidewalls is a tad too thick for me, so, it's time to get rid of the moulded detail I don't want. These are the tools I'm going to use ... 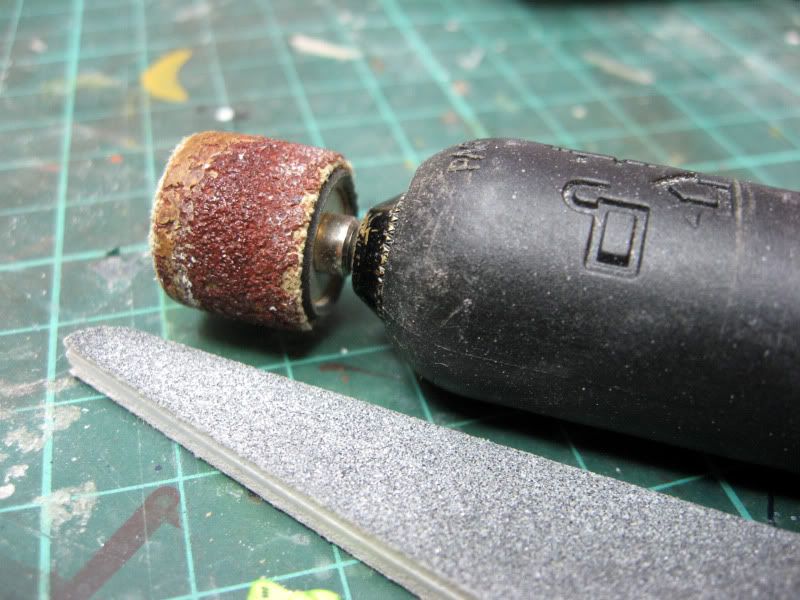 The tool to the right is a Dremel rotary drill, it has lots of uses, this time, it's loaded with a rotary sander. The sanding band is fairly well worn but it's good enough for this job. Next to the Dremel is a course sanding stick, basically two sheets of emery board glued either side of a sponge cushion. First of all, here's a before and after shot of the front tyres ... 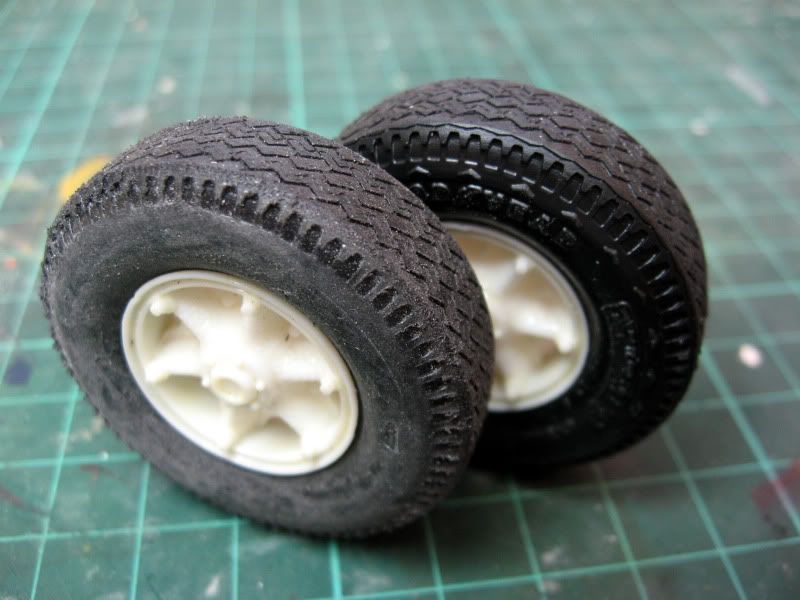 ... the nearest tyre is the one I've just attacked with the Dremel, the tyre at the rear is yet untouched. First of all, the Dremel is set to minimum speed, around 200 rpm. The sanding disc is gently moved around the circumference of the tyre, just enough pressure to remove the excess rubber at the centre of the tyre. The sanding stick is then pulled across the tread to flatten any rough spots and reduce the depth of the tread and to give a slightly used look. Now the next bit. This can be done with the Dremel or the sanding stick, whichever you feel comfortable with and depending on how much time you have. I quickly and carefully used the Dremel to remove all the raised detail from the tyre, I then used the sanding stick to finish off. A simple piece of detailing which takes seconds. The final weathering will be done once the model is painted. Now then, excuse me, I have 9 other tyres to fettle. |
|
|
|
Post by brianthemodeller on Feb 22, 2010 10:03:39 GMT
I'm sure Howard provided a drawing explanation in a previous edition of TMW, time for a firk in the workshop and find the edition concerned. TMW 150 & 151 - had to dig them out for my MAN! |
|
 Members' Forum")


