|
|
Post by iansadler on Jun 27, 2011 18:00:06 GMT
Hi I am building the new kit by Vision models of the Aerosan rf-8-gaz-98 . I have found that it needs a lot of pre planing , building out of the order set down in the plans and painting . I will let you know how I get on over the next few days , here is the start the prop blade . cheers ian 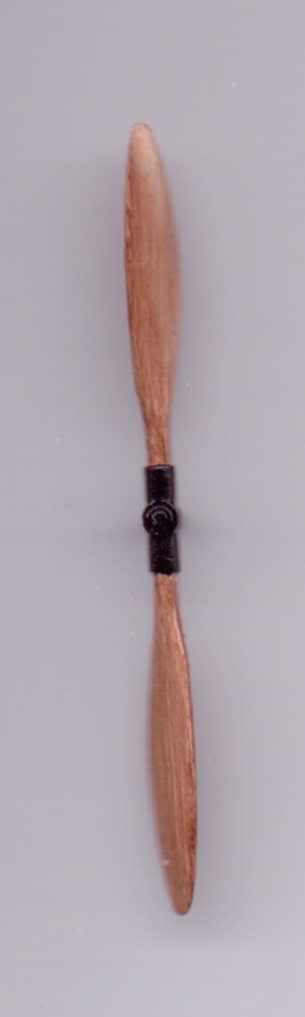 |
|
|
|
Post by iansadler on Jun 27, 2011 18:18:58 GMT
hi all, this is a scan of the box art , you get two aerosans and two miniart figures but no crew to man the cockpits . cheers ian 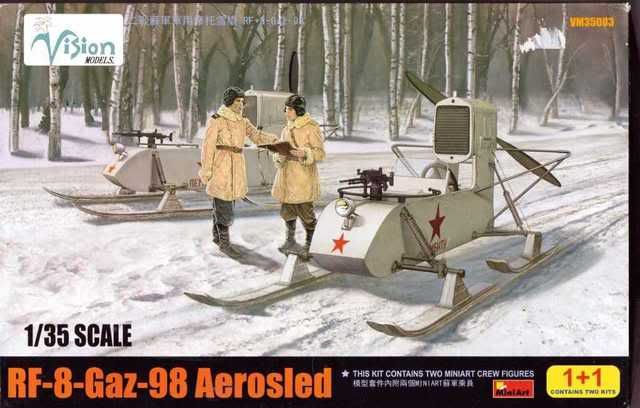 |
|
|
|
Post by iansadler on Jun 27, 2011 18:21:53 GMT
hi all , this is the tankograd book needed for ref on this one and others to come out later in the year by trumpeter . cheers ian 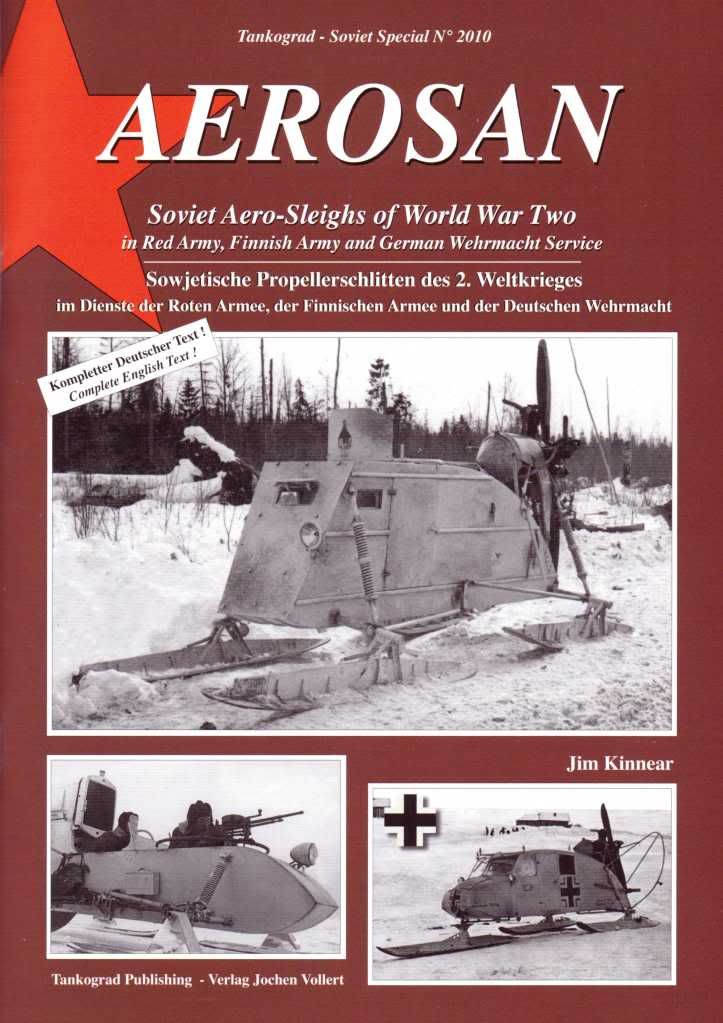 |
|
|
|
Post by iansadler on Jun 28, 2011 17:57:54 GMT
hi all , this is the scan of the spues starting with the ski sections cheers ian  |
|
|
|
Post by iansadler on Jun 28, 2011 18:01:01 GMT
this is one side of the main spue cheers ian 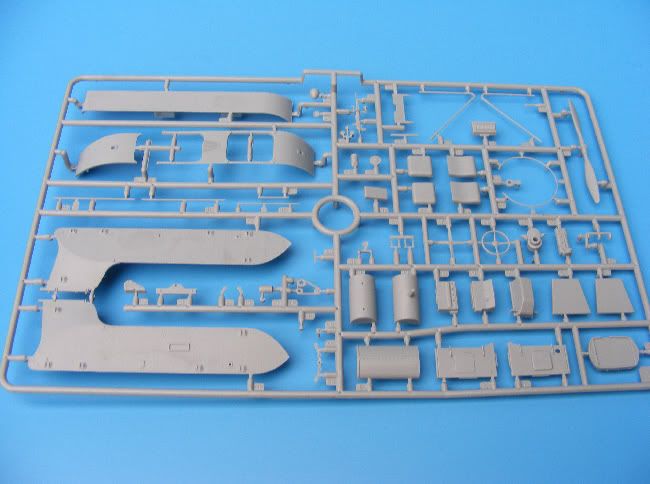 |
|
|
|
Post by iansadler on Jun 28, 2011 18:04:24 GMT
flip side of the same sprue , more soon cheers ian  |
|
|
|
Post by iansadler on Jun 29, 2011 16:07:58 GMT
a photo of the decals in the kit , you get two sets cheers ian 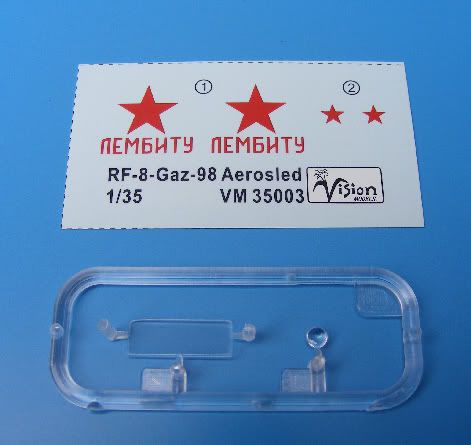 |
|
|
|
Post by iansadler on Jun 29, 2011 16:37:36 GMT
so far , I primed the inside , then a light buff coat followed by a thinned khaki with an old rush to replicate plywood , the seats are black with a touch of red/brown to simulate worn leather. I would not paint the fuel tank next time as it cannot be seen when the top is added , cheers ian 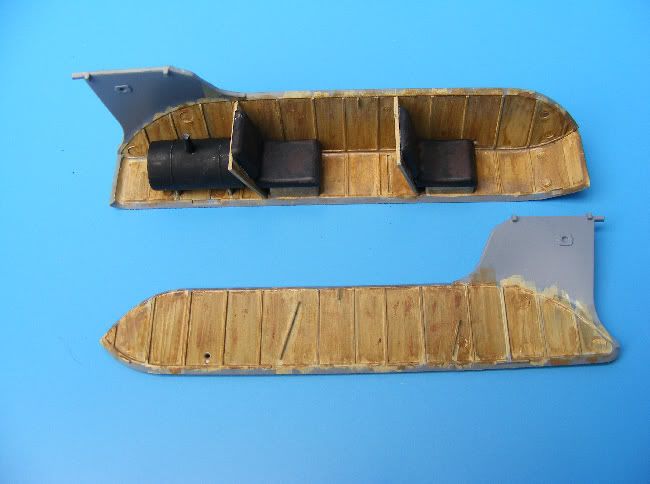 |
|
|
|
Post by iansadler on Jun 29, 2011 16:44:10 GMT
today , build up ,the sides and top sections need extra care when applying glue as the edges are very thin . As can be seen not much of the inside is visable when the top sections are added . more photos soon cheers ian 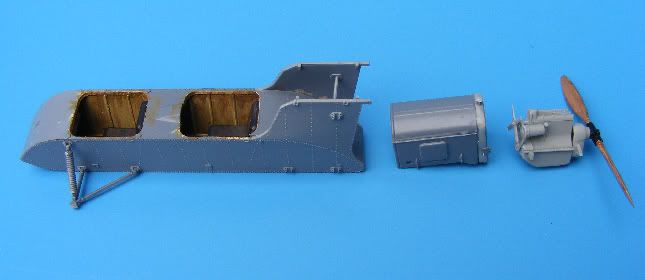 |
|
|
|
Post by iansadler on Jun 29, 2011 18:05:17 GMT
hi , nearly at the end of the build . Points to note the ski supports are fragile and need to dry out before putting the other side on . The rear prop blade guards are very fragile and the glue point is tiny to say the least again take your time cheers ian 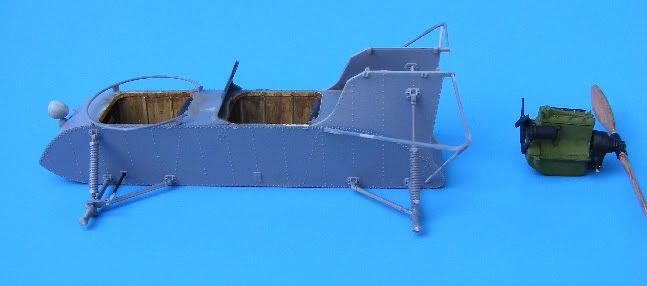 |
|
|
|
Post by iansadler on Jul 5, 2011 16:45:11 GMT
hi , a little update , it is now in white cammo , ready for the weathering . cheers ian 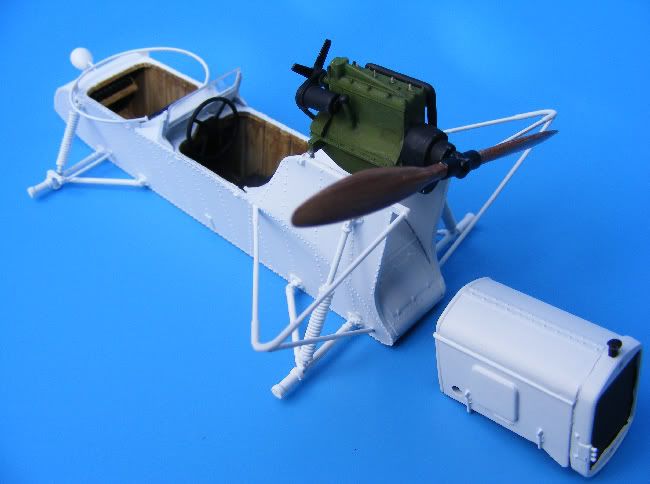 |
|
|
|
Post by iansadler on Jul 5, 2011 16:49:52 GMT
hi all , it was only after I took this photo i noticed the rear angled strut was in the wrong place . it has now been corrected . cheers ian  |
|
|
|
Post by iansadler on Jul 5, 2011 16:54:38 GMT
Hi all, this is last update for today . This is how I support the model while weathering the underside of the skis and main body . I use Two cheap tissue packs . cheers ian 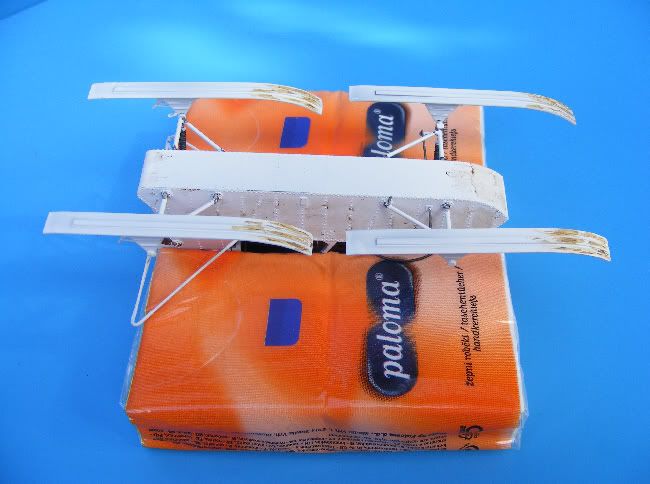 |
|
|
|
Post by iansadler on Jul 6, 2011 9:32:09 GMT
hi all , the last chapter , weathering it . I ended up using the old and tried method of flicking a wash of several colours in the direction of travel with and old tatty toothbrush . The secret is to keep the same distance from the model so you very nearly end up with similar splatter of mud and other colours . cheers ian 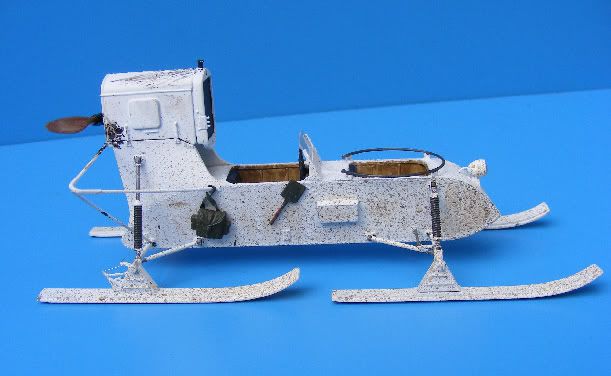 |
|
|
|
Post by iansadler on Jul 6, 2011 9:39:59 GMT
This is the other side , the hard part was threading the field pack straps over the bars without breaking them , cheers ian 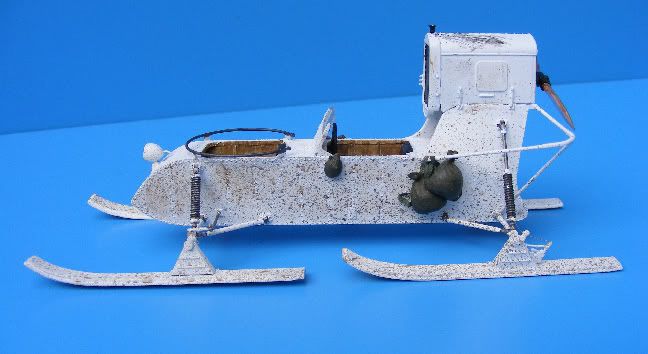 |
|
 Members' Forum")

