|
|
Post by semijoe on Mar 31, 2013 12:21:48 GMT
the basic box is all done , ready for paint next 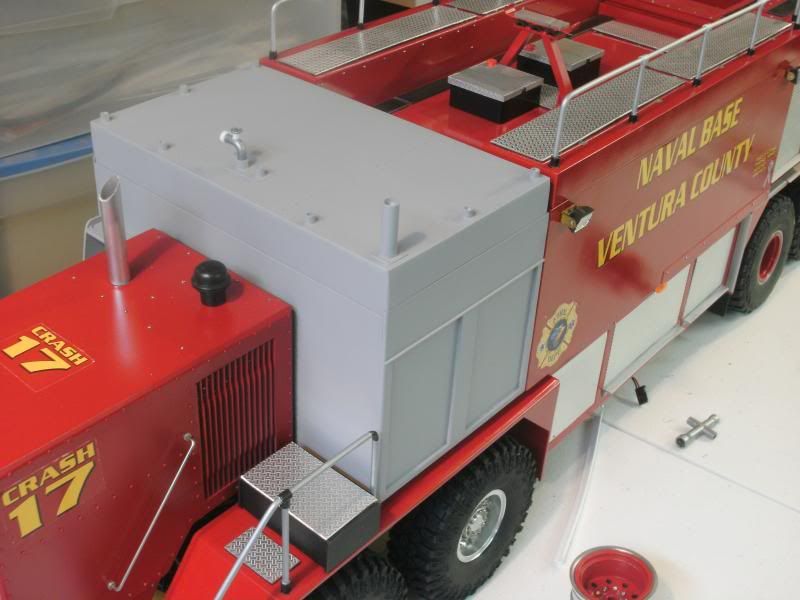  |
|
|
|
Post by semijoe on Mar 31, 2013 12:22:19 GMT
added some color and clear,added the doors and started on the micro screws 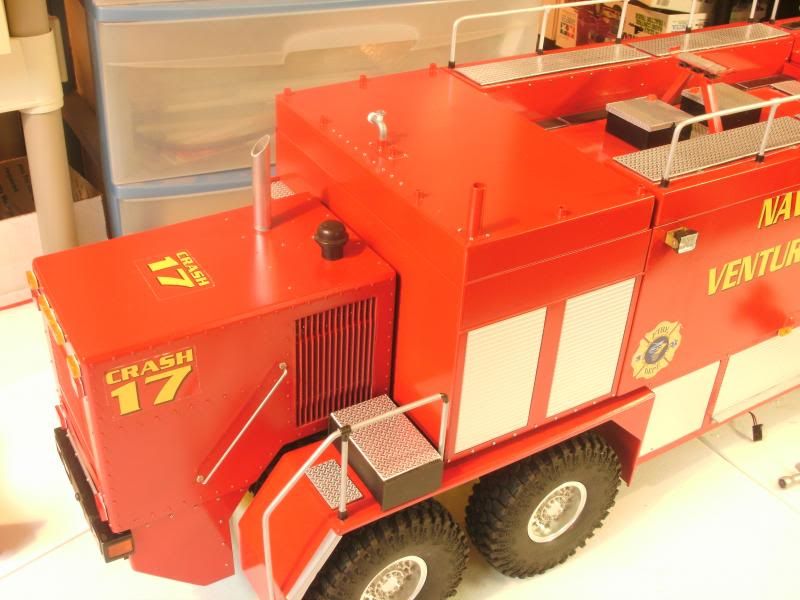 |
|
Deleted
Deleted Member
Posts: 0
|
Post by Deleted on Mar 31, 2013 18:50:54 GMT
Welcome back Joe I've missed this!
|
|
|
|
Post by semijoe on Apr 23, 2013 0:58:55 GMT
the week from hell has began, time to wire this up with lights and sounds 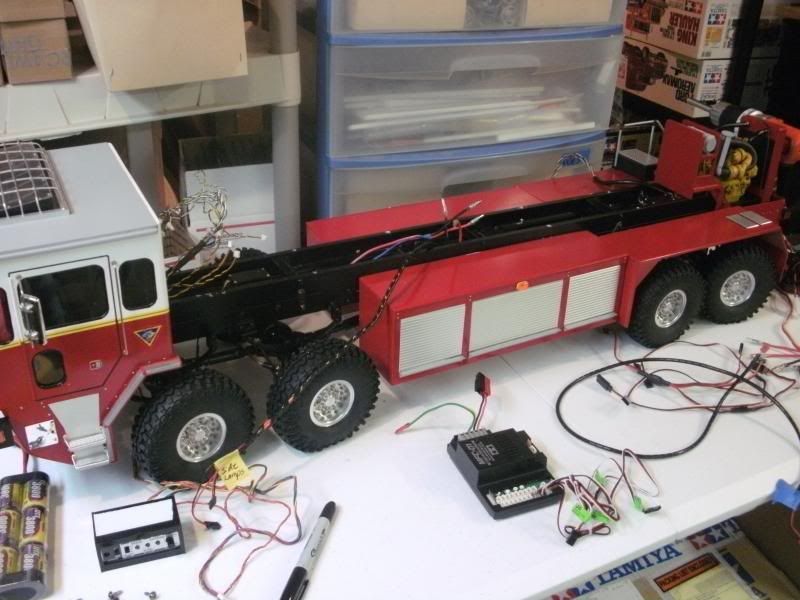 |
|
|
|
Post by semijoe on Apr 23, 2013 0:59:31 GMT
so when it came to the lights on the rear engione compartment , i was right , they all were burnt. soooooooooooooo, time to break out some new ones . i have rc4wds bruiser light kit here, perfect for what i need for running lights. i use 2 sets, 4 reds and 4 yellow, did some splicing. plugs right into the receiver , later i will add and on/off swith, the bumper lights are fine. ive also added a back up light top center 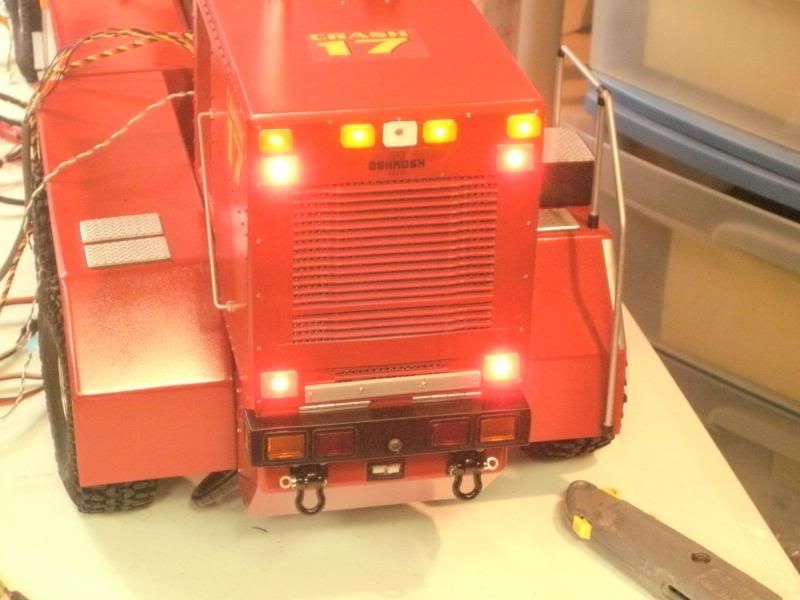 lights, lights, and more lights lol! insane any way , while i had the radiator out , ive add some electric fans(fake) 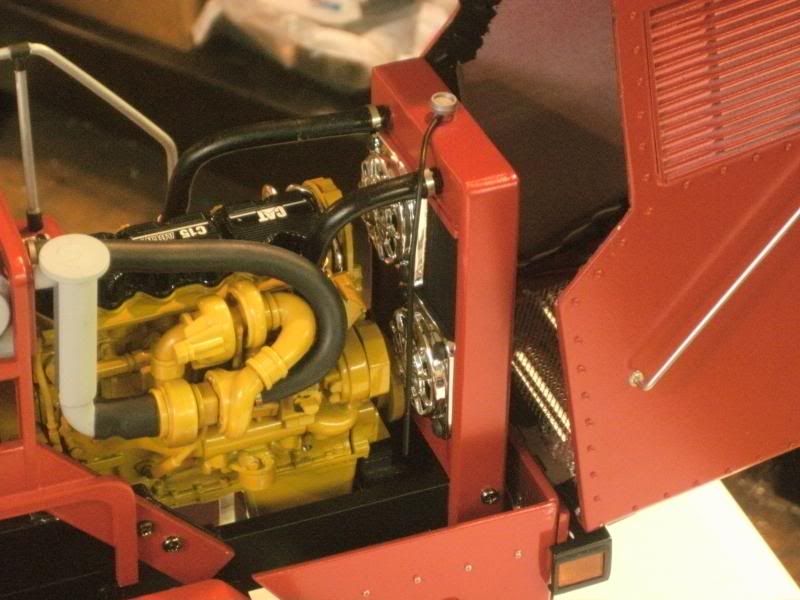 |
|
|
|
Post by semijoe on May 10, 2013 21:01:51 GMT
|
|
|
|
Post by okdoky on May 11, 2013 10:17:55 GMT
That is looking fantastic !!!!!!!!!!!!! I really admire your detailing !!!!!!!!!!!!!!! I would love to have the skill to do electrical stuff to bring the models to life !!!!!!!!!!!!!!!
That is some size of machine !!!!!!!!!!!!!
Nige
|
|
|
|
Post by semijoe on May 13, 2013 22:32:38 GMT
That is looking fantastic !!!!!!!!!!!!! I really admire your detailing !!!!!!!!!!!!!!! I would love to have the skill to do electrical stuff to bring the models to life !!!!!!!!!!!!!!! That is some size of machine !!!!!!!!!!!!! Nige thanks man |
|
|
|
Post by semijoe on May 13, 2013 22:33:01 GMT
video main boom is mount and running, will work on the lights for it tomorrow  |
|
|
|
Post by semijoe on May 15, 2013 15:49:48 GMT
today im going to show you how im making my search lights i start with a basic r/r light kit from china, it was about 11.00 usd whats nice about its 1/10 scale and it plugs right into your receiver or a 4.8 battery pack 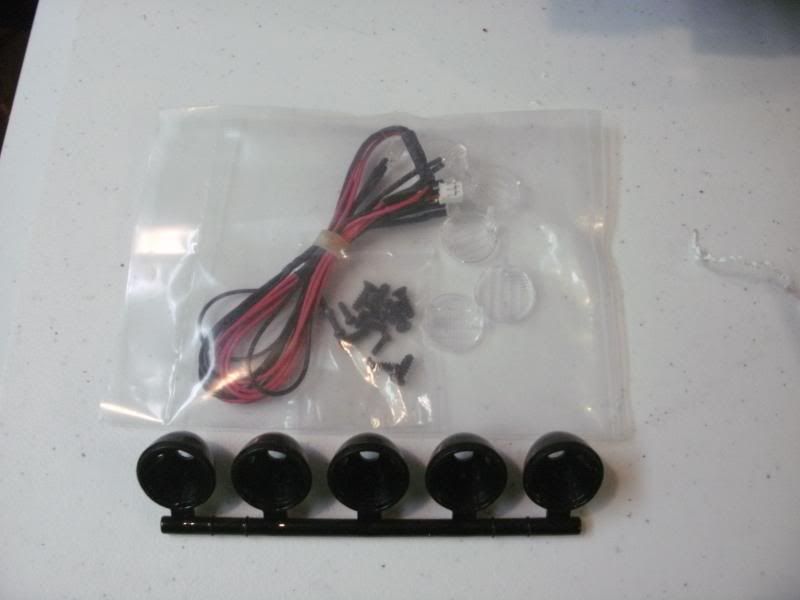 next i cut each light bucket from the main light bar, keeping the main bar as a part of the light bucket. next i cut a hollow round plastic tube for the neck, next i drilled a small hole in the tip of the tube and the light bucket , this will let the light buckets tilt 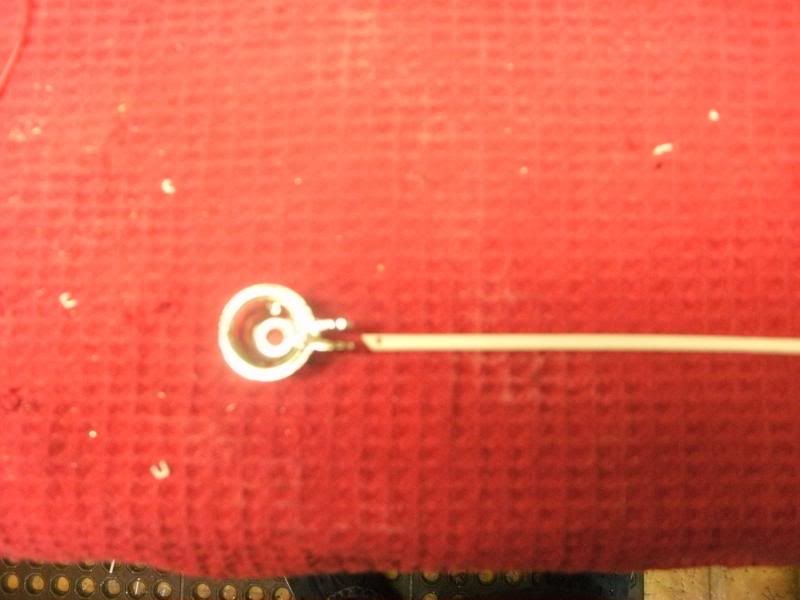 next i ran small wiring through the rod and attached the light buckets with 2 micro screws 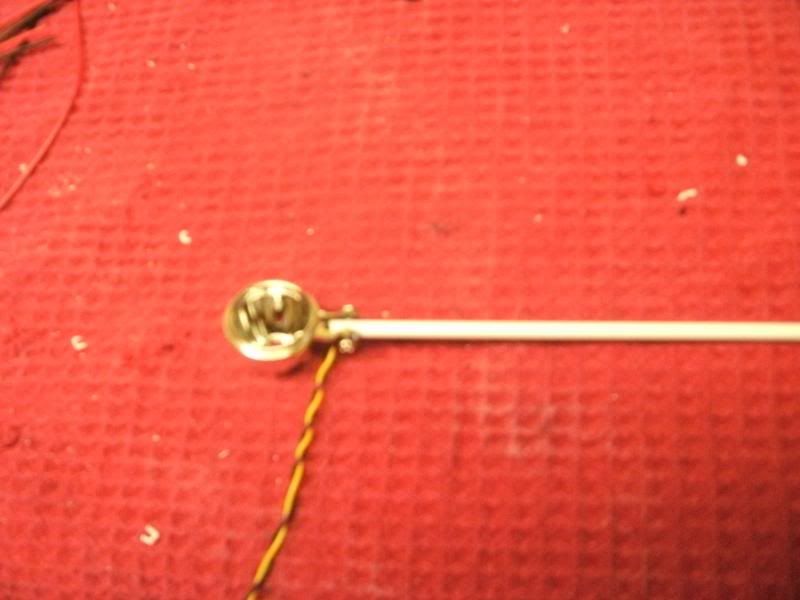 |
|
|
|
Post by semijoe on May 15, 2013 15:59:38 GMT
next i cut 3 pieces of shrink tube and cut one of the lights off the main  ok, this is how i did this end of it, now i have to make 3 more, after this i will show you how to do the other end of it 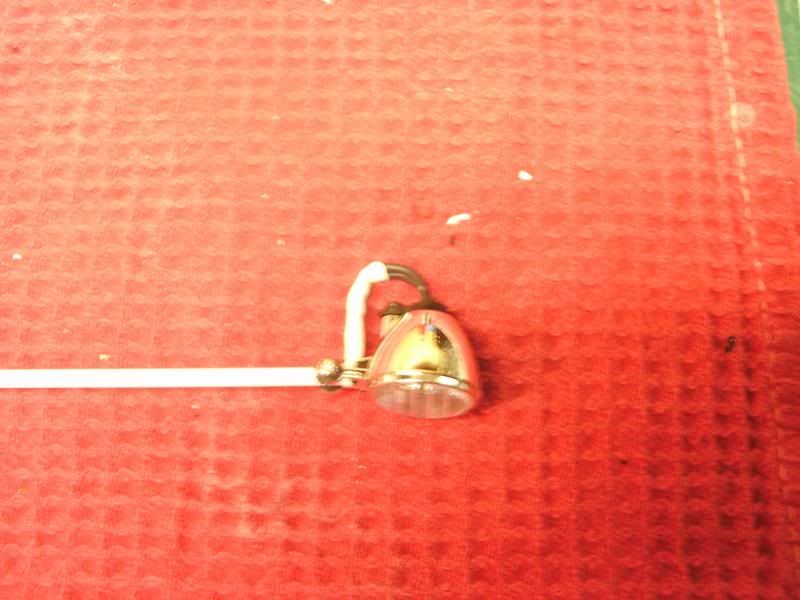 all 4 are made, next step . i drill a whole in the deck of the truck. the piece will be glued in 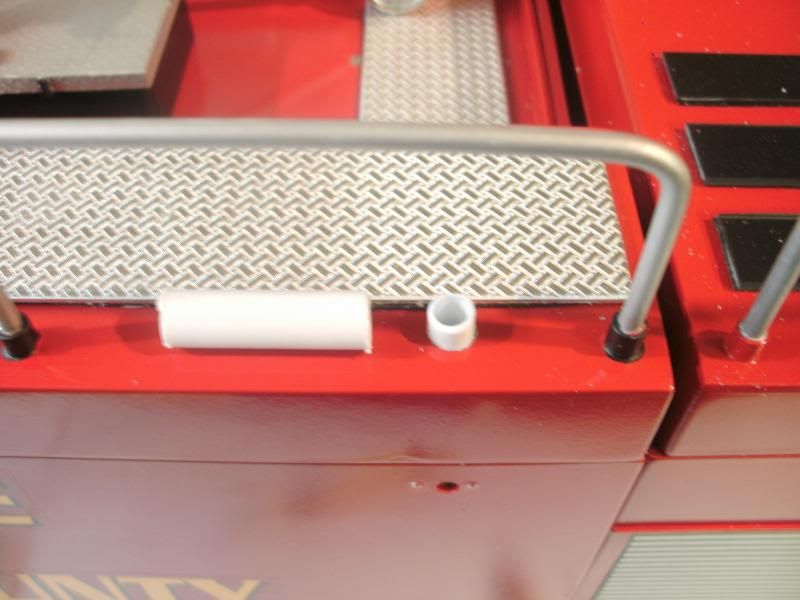 |
|
|
|
Post by semijoe on May 15, 2013 16:26:07 GMT
next i cut another sleeve that fits over light bucket pole but is smaller then the deck sleeve . will also attach the wire tip/plug 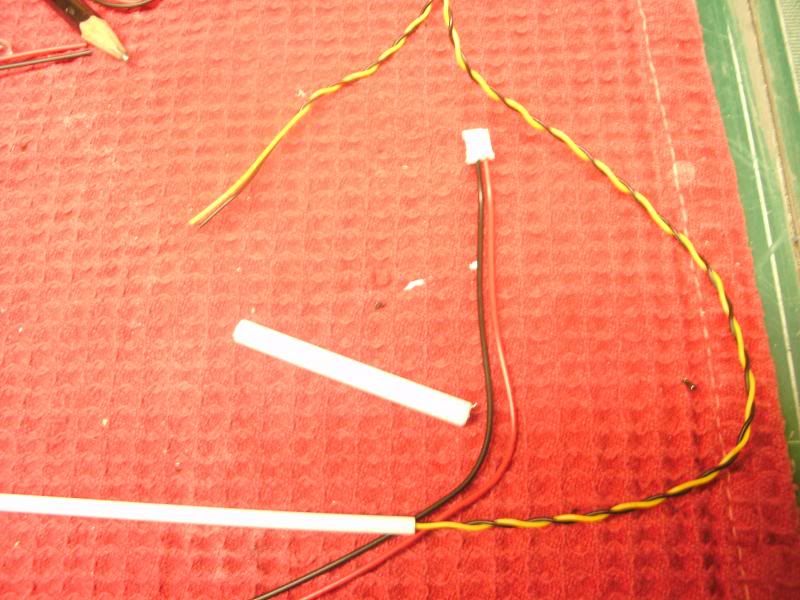 next i flipped the deck upside down, yellow/black wires are the 4 search lights, the red/black with white tips are for extras light for boom later. the red/black wire with black tip is power for the lights  the search light are up and working 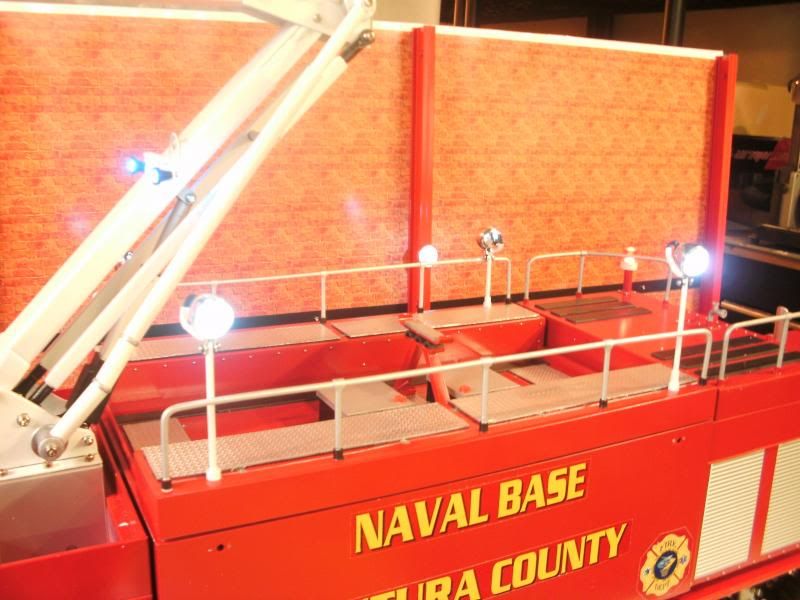 the boom lights are working also 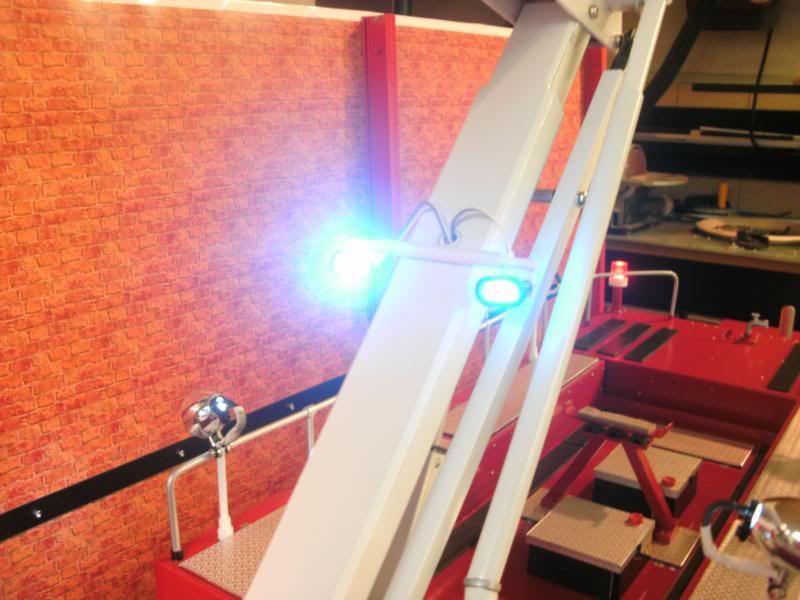 |
|
|
|
Post by colinburgess on May 17, 2013 5:31:00 GMT
Lookin' good there Joe, I thought we'd lost you for a while. It's an impressive model you've built there, I've enjoyed you build pics.
Colin
|
|
 Members' Forum")


