|
|
Post by okdoky on Dec 17, 2012 0:36:32 GMT
Load sensor started. Pipes feed through it on the chassis rail just around the nearside rear axle 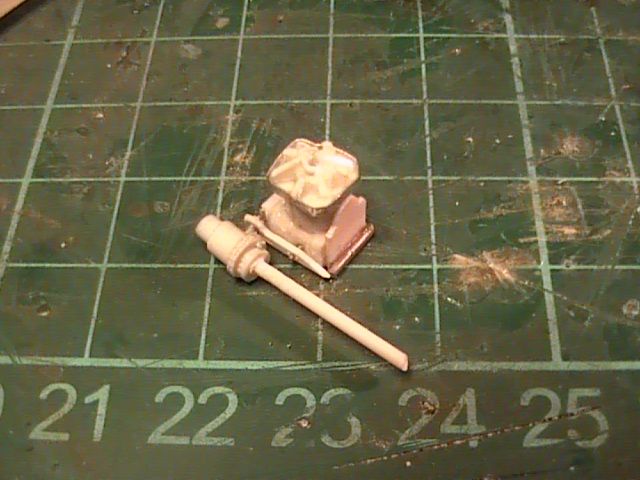 Fiddly for adding pipes to all areas and trying to unravil spagetti junction !!!!!!!! Nige |
|
|
|
Post by stuckontrucks on Dec 17, 2012 9:26:41 GMT
Once again, your attention to detail is quite superb. Is Father Christmas bringing you a new cutting mat Nigel?  ;D |
|
|
|
Post by okdoky on Dec 17, 2012 17:58:46 GMT
Once again, your attention to detail is quite superb. Is Father Christmas bringing you a new cutting mat Nigel? ;D It is a bit grott ain't it !!!!!!!!!!!!!!!!!!!!!!!!!!! Maybe father xmas might see one now he/she is looking over my shoulder right now !!!!!!!!!!!!!!!!! Ha ha ha ha ha Nige |
|
|
|
Post by bowman on Dec 17, 2012 21:29:35 GMT
A well used cutting mat is a sign of a very serious modeller... Or a messy bugger, like me!
Confusius
|
|
|
|
Post by okdoky on Dec 22, 2012 15:28:52 GMT
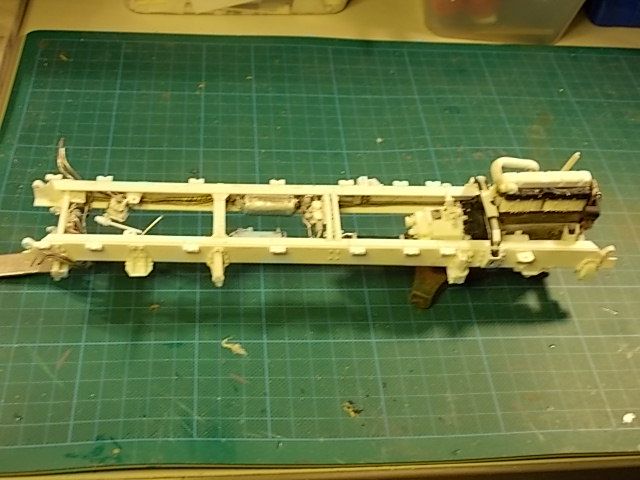
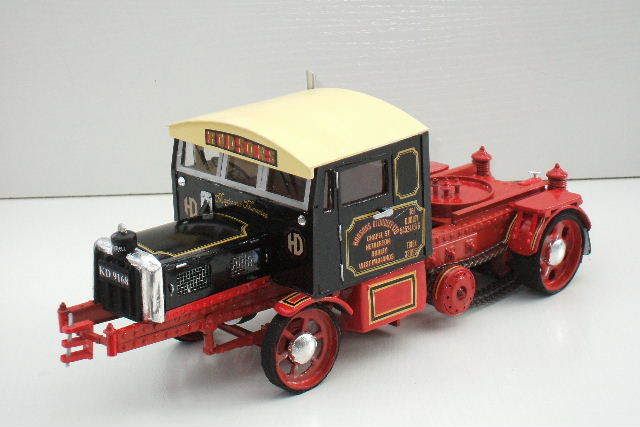
Like everything else, it will be my representation as close as I can get to the tangle taking account of what I can fathom out from the photos!!!!!!!! But it will be by no means perfect, like the masters of the art, as some bits just get too hard to handle and will be fudged accordingly !!!!!!!!!!!! But that is hopefully where a coat of primer and a few coats of paint will mask a few of those glaring mistakes !!!! It will hopefully look good from a distance !!!!!!!! Start of filling up the chassis side rails 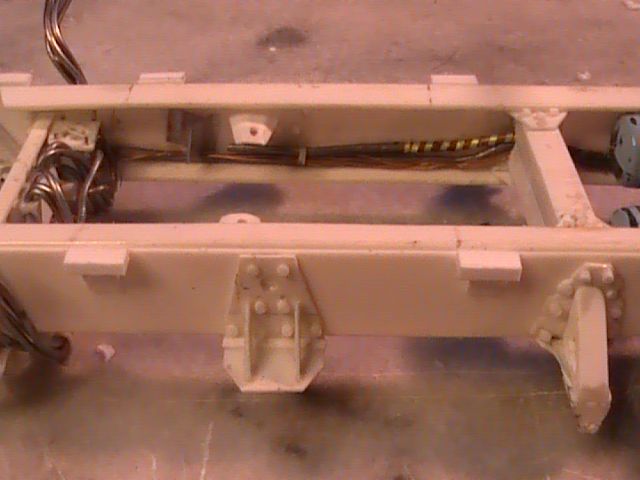 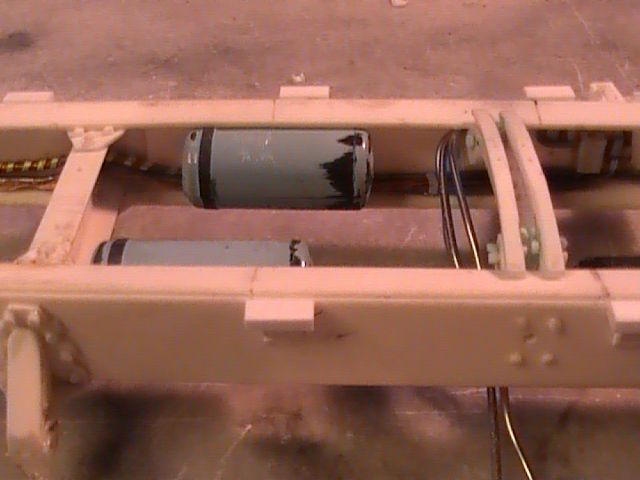 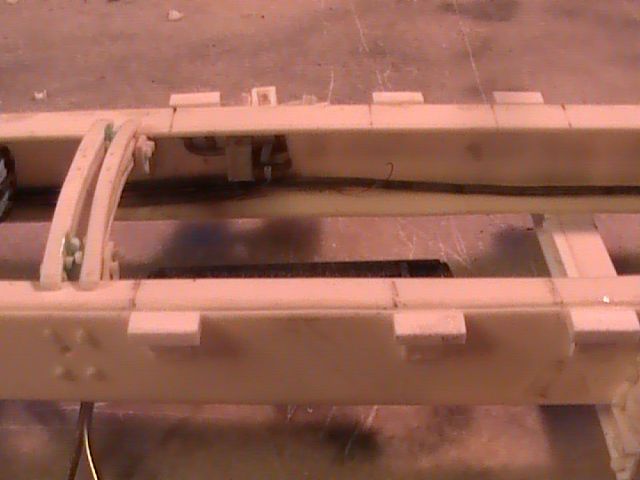 And the relay valves and pipes (assumed serving part of the air brakes system and possibly air actuators for the gearing and transfer box) 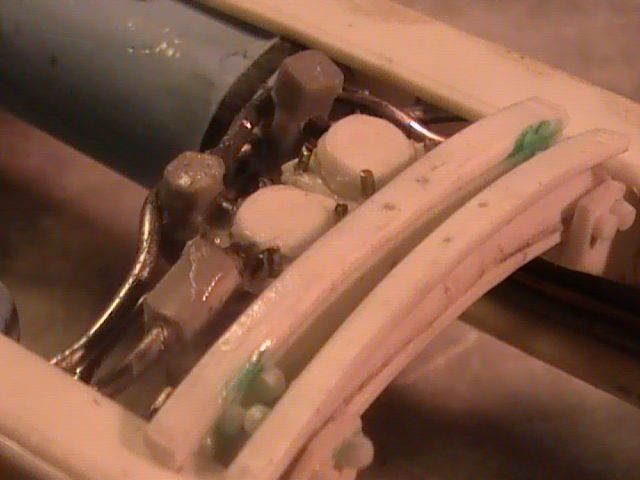 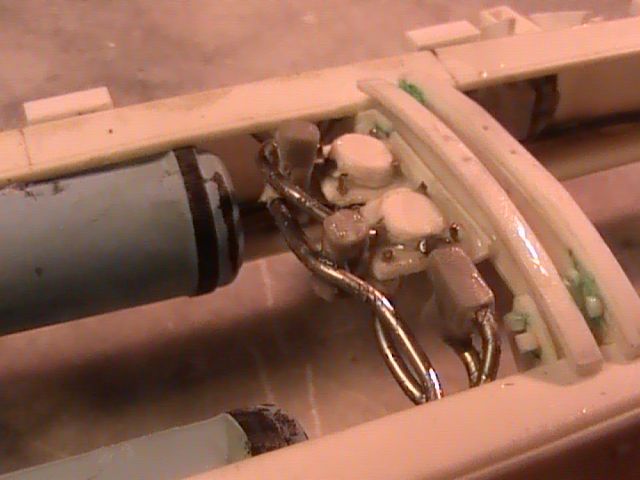 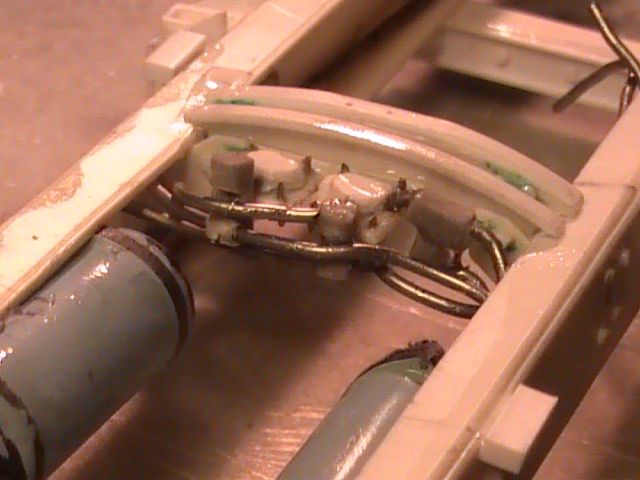 Nige |
|
|
|
Post by okdoky on Dec 23, 2012 1:07:42 GMT
Is it madness  ? Is sending me mad at times !!!!!!!!!! But how mad can I really get ?? I have been lubricating my pipes with much needed amber necter and soothing a husky throat ,,,,,,,,,,,,,,,,,,, well that is my excuse if ever I needed one !!!!!!!!!! Just in case I display the TM with the cargo bed off, I have drilled out the bracket holes and shaped the centre slope in the middle 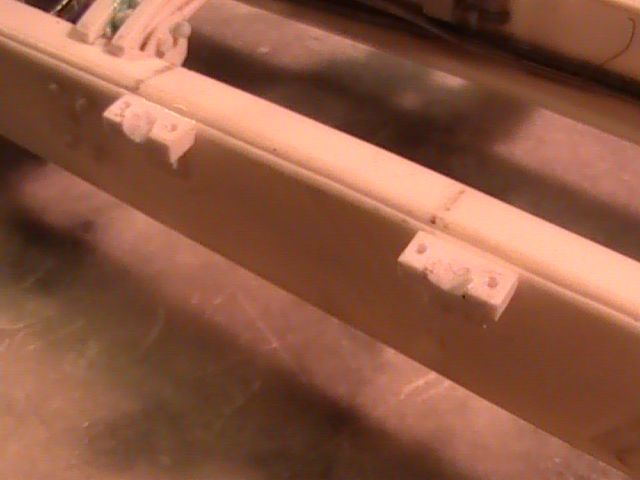 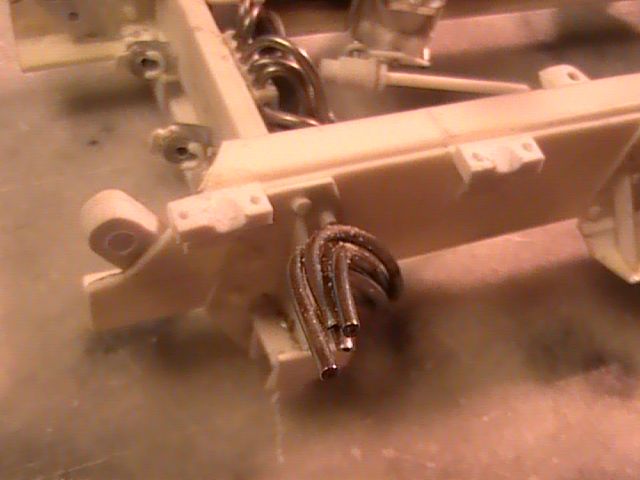 The two main air tanks plumbed in (third one made but do that tomorrow) 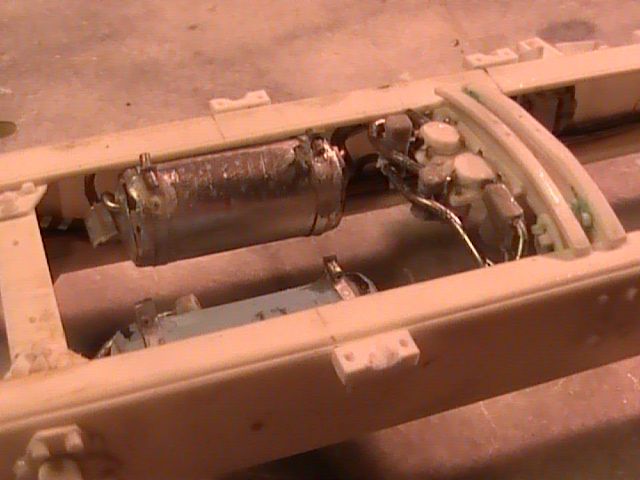 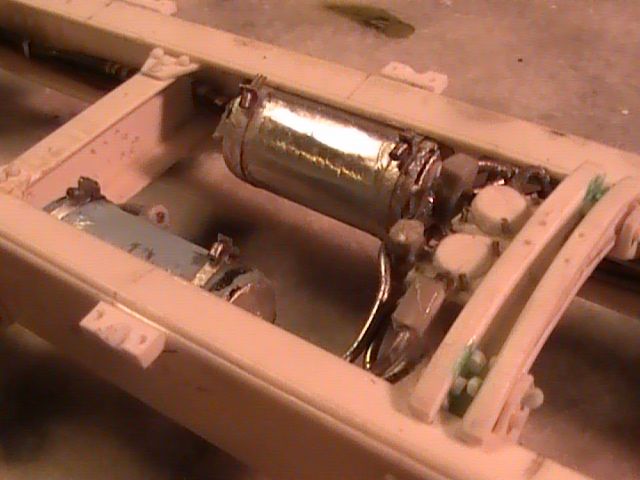 The load sensing valve and fittings plumbed in and secured to chassis Very fiddly angle to place it at 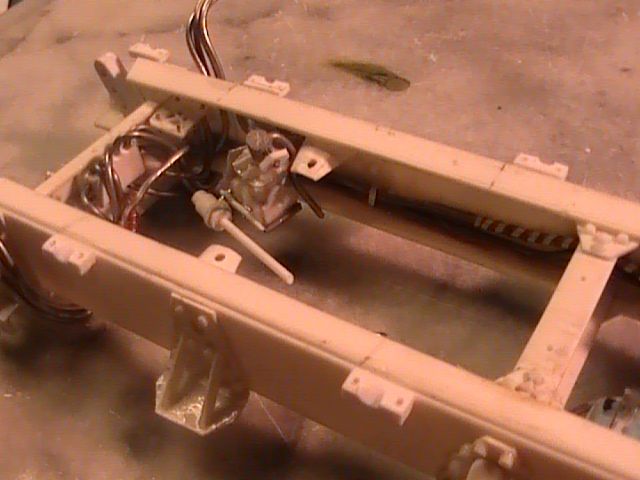  Chassis filling up nicely now 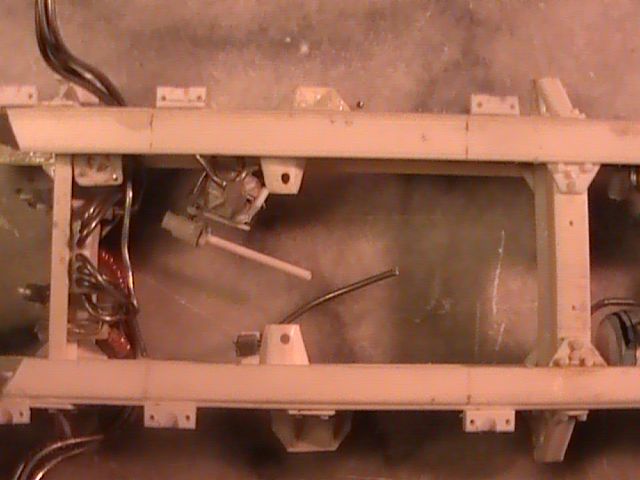 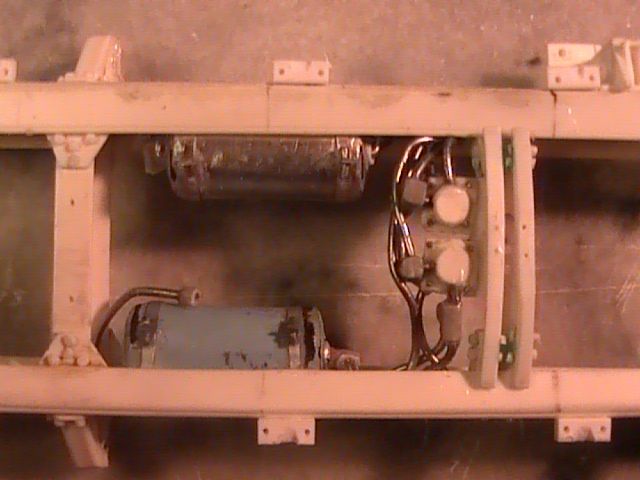 Hope you like Nige |
|
|
|
Post by bowman on Dec 23, 2012 20:13:08 GMT
Nige, This is detail on steroids! Where do you get all the information from - have you got one of your own in the back garden?  Steve |
|
|
|
Post by okdoky on Dec 23, 2012 21:07:37 GMT
Hi Steve Long story short, found it local on E-bay. Wish I could have bought it though !!!!!! Instead I contacted them and was allowed to go over and measure/photograph it to my heart's content !!!!!!!!!! s212.photobucket.com/albums/cc229/okdoky/1-24%20Bedford%20TM%20Build/Bedford%20TM%20reference%20photos/I am hoping it did not sell as I might need to go over again and take a few more photos and dimensions !!!!!!!!! Also folks on all the forums I am on have been so helpful with small snippets of info !! And someone also gave me a workshop parts manual that would have been thrown out !!!!!!!!! Just have to dilute it all down to some basic representation that is close enough without going over the top and impossible to achieve (at my level) !!!!!!!!!!!!!! Nige |
|
|
|
Post by okdoky on Dec 28, 2012 7:12:15 GMT
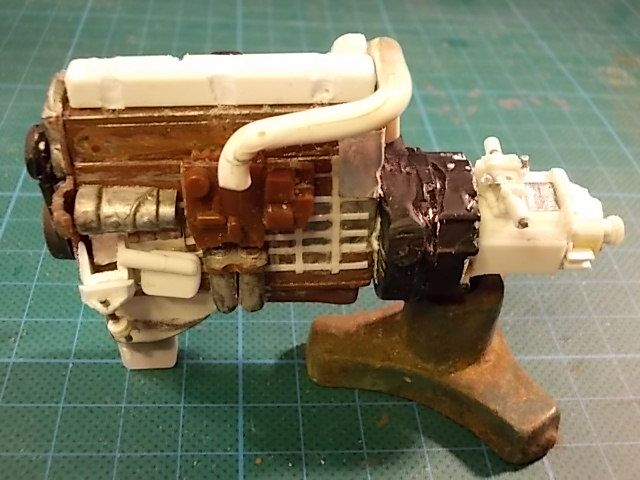
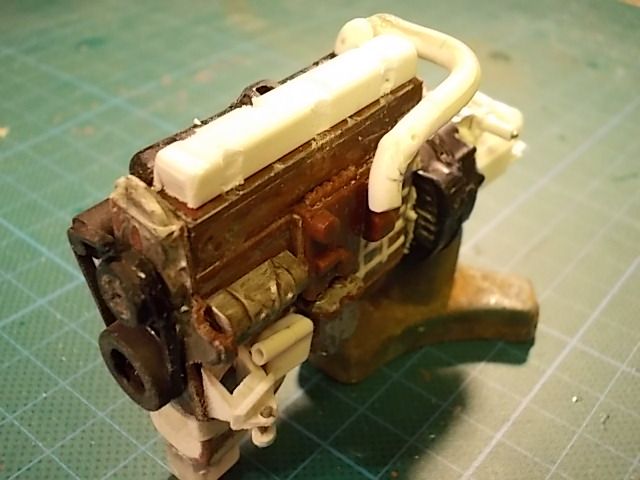
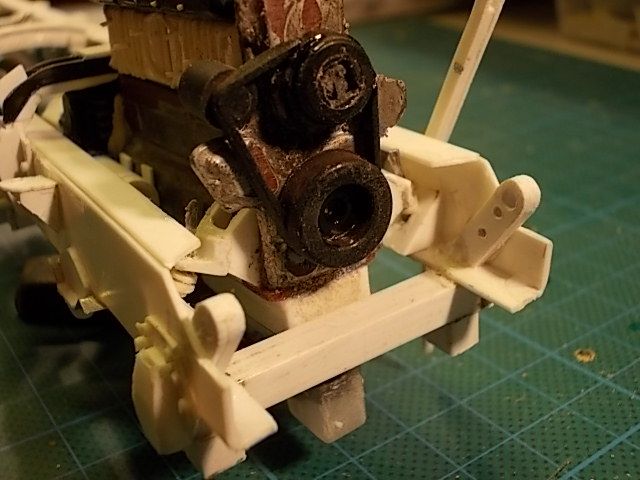
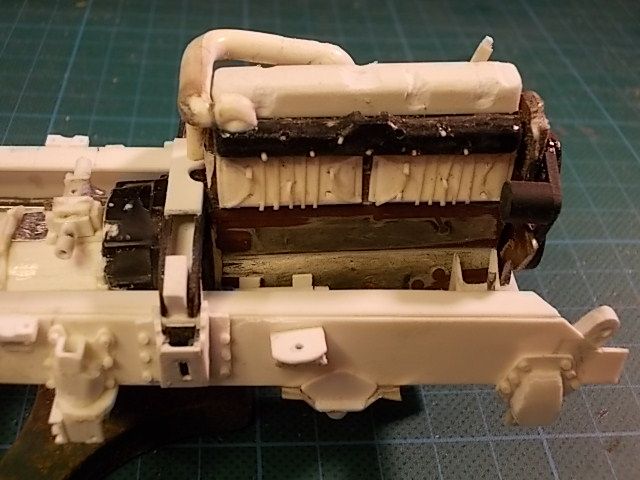
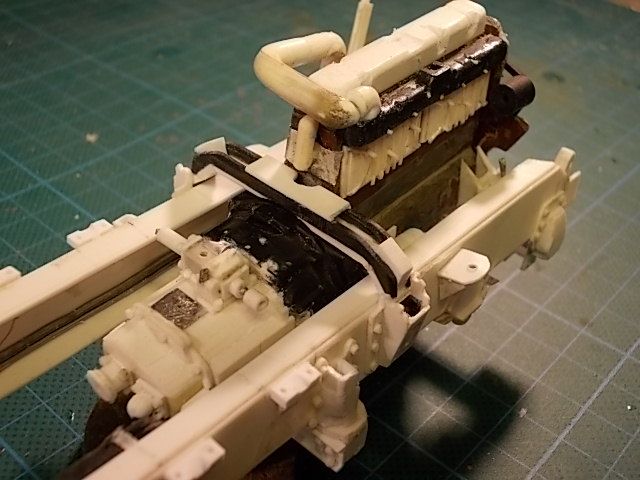
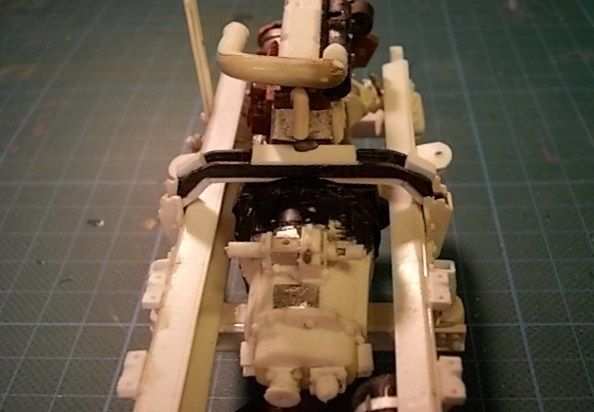
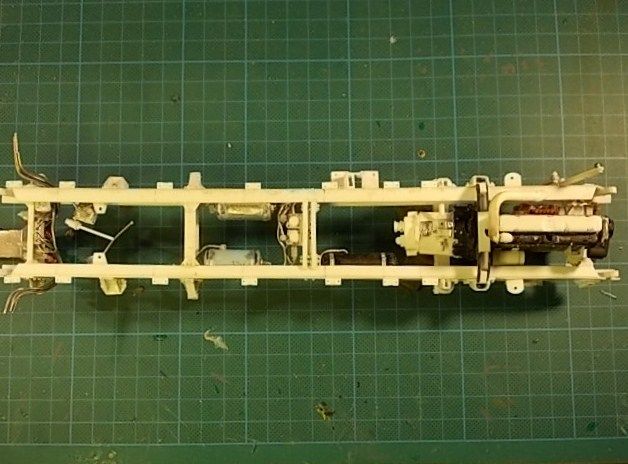
Heading for the New Year now Made a start on the engine block and chopped up one from the spares box that must have come from a Volvo. At least it was a 6 cylinder block so had the basic size and shape I needed 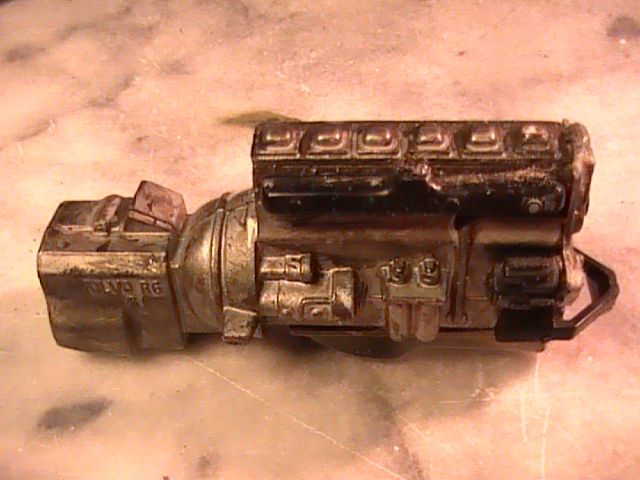 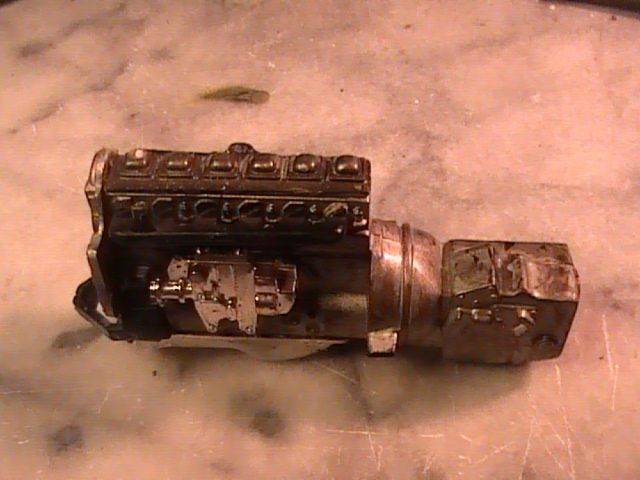 This is what I hope to get it looking close to 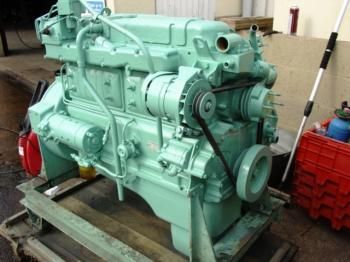 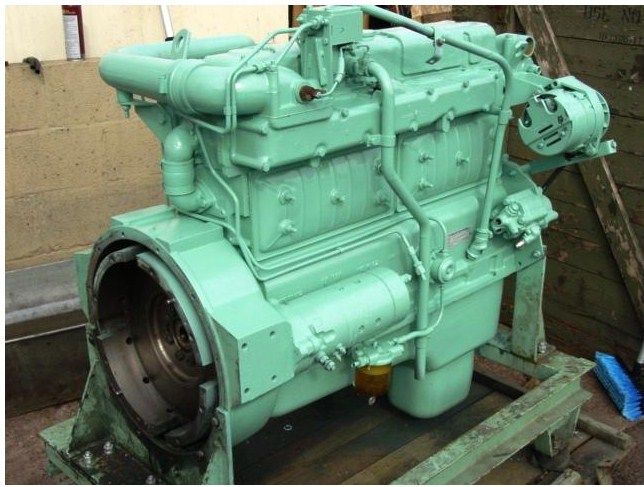 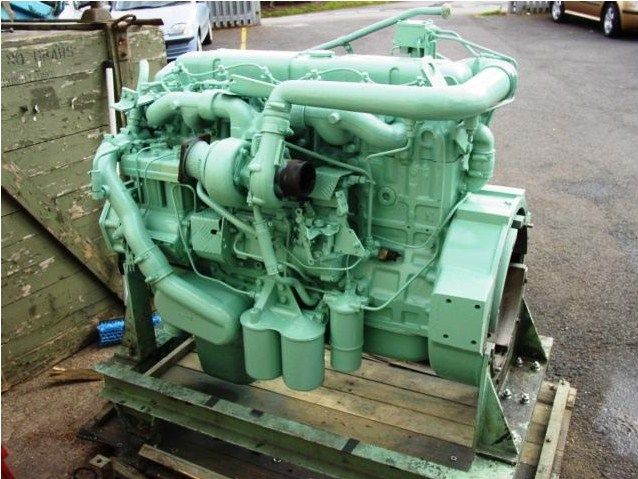 Chopped it down losing the gearbox, sump and ancillaries leaving the basic shape 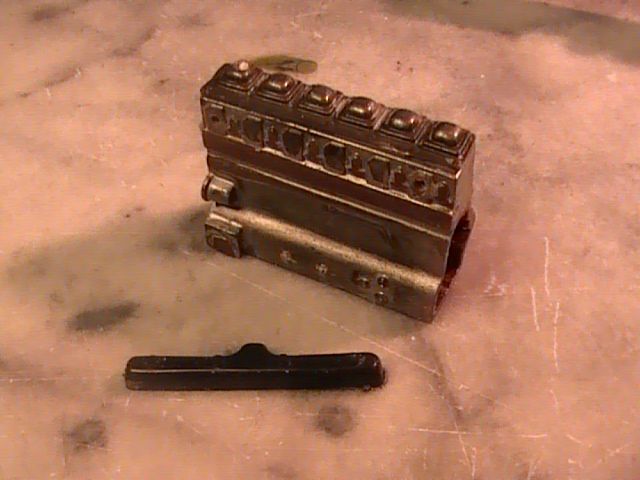 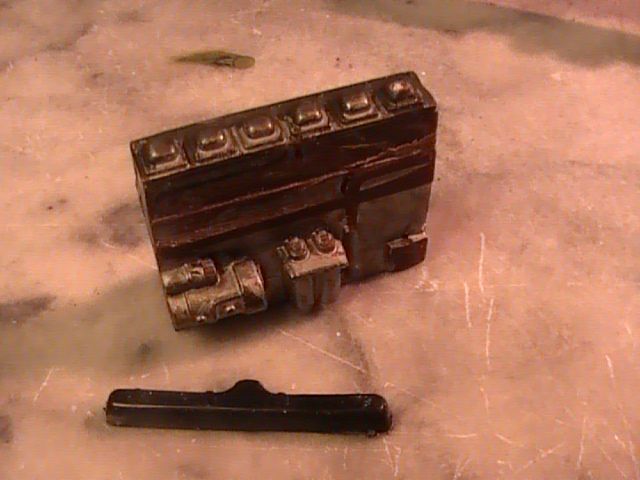 Where I am so far 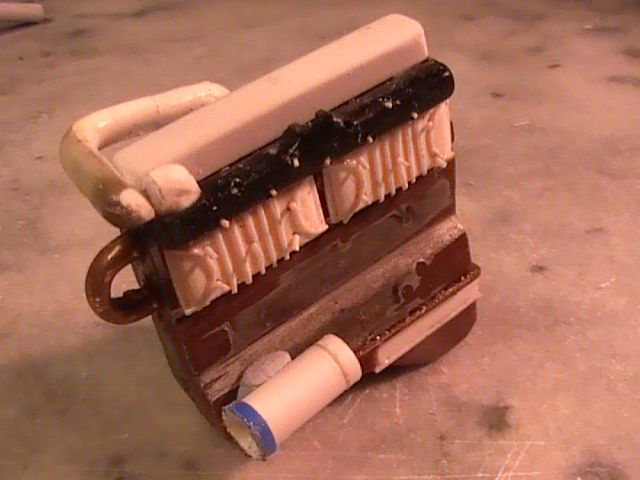 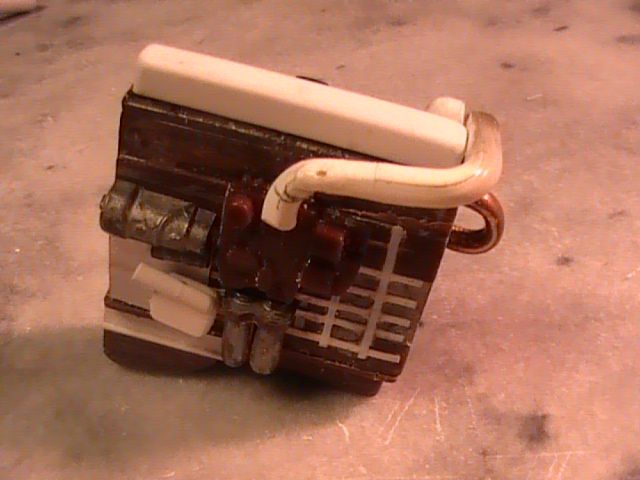 Also got around to starting on the axles and again canibalised a couple of axles from the spares box and chopped off the square half shaft housings leaving only the circular diffs. Basic tube through them which will need refined like all the other bits 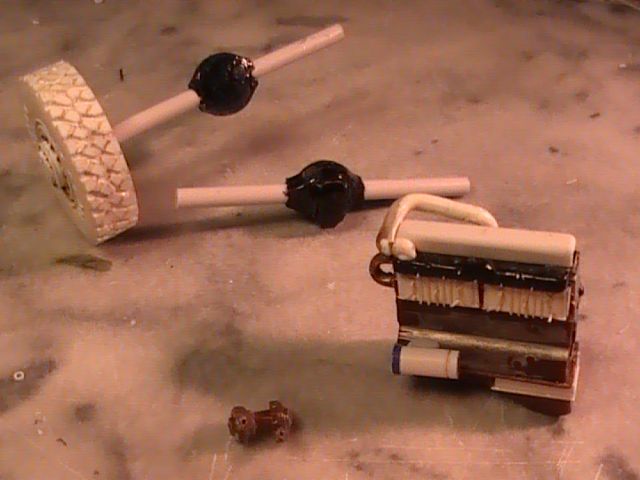 Some bits will get more refined than others depending on how prominent they will be, or how visible they might become if I display the model without cab or cargo bed fitted. Nige |
|
|
|
Post by badger42 on Dec 28, 2012 12:18:56 GMT
Amazes me how you guys can do this scratch stuff to such a high standard. Looking forward to seeing this in the flesh @ Perth Nige.
Barrie.
|
|
Deleted
Deleted Member
Posts: 0
|
Post by Deleted on Dec 29, 2012 10:50:32 GMT
Amazes me how you guys can do this scratch stuff to such a high standard. Looking forward to seeing this in the flesh @ Perth Nige. Barrie. Which year is that Barrie? ... seriously Nige, you've put some effort into this build, really looking forward to seeing it at Perth. Now then, maybe it's time I started to finish a couple of builds otherwise you'll be having a go at me ...  |
|
|
|
Post by colinburgess on Dec 30, 2012 14:11:41 GMT
Lookin' seriously good there Nige, keep up the good nay great work.
Colin
|
|
|
|
Post by colinburgess on Dec 30, 2012 14:12:09 GMT
Lookin' seriously good there Nige, keep up the good nay great work.
Colin
|
|
|
|
Post by okdoky on Jan 3, 2013 15:09:46 GMT
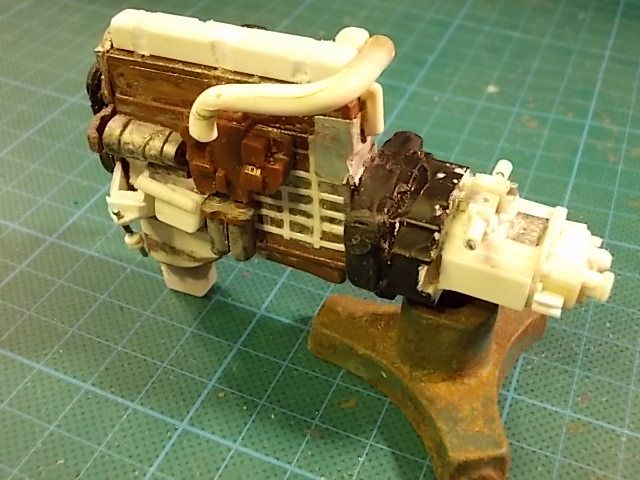
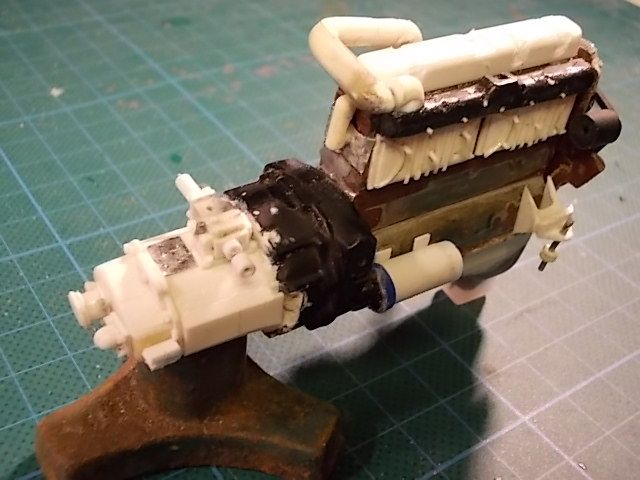
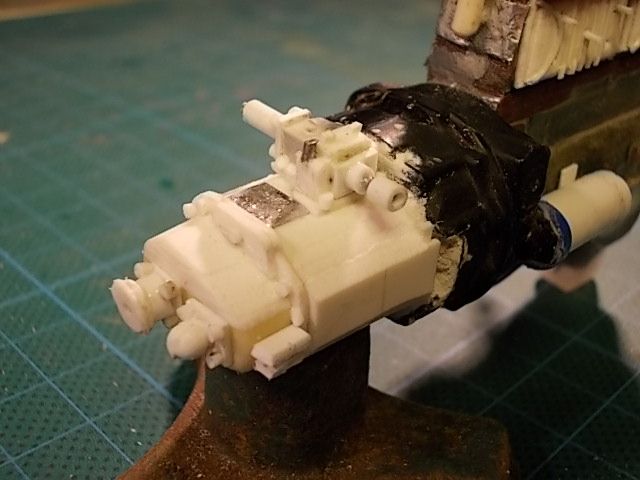
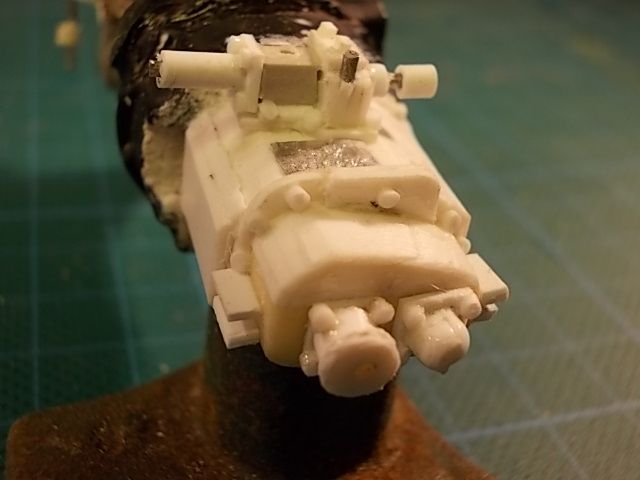
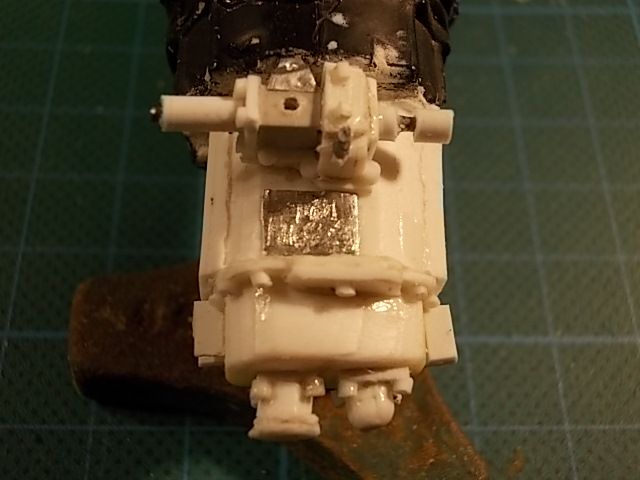
Back onto the workbench after all the pies and pints from the festive season !!!!!! No headaches though thankfully !!!!!!! Also after appearing worldwide on live TV with my family at Stirling Castle New Year Concert with the Proclaimers !!!!!!!!! Don't worry, my head not swelling too much as was only a bit part with 6000 other people !!!!!!!! Ha ha ha ha ha !!!!!!!!!! www.facebook.com/photo.php?fbid=557753714253518&set=a.100461476649413.748.100000566829707&type=1&theaterHad a go at making the gear box and actuators and fitted it to a donor clutch housing from another kit engine lump that looked similar !!!!!!!!! 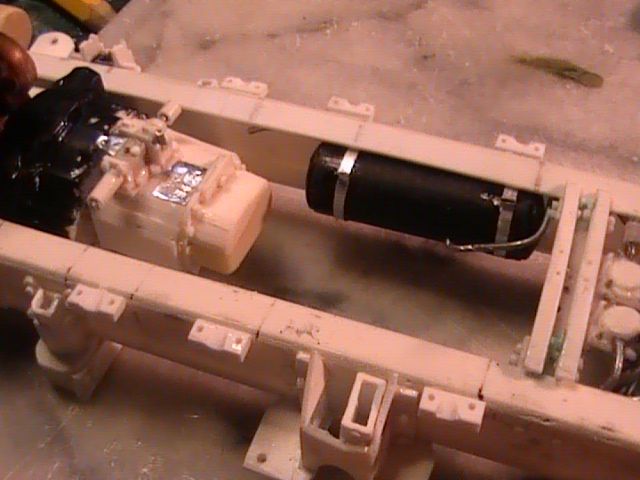 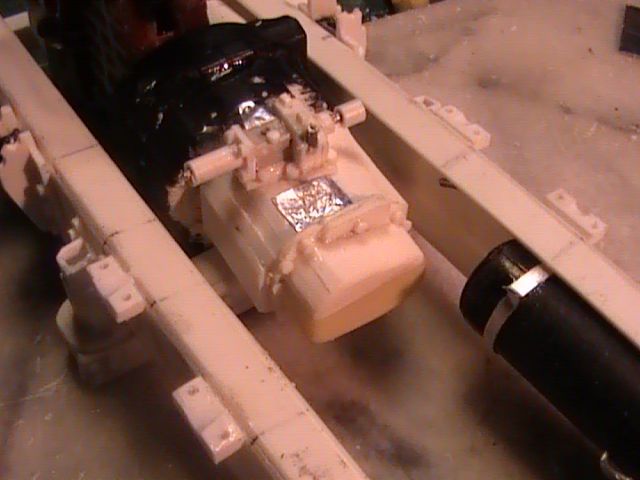 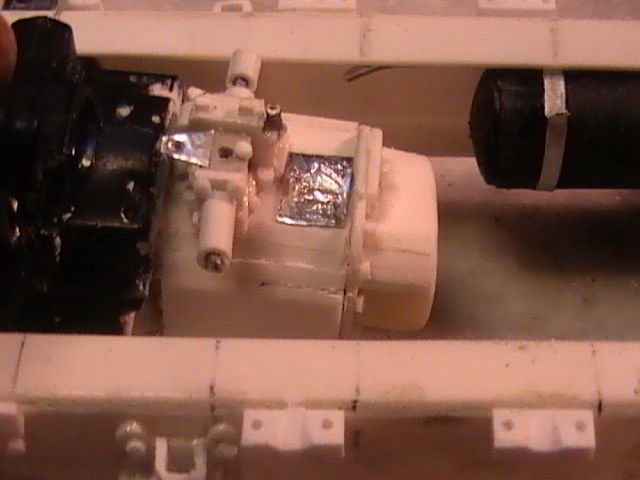 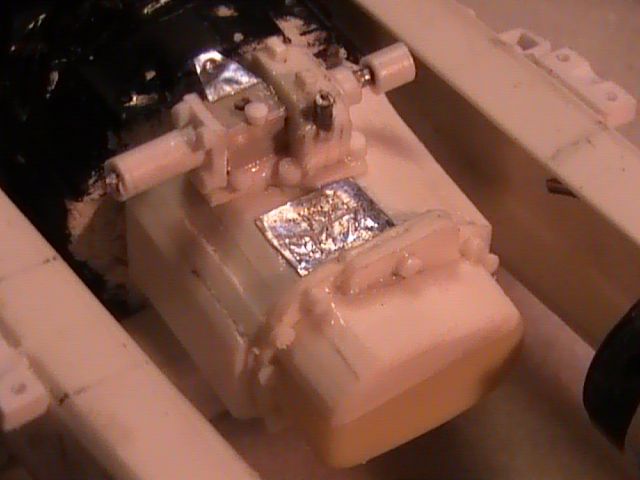 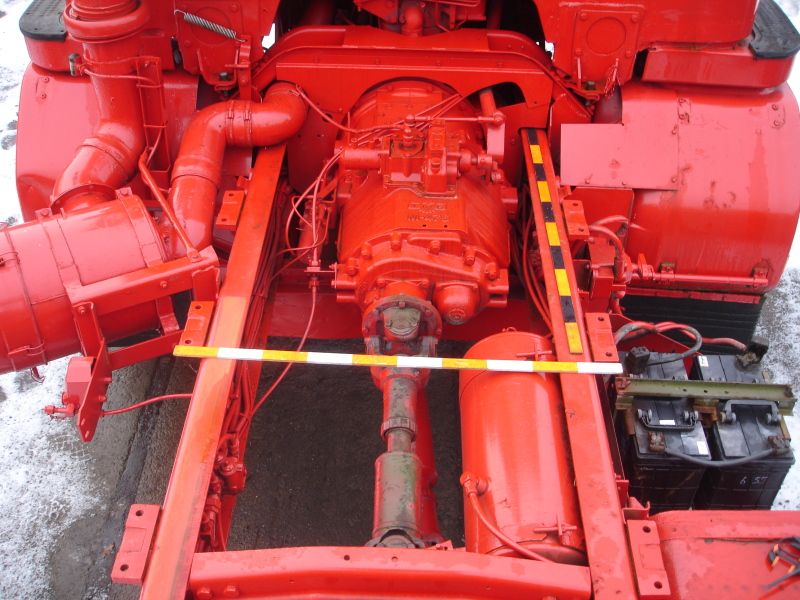 Hope these work as it looks like Photobucket may be getting unstable and losing or mixing up pics in my folder !!!!!!!! flippin' TECHNOLOGY !!!!!!!!!! Nige |
|
|
|
Post by okdoky on Jan 5, 2013 0:22:29 GMT
|
|
 Members' Forum")


 ;D
;D