|
|
Post by okdoky on Apr 27, 2012 2:48:52 GMT
Whilst paint is drying on parts for the DAF, I thought I would give you a teaser of a project that might very soon make a start. I wonder what is in the Box  ? 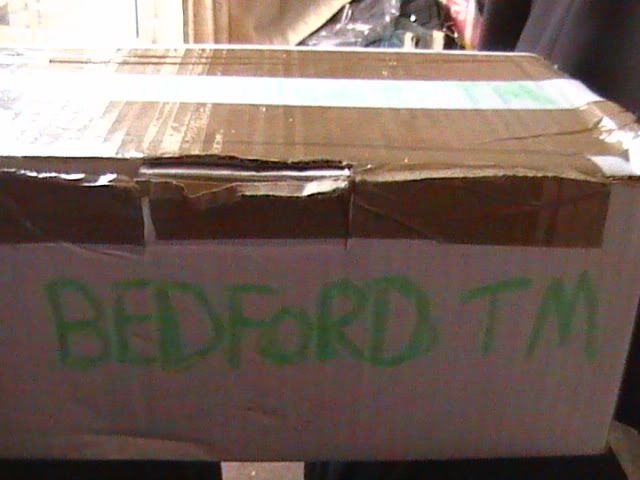 It is the Cab and parts for the Bedford TM that Howard Whitehead of Kit Form Services sold me a long while ago !!!!!!! From what I remember, Howard gave me his last copy and bits available from the run he did. 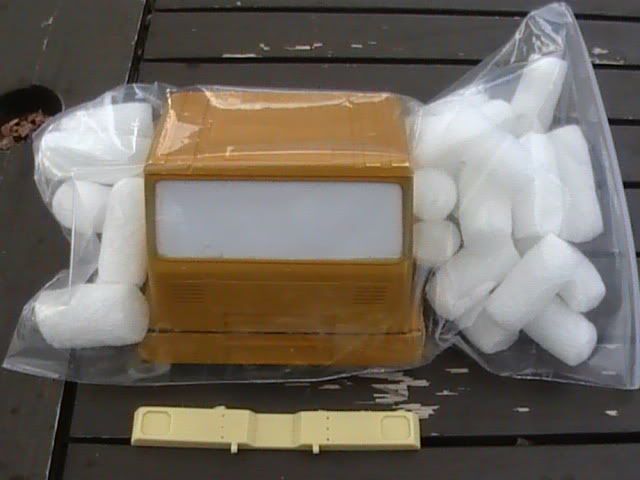 Having wanted a model of this truck I got to drive in the TA to build, I was only too glad to get what I could from KFS knowing full well that any re-run of the kit might be a long time off, if ever at all. Howard gave me what he could at the time, and I am grateful to him for that. 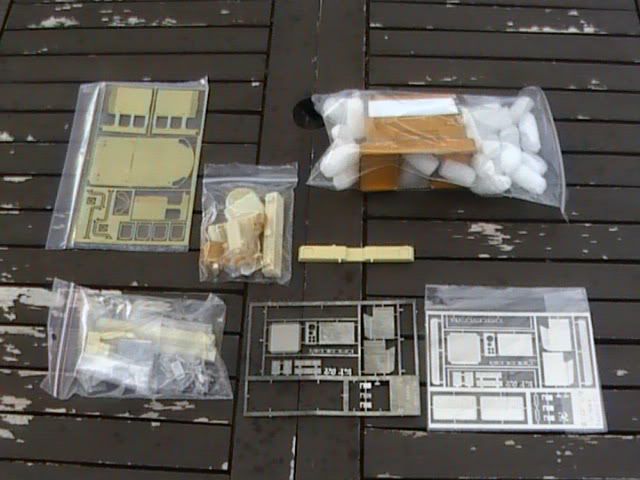 No instructions though, so I think I am going to have fun guessing the parts from comparing with an Army parts manual on the TM that a friend has just provided me with. Thanks Neil for your help. Information will be a great help on this one. I haven't opened the bags, but I can see that there is a good selection that will make my life a bit easier 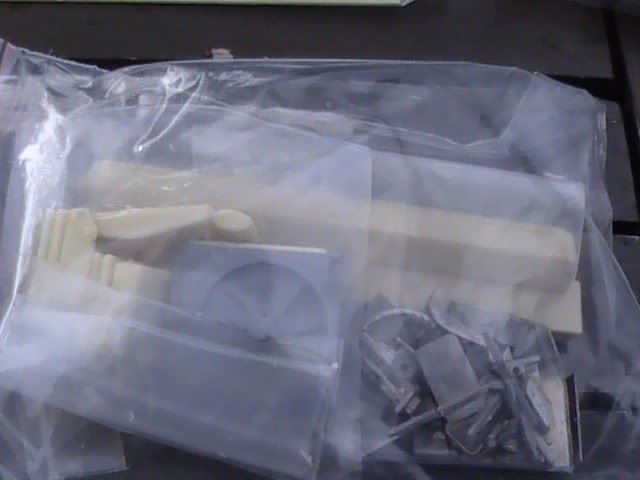 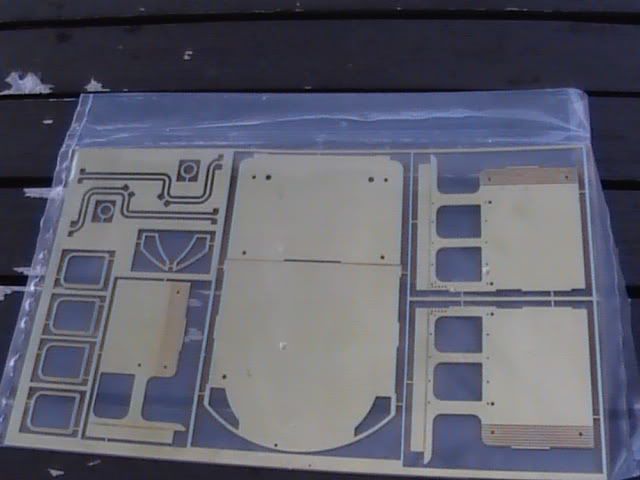 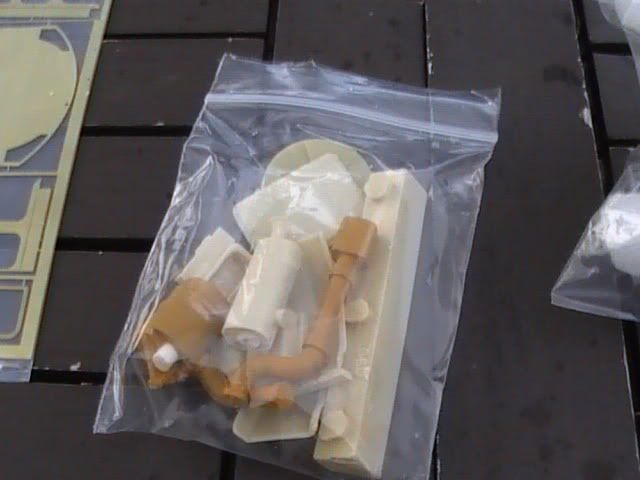 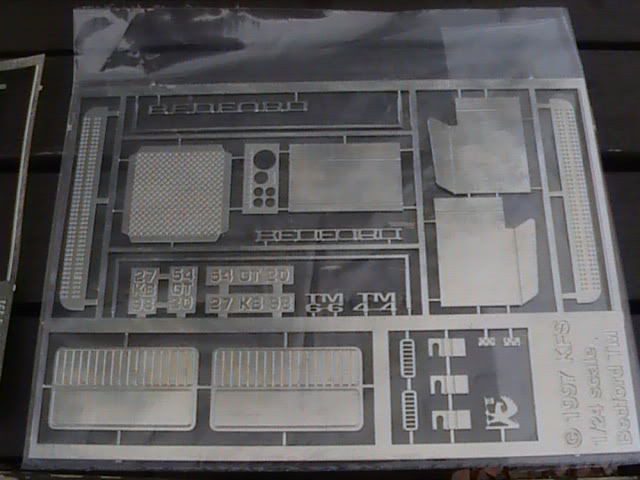 Since the info I have is mainly on the 4X4 Eight Tonne, it is likely that I will go for that, although, if I can source seven wheels and tires of the right size, I might be persuaded to go for the 6X6 Fourteen Tonne. 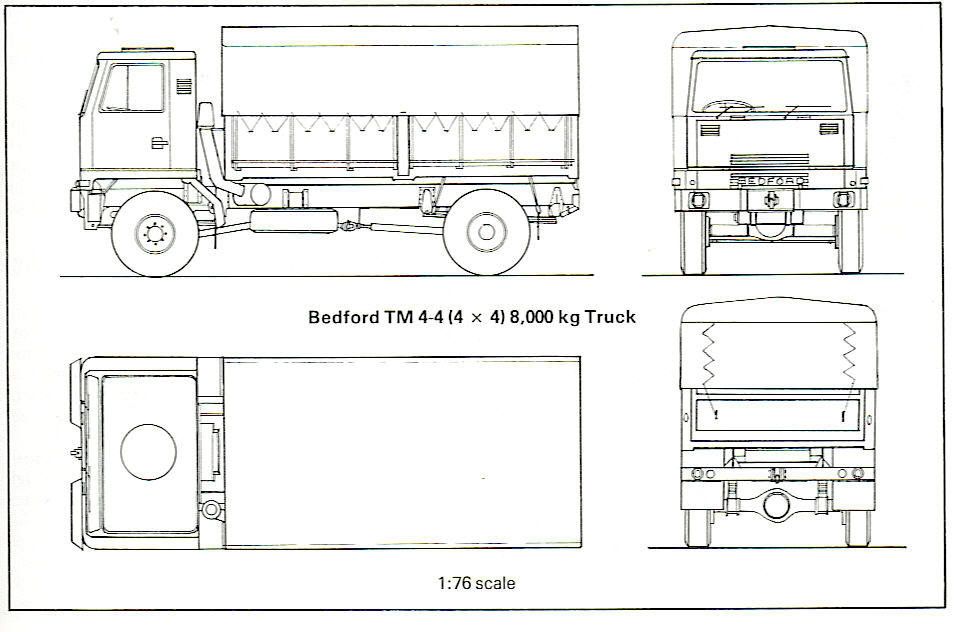   And this is what I hope it will look like at the end 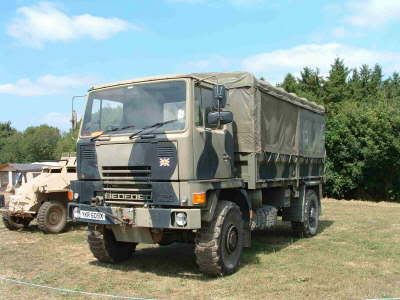 Hope that is a wee teaser for now. Must get back to the DAF !!!!!!! Nige |
|
|
|
Post by okdoky on Jun 16, 2012 15:29:28 GMT
That is the blank formed and ready for some setting out of the tread. Had a snow storm with the amount of plastic I had to shed first. Note to self get the basic diameter a bit closer next time !!!!!!!!!!!! 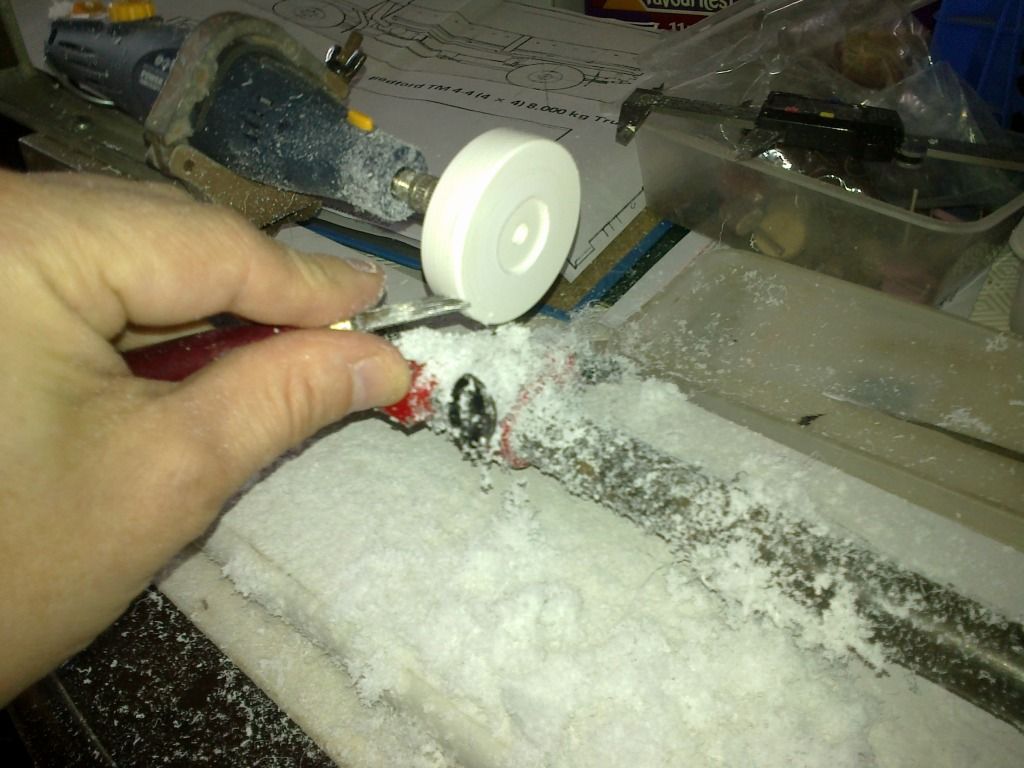 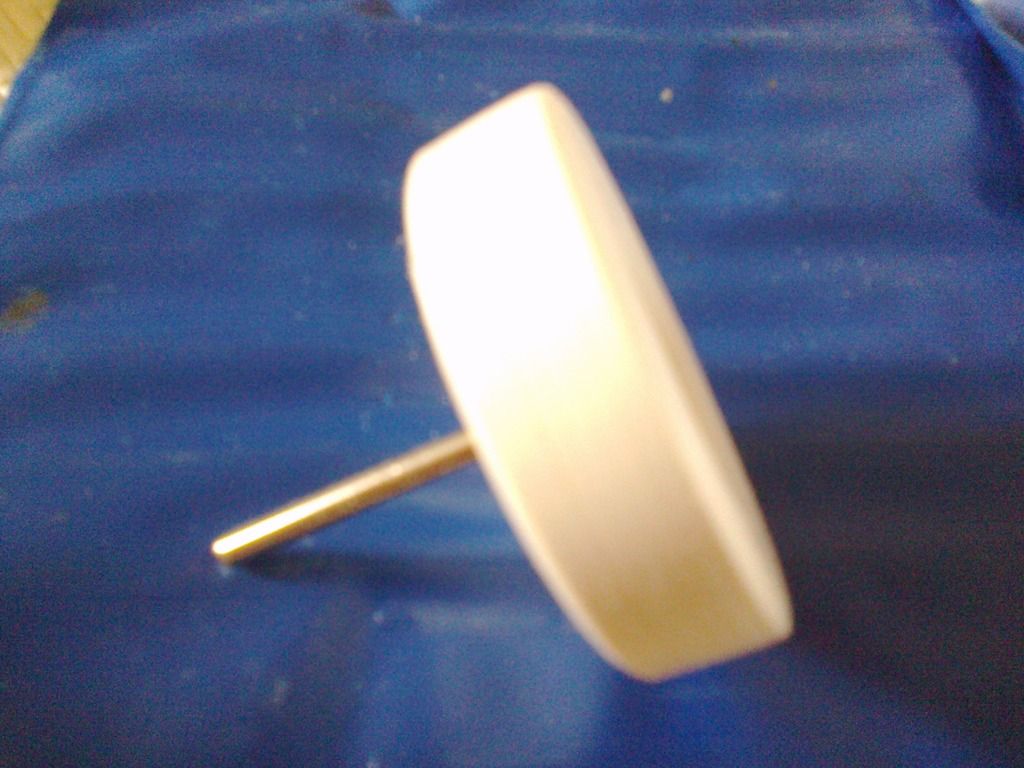 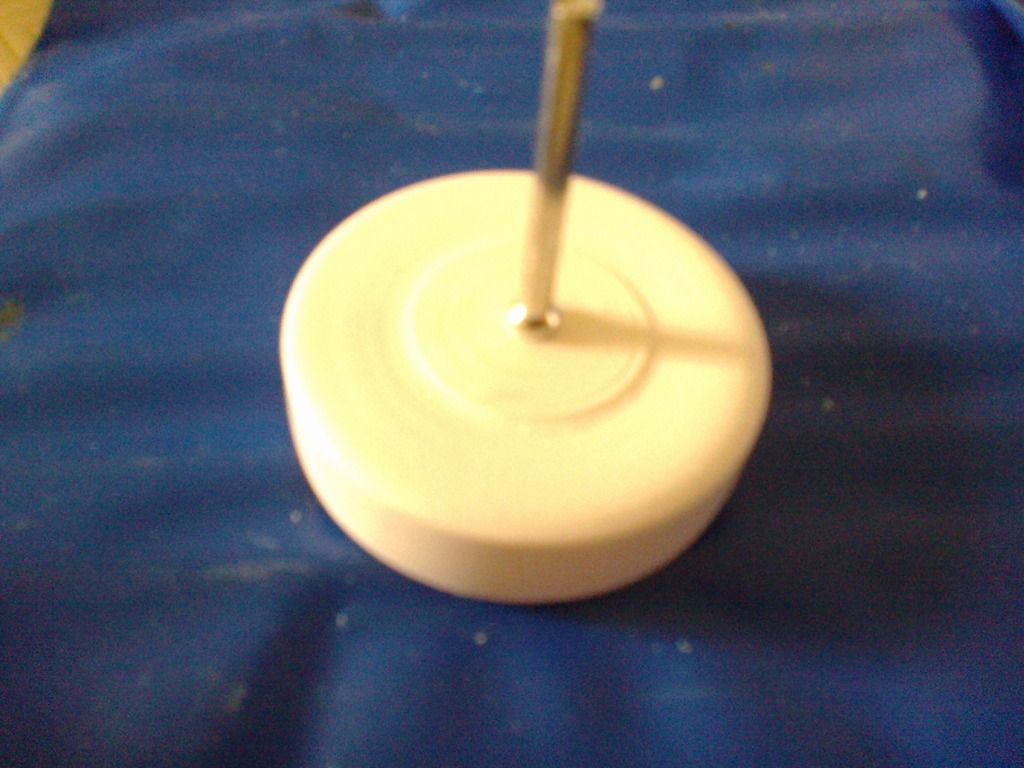 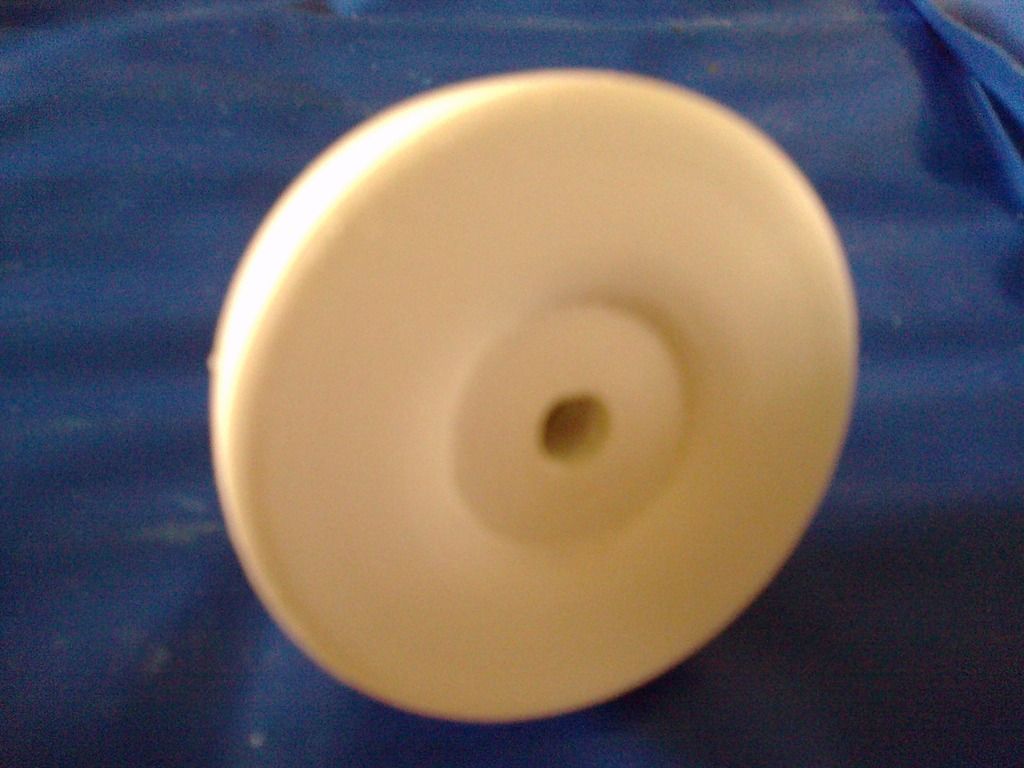 So far this process has been far easier than I thought and really quite therapeutic. Will try to mark it out tomorrow and make a start with the pyrograve !!!!!!!!!!!!!! Nige |
|
|
|
Post by okdoky on Jun 17, 2012 18:15:43 GMT
|
|
Deleted
Deleted Member
Posts: 0
|
Post by Deleted on Jun 18, 2012 12:32:22 GMT
If there's anything at Beltring Nige I'll get a photograph of it. You've certainly made a good start ... 15 years maybe until the this one is done?  |
|
|
|
Post by okdoky on Jun 19, 2012 1:31:39 GMT
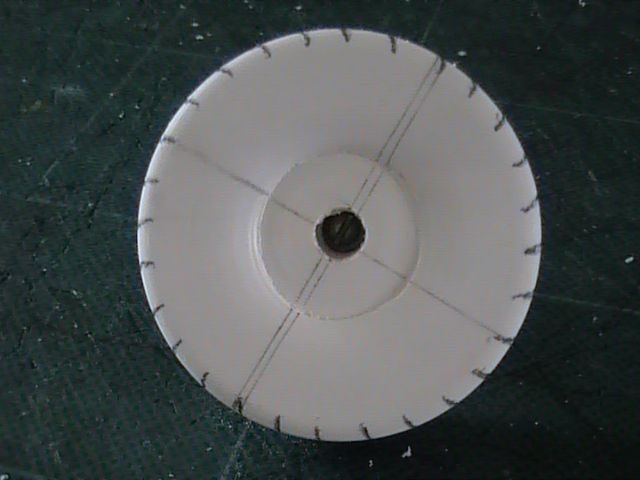
Thanks Nick ,,,,,,,,,,,,,,,,,, anything you can get ,,,,,,,,,, especially with measure sticks in the picks would be greatly appreciated. When is Beltring ?? Well Plan A did not work too well as the etching tool on the mini drill was too wide and too rough to etch clean, narrow troughs. I knew I had to try it out simply to know what the limitations of the etching tool are when doing such fine work !!!!!!!!!!! As I said though, this piece is very much a practice piece and I have been able to simply carve away the tread and reduce the diameter of the blank so that I can now try Plan B ,,,,,,,,,,,,,, adding the nubs to a flat strip in the right pattern and hopefully get a nice even tread !!!!!!!!!!!! To Boldly Go Where No Man Has Gone Before (OK LOADS HAVE GONE BEFORE) ,,,,,,,,,,,,,,,,,,,,, but it is a first for me !!!!!!!!!!! Wish me luck !!!!!!!!!! More to follow Nige |
|
paddy
Kit Basher
 Learn something new every day.
Posts: 79
|
Post by paddy on Jun 19, 2012 7:42:07 GMT
This must be the hardest thing to scratch build, I would not have known where to start  Cutting all the tread pads will be a chore but possibly the best way of doing it. Have you thought of cutting just the one and making a shallow mould to cast the rest? At least they will be uniform(ish) Or, maybe a silly idea, what about making one of each tread pad then attach them to a short stick so you make a stamp. Get some of that two part mould making putty and stamp the tread along a strip equal to the circumference of the tyre then use scenic water poured into the mould. When set, it will be a flexible strip to wrap around the wheel. OK, it sounded right when I thought of it but maybe not lol  |
|
|
|
Post by grousebeater on Jun 19, 2012 20:27:09 GMT
eh up hige your are a glutton for punishment aint ya.
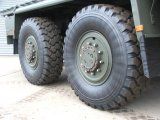
any hoo you dont need to go for these tyres mate you can use the older type michelens with the directional tread, i think that KFS sell them.
unfortunately our unit has cast ours in favour of the new MAN s so cant get you in for the day this time, if you like i will see the reme tomorrow and see if they still have the 501s and AESPs and get them photocopied for you.
grousebeater
|
|
|
|
Post by okdoky on Jun 19, 2012 21:17:06 GMT
You are a star Iain
Would be good to catch up with you and show you the DAF DROPS close up some time !!!!!!!!!!!!!!!!!!!!! Your help got it where it is right now !!!!!!!!!!!
Any help you can give me on this build will be greatly appreciated as always !!!!! Are you involved with the military days around Scotland, and in particular the Stirling show this weekend !!!!!!!
I am taking the family and the DROPS model to the show and will hope fully catch up with the guys from Dunfermline again !!!!!!!!!!! Would be good if you were there too !!!!!!!!
Hope to chat some time soon and buy a few beers at the bar ,,,,,,,,, my treat !!!!!!!!!!!
Nige
|
|
|
|
Post by okdoky on Jun 19, 2012 22:10:48 GMT
Hi Iain
I know I am probably giving myself a bigger headache but If I do get the omnidirectional tire right, I only need one single (hopefully correct) master !!!!!!!!!!!!
If I do the older type Michelens with the directional tread, I would need to do a nearside and offside and remember to cast enough of each !!!!!!!!!!!!!
On the other hand, I could be a total masochist and do all three with the 4x4 shod with one type and the 6x6 the other !!!!!!!!!!!
Arrrrrrrgggggghhhhhhhh !!!!!!!!!!
Nige
|
|
|
|
Post by grousebeater on Jun 20, 2012 19:24:23 GMT
Hi nige, i wont make it to the Stirling show this weekend as my OH has decided to take me to edinburgh to see the pandas.
i'll get in next week and see what literature i can get on the TM for you.
enjoy the show mate.
grousebeater
|
|
|
|
Post by okdoky on Jun 20, 2012 21:41:02 GMT
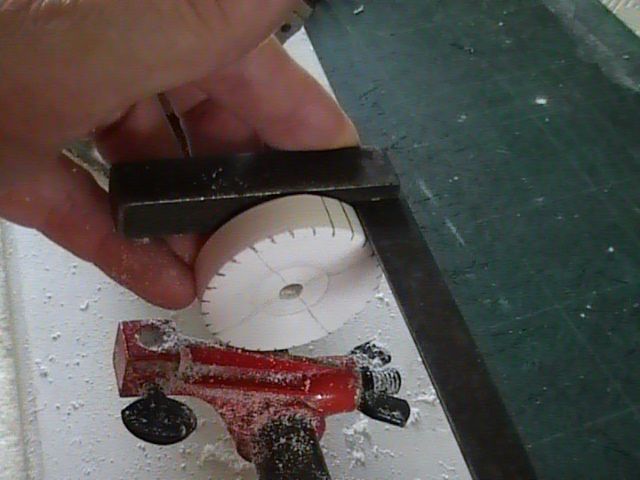
Thanks Iain ,,,,,,,,,,,,,,,,,,,,,,,, will do my damnedest even though the weather forecast is not looking the best at the moment !!!!!!!!!! Well this is Plan B started !!!!!!!!!!! And it does help if you have 32 nubs like the original, not 28 as I had miss-calculated on the blank before !!!!!!!!!!!! Measure twice, cut once (or drill,,,,,,,,,,,, or sand ,,,,,,,,,,,,,or whatever) !!!!!!!!!!!!!! 360 divided by 32 equals 11.25 degrees per nub !!!!!!!!!!!!!!  Setting out by angle proved far more accurate than trying to set out with a compass around the circumference !!!!!!!!! Lesson learned !!!!!!! 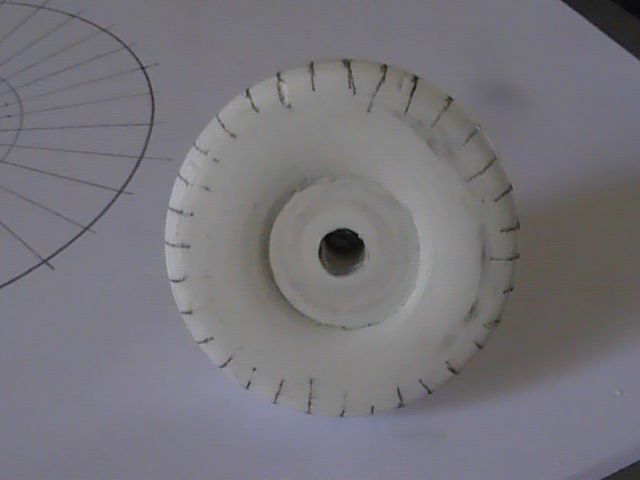 Using a black piece of sprue, I cut the inner nubs out using my multi-angle guillotine with a necessary adaption of a catchers mitt (a clear sandwich bag weighted down inside) to catch the cut nibs before they can become carpet fodder !!!!!!! 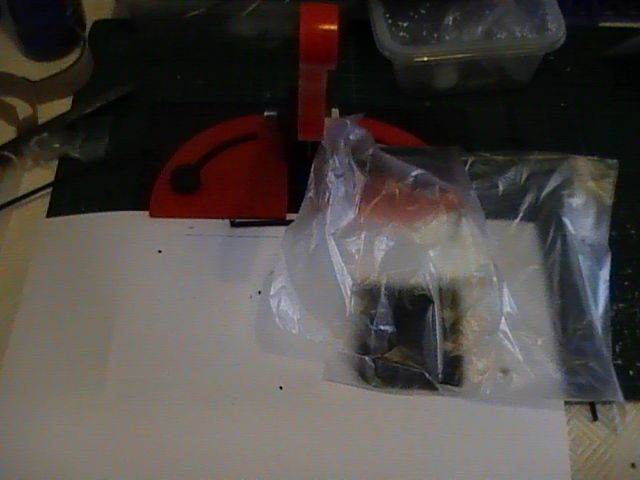 To see the size of cut I wanted to make, I added a sheet of white paper with a very basic measure drawn on it !!!!! I would love to add a more substantial butt stop and measure gauge and would be interested to see what others have maybe added to theirs !!!!!!!! 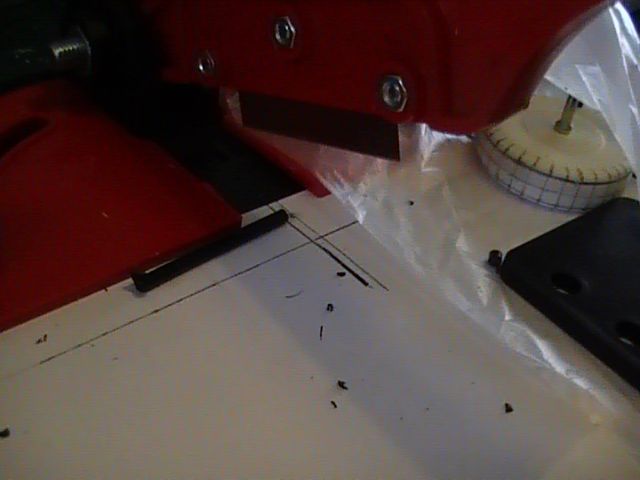 Adding the nubs to the blank was very easy and quick to get the pattern !!!!!!! The outer nubs have still to be designed and cut, but that will be another day !!!!!!!!!!!!!! 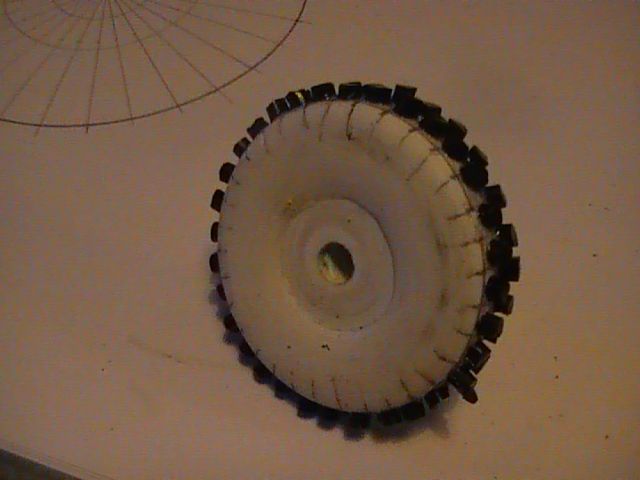 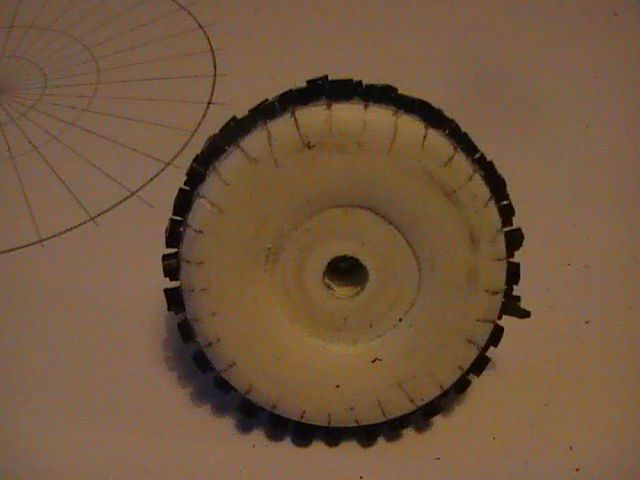 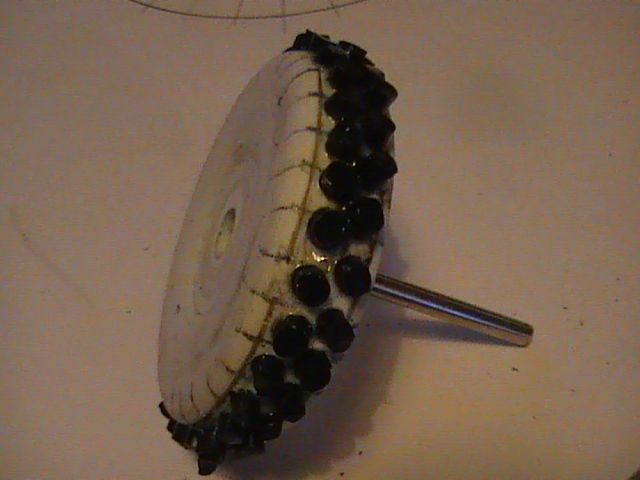 I have made the nibs much larger than needed so that I can gently sand them down all together to the finished tread depth !!!!!! Not sure if to sand them with a slight oversize so that there is less risk of resin shrinkage on the treads !!!!!!!!!!! What do the folks who cast regularly think on this proposal ? Nige |
|
|
|
Post by okdoky on Jun 30, 2012 0:52:45 GMT
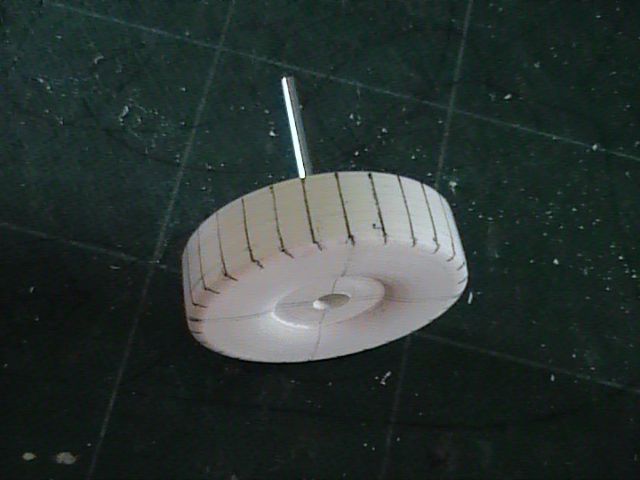
Made a start on the outer nubs of the tire. Judged the tread thickness and used double thickness of card to make sure the tread will be thicker than needed to allow for sanding back. Also extended out beyond the side wall to allow a sanding back to the vertical equally. 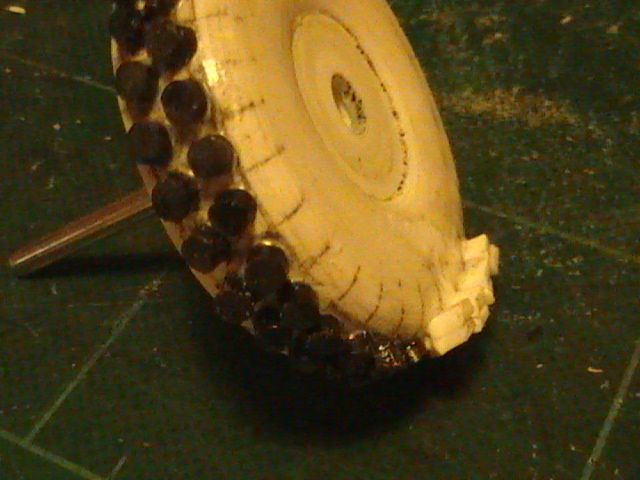 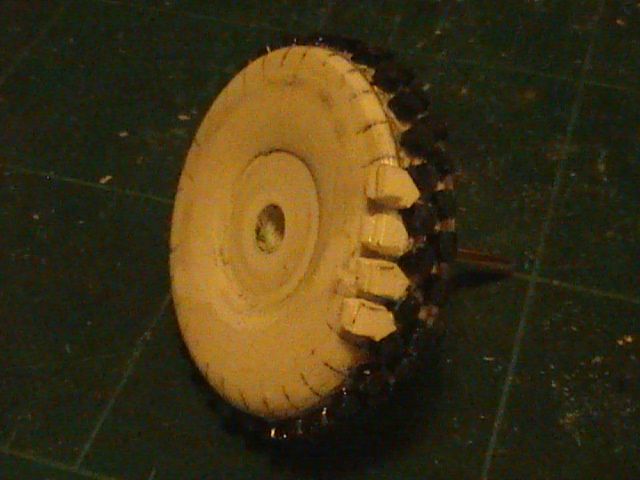 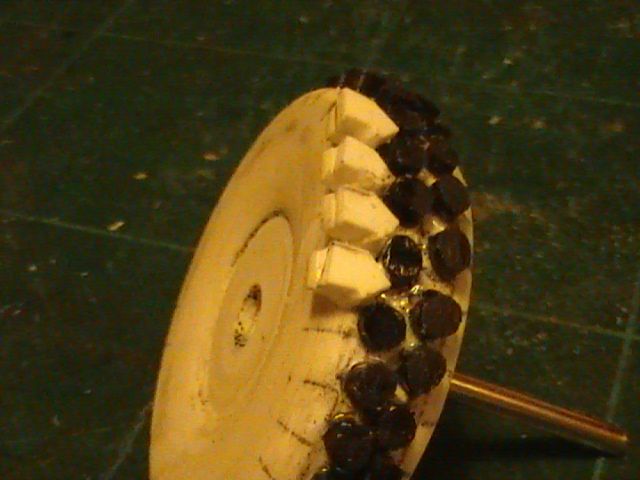 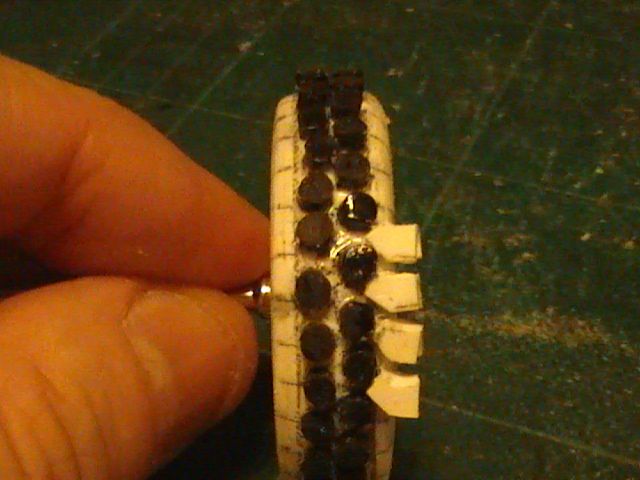 Only 64 to make ,,,,,,,,,,,,,,,,,,,,, ha ha ha ha ha ha !!!!!!!!!!!!!!!!! Slow progress !!!!! Nige |
|
|
|
Post by okdoky on Jul 1, 2012 1:58:06 GMT
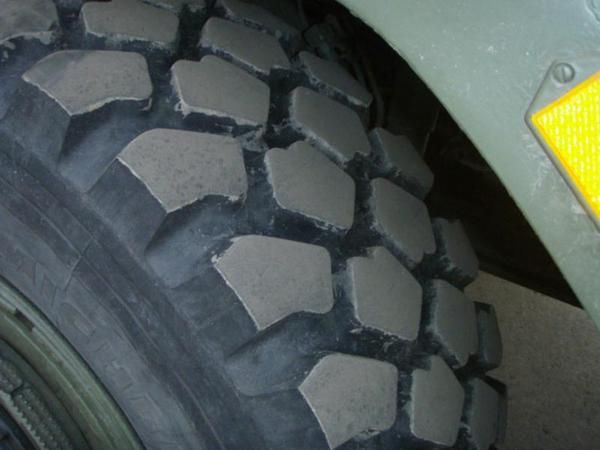
This is the Michelin XZL 395/85R20 It means the tyre is 395mm width outer side wall to inner side wall at its widest point. The aspect ration is 85% of the width = 335mm from hub rim to tread surface. R = Radial 20 = 20 inch diameter wheel or 500mm diameter. 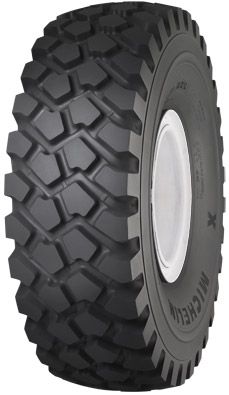 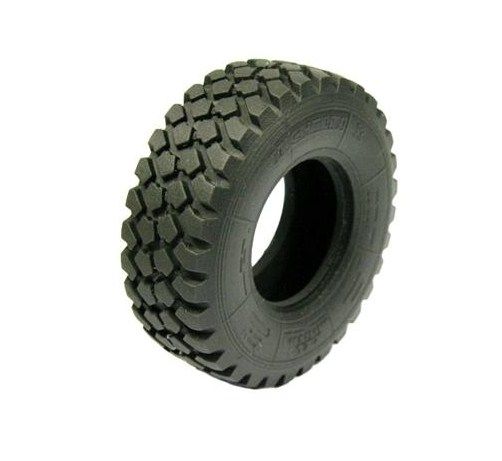 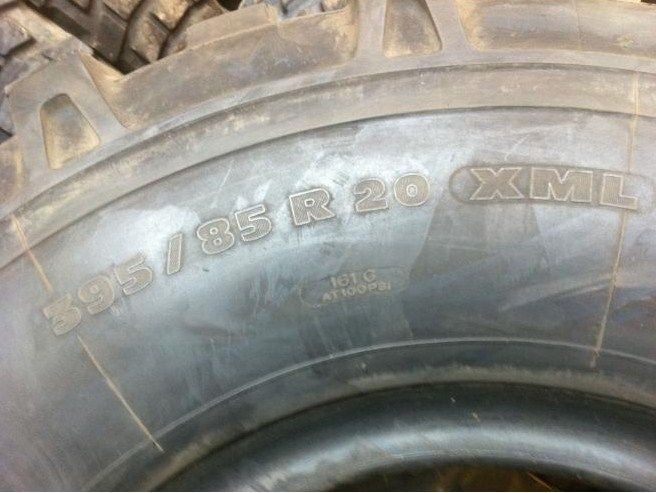 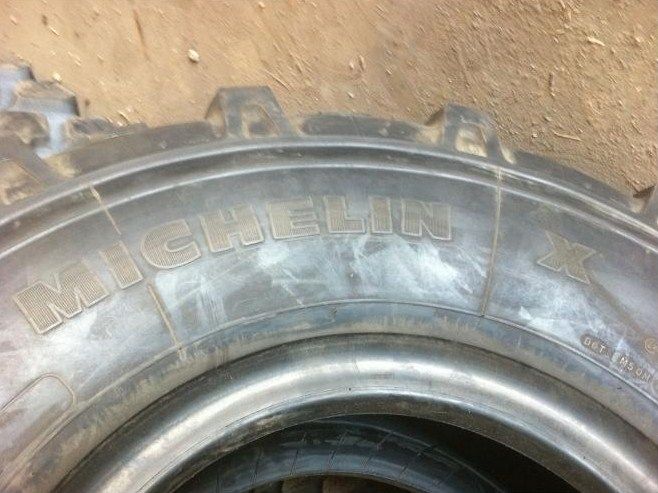 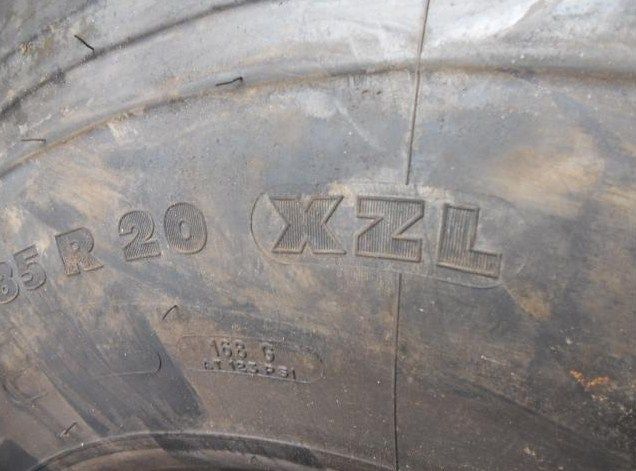 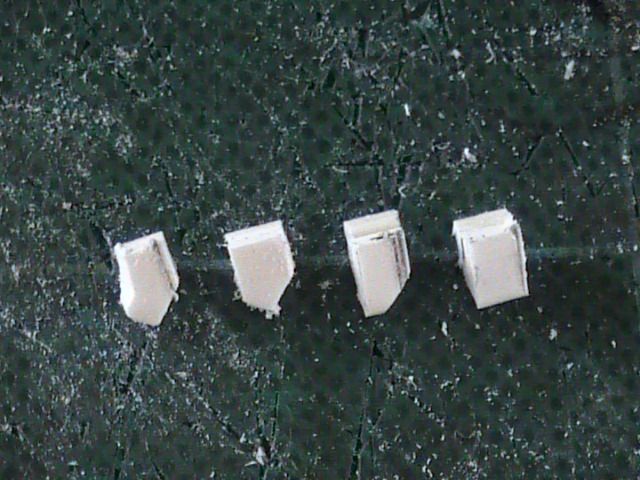 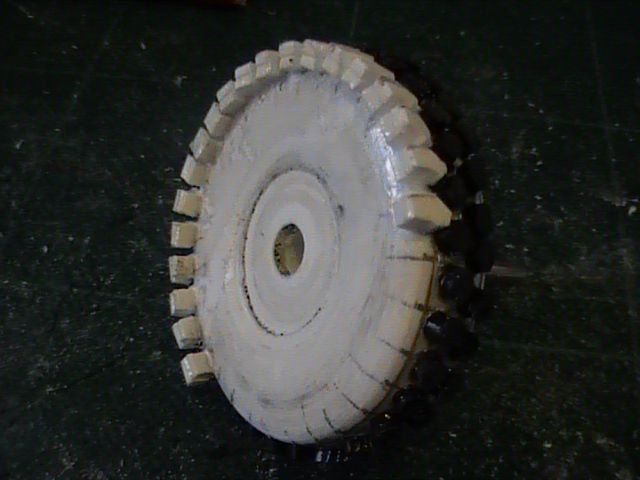 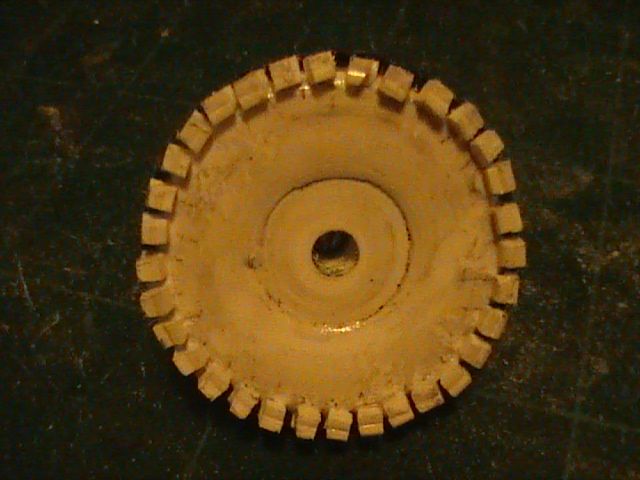 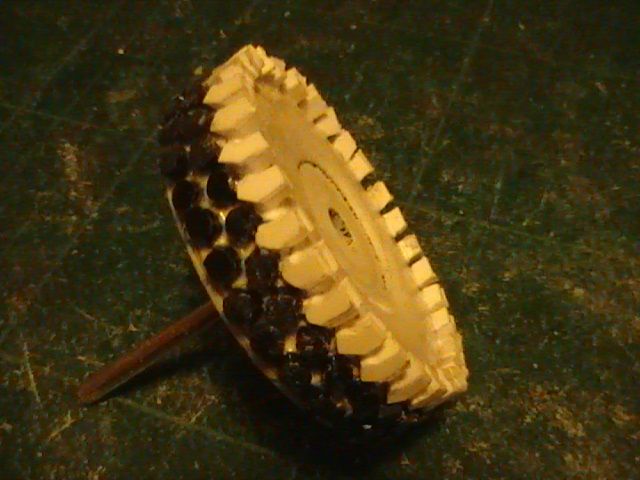 Will paste some superglue in the joints and then sand tomorrow !!!!!!!! Tread and side wall will get sanded down !!!!!!!! More tomorrow !!!!! Nige |
|
|
|
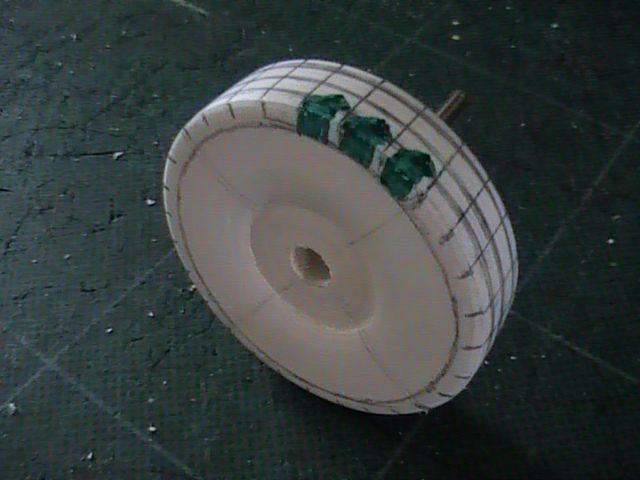
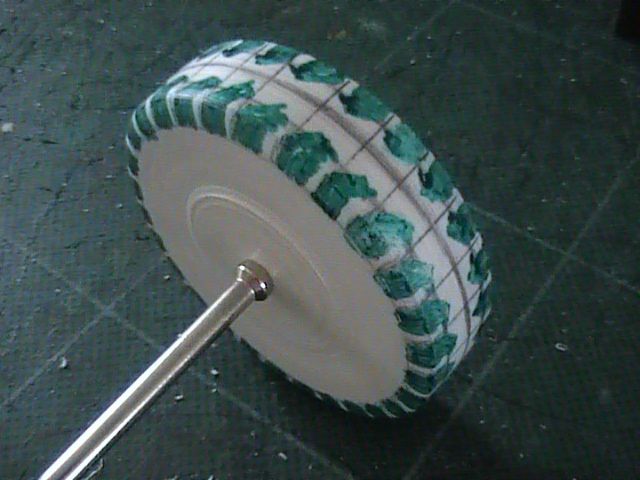
Post by okdoky on Jul 1, 2012 14:50:17 GMT
Here is where I am at 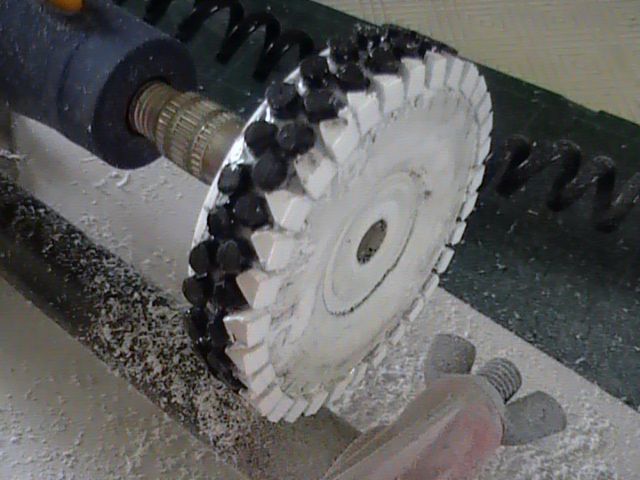 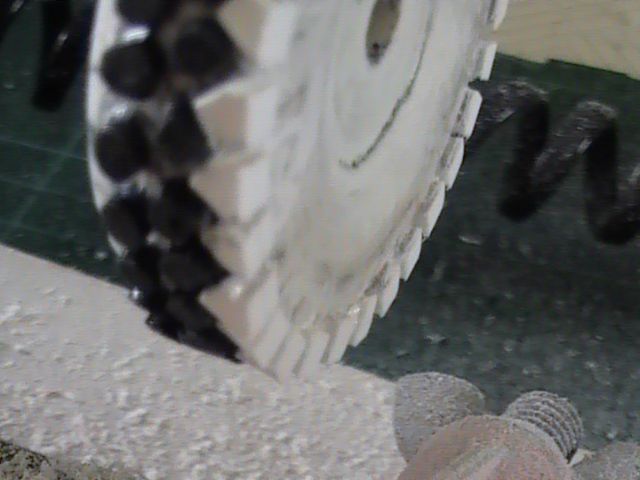 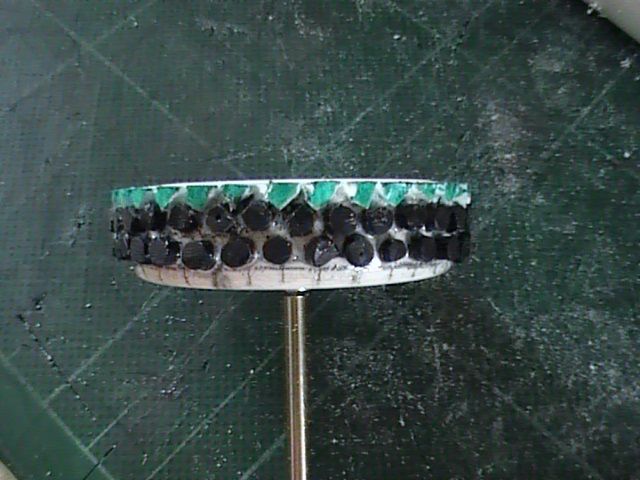 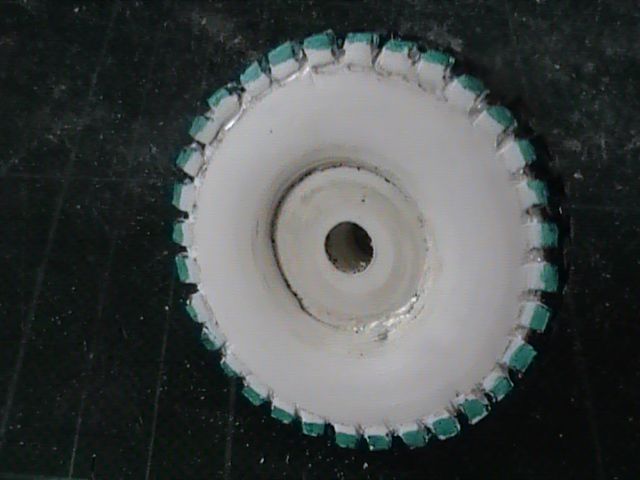 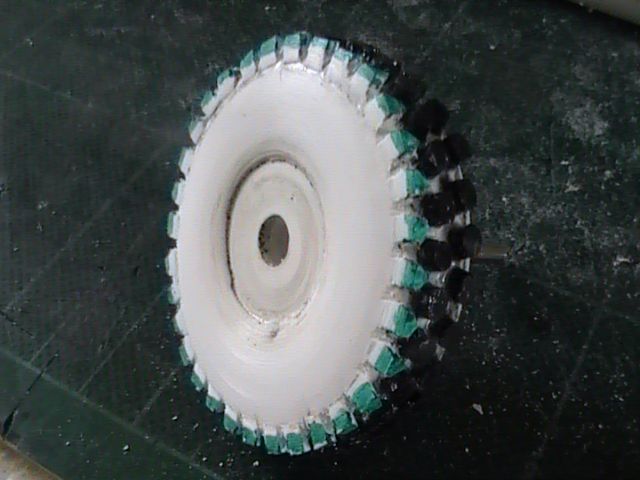 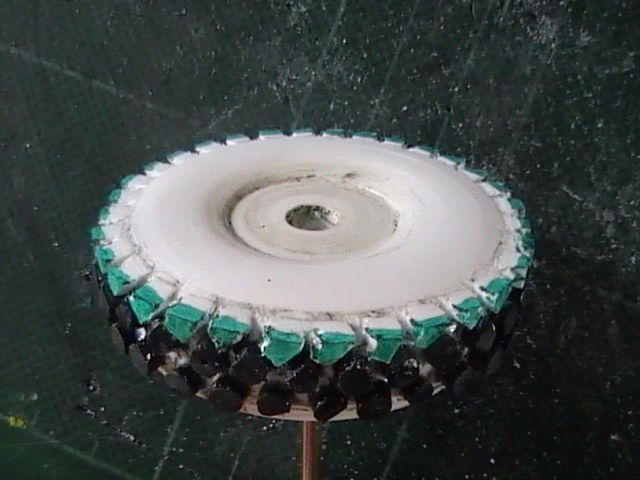 All the nubs are as good as this, but I am happy so far. Just another 32 to do for the inner side wall !!!!!!!!!!!!! Nige |
|
|
|
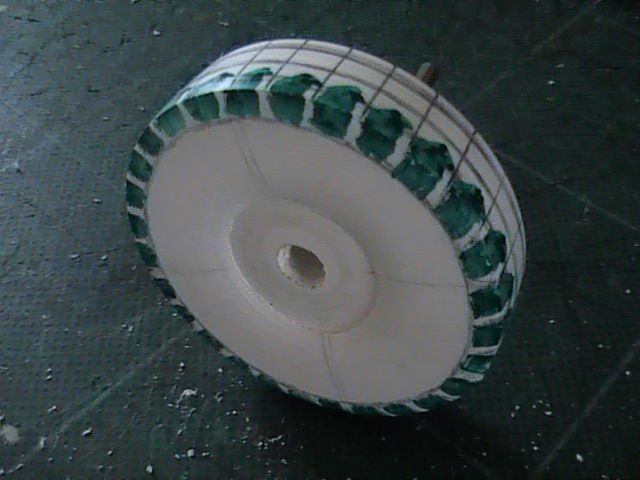
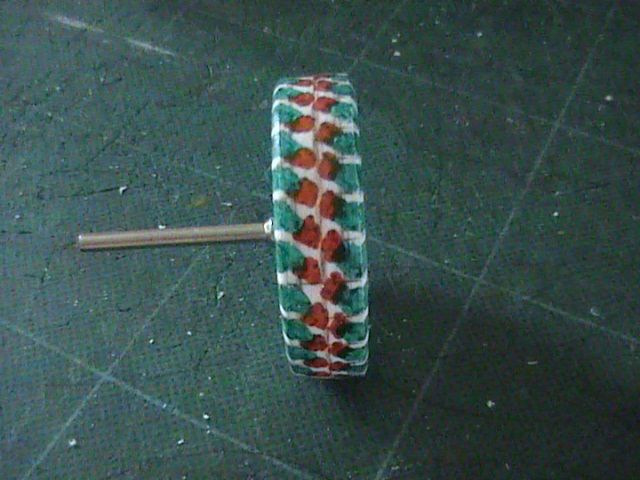
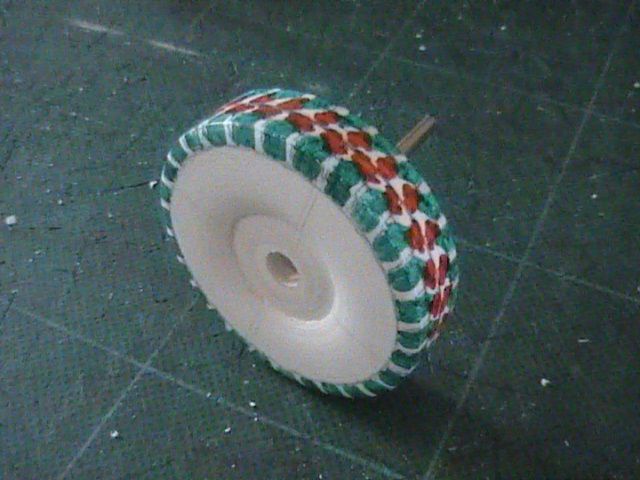
Post by okdoky on Jul 2, 2012 21:24:48 GMT
Well I got some progress on the tire and I am quite chuffed with my first attempt !!!!!!!!!! Is not perfect, but I am not a perfectionist by any stroke of the imagination !!!!!! 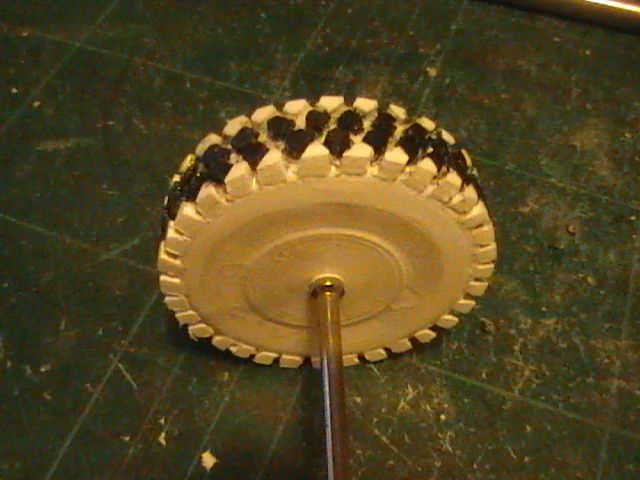  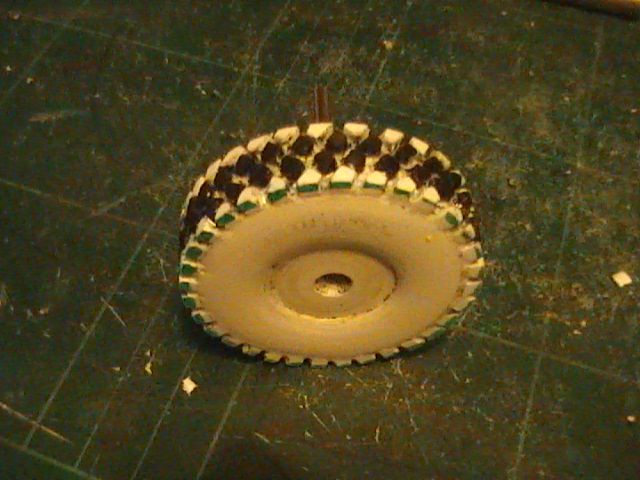 I will chuck some lines on it for the side wall beading and cross banding. Will need to figure out how to add the lettering and tire sizing figures. I fancy buying some tiny etched brass numbers and letters but will see how the pennies go. Hope you like Nige |
|
 Members' Forum")


 Cutting all the tread pads will be a chore but possibly the best way of doing it. Have you thought of cutting just the one and making a shallow mould to cast the rest? At least they will be uniform(ish)
