|
|
Post by iansadler on Dec 19, 2012 19:15:38 GMT
Hi all , this is my secret project that I started about a month go . It uses the new mini art GAZ AAA as the basic truck , the rest will be total scratch a build. I intend to frame out the workshop body as per original . A detail often missed by many . The roof will be removable to show of the internal details of the bench and vice , lathe and pedistal grinder . This is the work so far on the bench and lathe and grinder . Then they are test fitted the cago body in the body, More to follow soon cheers ian. 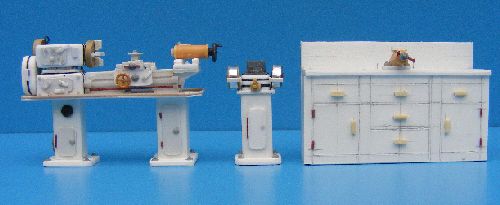 |
|
|
|
Post by iansadler on Dec 19, 2012 19:21:02 GMT
hi all this is the test fit of all three in place inside the lower cargo body. 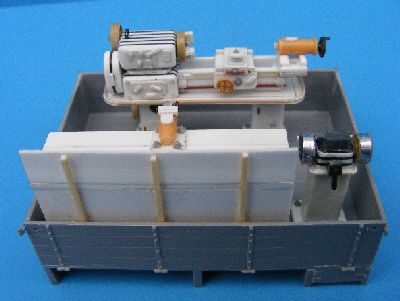 |
|
|
|
Post by iansadler on Dec 19, 2012 19:24:24 GMT
Hi since the bottom photo was taken I have added the coolant pipe . I made this from brass wire and plastic tube . photo soon cheers ian
|
|
|
|
Post by okdoky on Dec 19, 2012 20:11:39 GMT
Very nice and intricate work there !!!!!!! Did you use that mini lathe to build all the other items  Looking forward to seeing this at Perth !!!!!!!!! And to seeing your good selves again of course !!!!!!! Nige |
|
|
|
Post by bowman on Dec 19, 2012 20:56:18 GMT
Hi Ian, this is some really impressive scratch building! How are you planning to finish the workshop equipment?
Steve
|
|
|
|
Post by iansadler on Dec 20, 2012 9:44:11 GMT
hi steve I have not decided on a colour yet , still a bit of research to do in the area . cheers ian
|
|
|
|
Post by iansadler on Dec 20, 2012 19:14:36 GMT
Hi I added a tool storage shelf to the rear of the bench and then scratch built the following tools to fit into the holes , 3 steel files , hammer , spanner, and a metal cup . I am working on a paint kettle and paint brush , I would have taken photos but it is still raining, better luck if the world does not end . cheers ian
|
|
|
|
Post by iansadler on Dec 30, 2012 19:20:44 GMT
Hi all. the bench looked naked without a few tools so this is my effort at scratch building them as mentioned in the previous post cheers ian 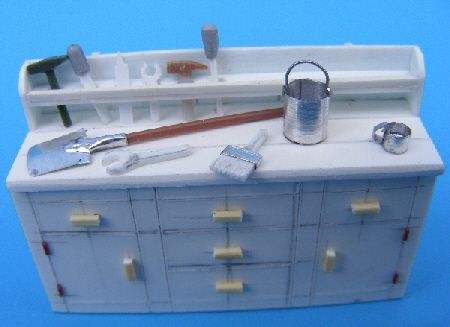 |
|
|
|
Post by iansadler on Dec 30, 2012 19:25:13 GMT
Hi all. this is the top view of the bench with the tools scattered about . cheers ian 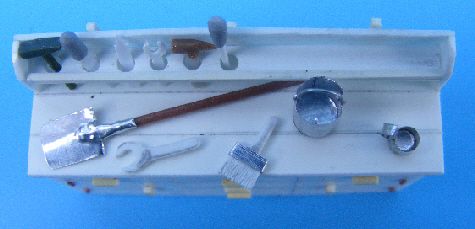 |
|
|
|
Post by iansadler on Dec 30, 2012 19:36:43 GMT
Hi all , while waiting for the various sub sections to harden off , I did a bit of research on the Parm1 in my books . I noticed I needed a access ladder , so I scratched my head as to ways of making it and keeping the rungs equal. Nothing I could come up with seemed to work. Then I remembered in my stash I had the Hobby Boss T 26 tank, and it had a track guide or template . So I got it out and measured it up the spacing it was within the margin of what I wanted. I ended up with a 6ft ladder , I used flat plastic card for the frame and helicopter rotor blade shape as the rungs as the looked just right . As with all test pieces I did a reaction test to see if the glue would react to the template it did but is very minor . So I was able to remove the ladder without any damage. Other track templates may give different spacing but I cannot comment as this is the only one I have in my stash. cheers ian  |
|
|
|
Post by iansadler on Dec 30, 2012 19:40:20 GMT
Hi all, this is the completed ladder and the track template seperated , I am pleased with this first attempt at making a ladder. cheers ian 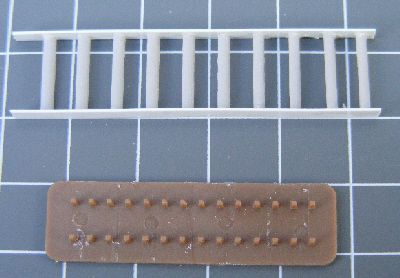 |
|
ptcruiser
Moderator  Car & Motorcycle SIG Leader
Posts: 1,223
|
Post by ptcruiser on Dec 31, 2012 18:28:56 GMT
I love your scratchbuilds Ian, great work!
Rich
|
|
|
|
Post by iansadler on Jan 2, 2013 19:38:15 GMT
Hi all, I needed two lamp shades industrial types , so I went to my fav spares box map pins , selected two and cut one in half and then shaped the results into two lampshades . Added the fixing tube , all I need is some dress making pins for the lamps . The lampshades scale out at 9 in for the large one in the centre of the house body and 6 in for over the lathe . cheers ian 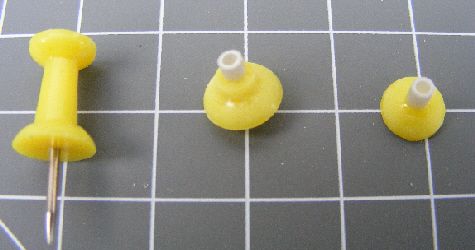 |
|
|
|
Post by iansadler on May 7, 2013 18:29:31 GMT
Hi all after all the bad weather and 6 weeks of an virus , I am at last able to restart work on the Parm 1 This is a test of the new photobucket . I am still not too happy with it . It is a long drawn out method to load and select photos . So I hope this works as a test cheers ian 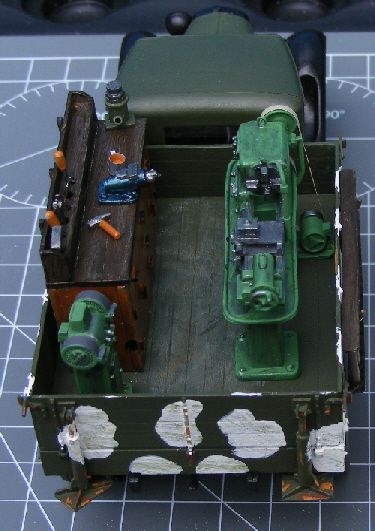 |
|
|
|
Post by iansadler on May 7, 2013 18:39:09 GMT
Since this was taken the cammo on the cab has been finished and the first stage of the weathering has been done , There is still plenty to do , build the frame for the spare wheels and mount them and then onto the final weathering cheers ian 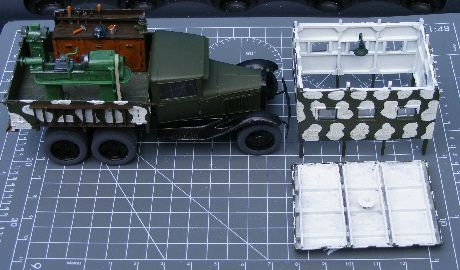 |
|
 Members' Forum")