|
|
Post by bowman on Sept 12, 2013 14:17:44 GMT
A little while ago I started a new scratch build project; an Eager Beaver rough terrain fork lift tractor from the 1960s/70s in 1/24 scale. The Eager Beaver was the predecessor of the JCB410M (my last project) and was in service with the British Army when I joined my first Ordnance Company as a very "green" Private soldier (that isn't me in the photo, by the way). 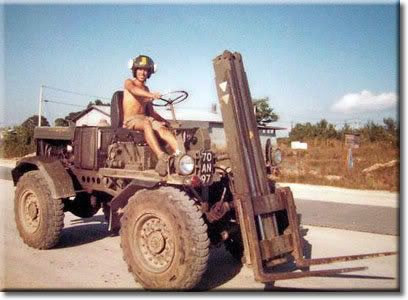 I started as usual by creating a "setting out" base board, to ensure that overall dimensions didn't "creep" during the build. 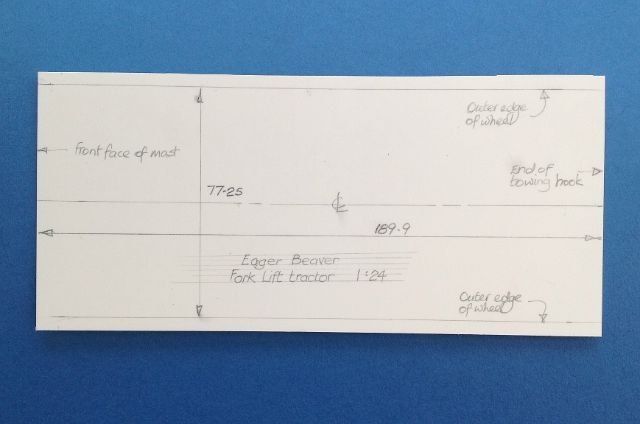 Having got the baseboard done I started work on the mast and forks, as I needed to complete a discrete component group to get me back into the scratchbuilding routine, have not touched plastic for nearly two months.  The front face of the mast was fairly straightforward, although the head of the mast (on the right of the photo) was a bit fiddly.  The back of the mast (above) was also OK, although again the head of the mast needed some care. With the main element of the mast complete, I started building the fork frame and forks. 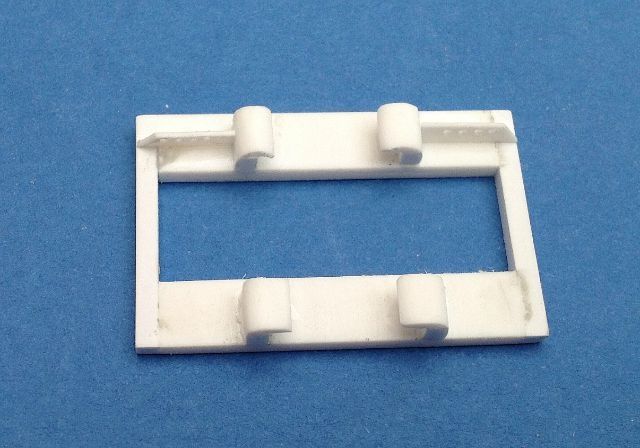 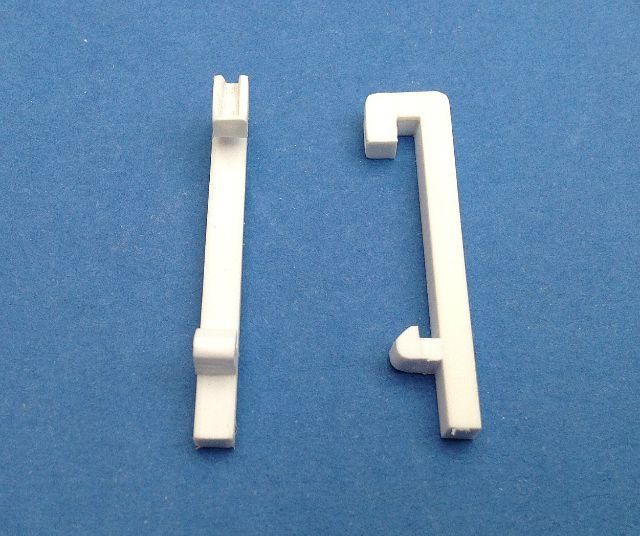 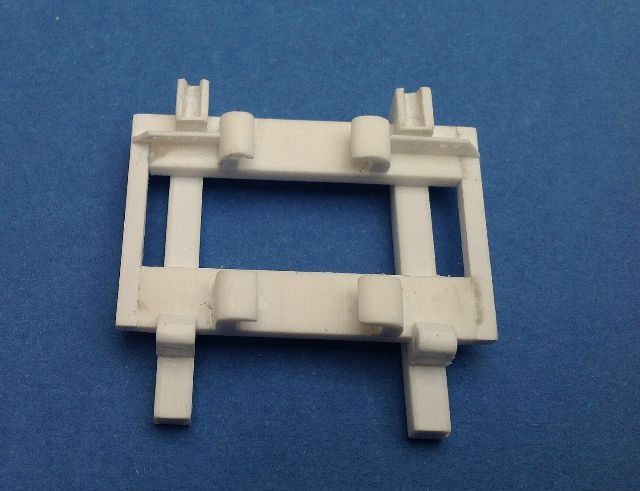 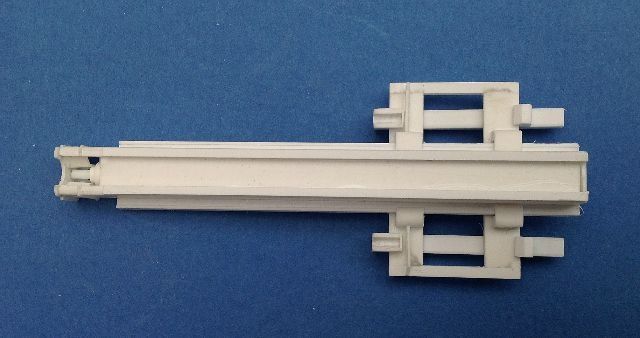 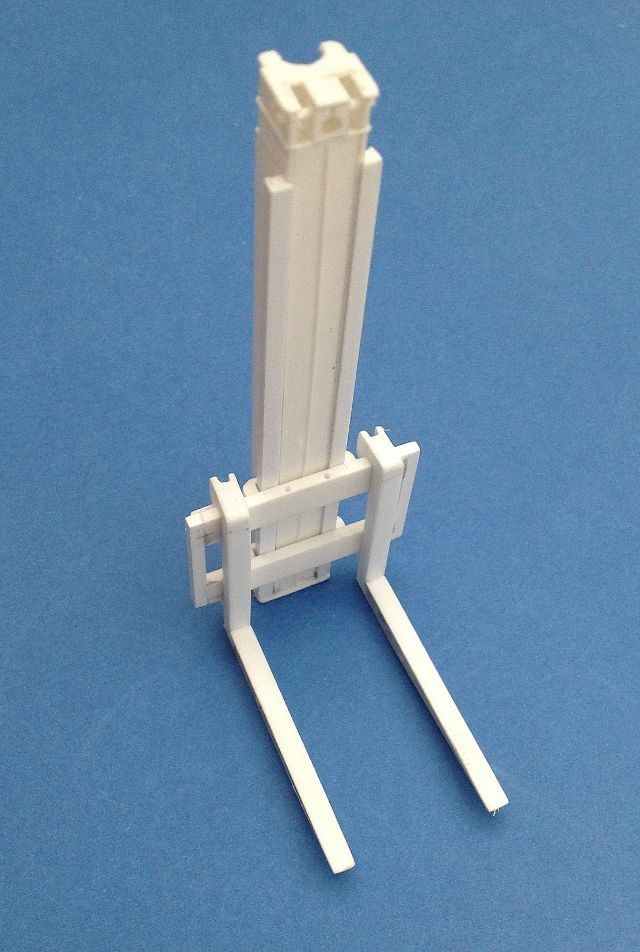 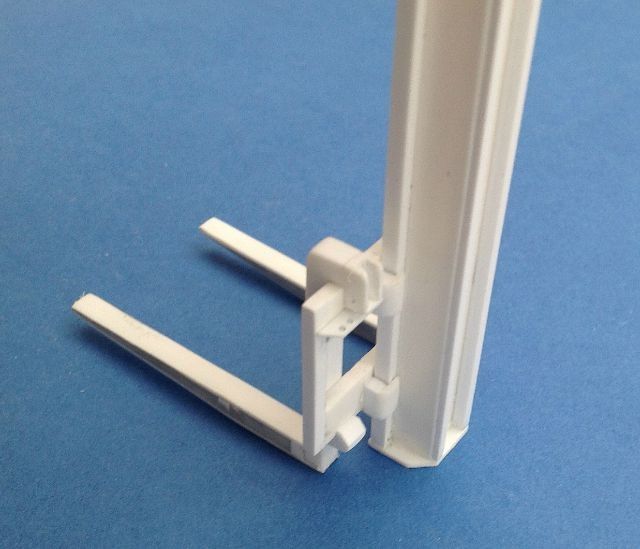 More to follow shortly. All comments, good bad or indifferent, welcome as always. Steve |
|
|
|
Post by bowman on Sept 12, 2013 14:40:31 GMT
Having got the basic shape of the mast and forks sorted, I decided to add a bit of detail to the front and back of the mast. The fork frame is raised and lowered on the mast by two chains, which resemble those fitted to motorbikes. Having scoured the internet for motorbike chain in 1/24 scale (not a chance!), I decided to see what I could do with lead wire and the knurled wheel off a pair of large compasses. 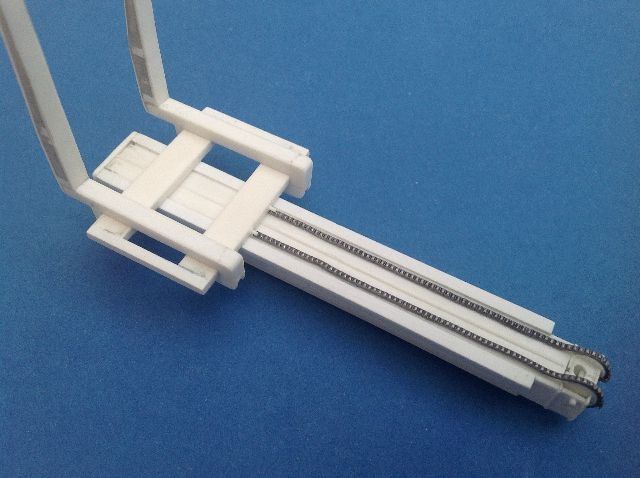 I think that with a bit of careful painting (not something that I'm noted for) these may be OK. The back of the mast was a bit easier, as the detail consisted of a couple of bracing plates and a bit of conduit. 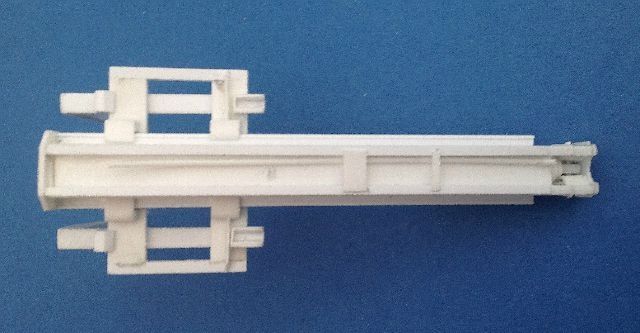 The single hydraulic actuator which tilts the mast was next. I used aluminium tubes of 2, 3 and 4mm diameter, but haven't glued them yet, as I want to be able to polish the "ram" that isn't painted before final assembly. 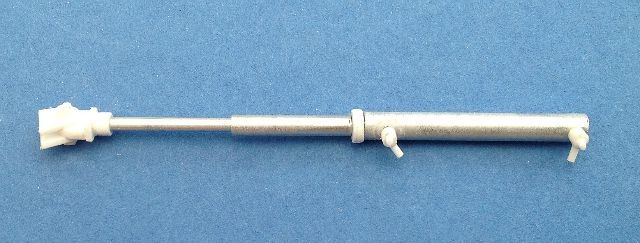 I've now started the spaceframe which everything else hangs off. It consists of two side members joined by cross struts and triangular bracing. So far I've only got one of the side members done and it still needs a bit of filling and sanding. 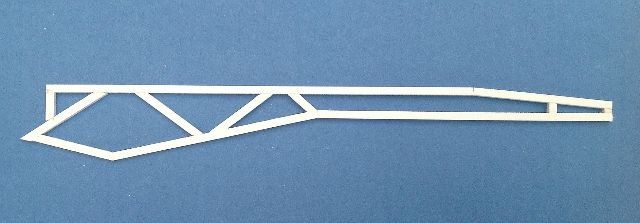 Fork extensions were on the agenda for this evening. These sit on the left hand side of the space frame, secured on a couple of brackets welded to the frame. 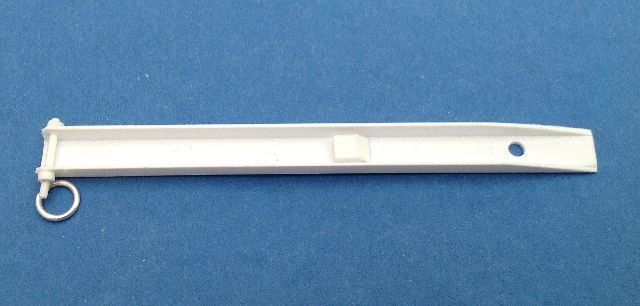 I've got to convert a few photos to the correct size before I can post any more, and it's model club night tonight, so hopefully a bit more progress will be posted tomorrow. Cheers, Steve |
|
|
|
Post by bowman on Sept 12, 2013 15:01:53 GMT
Found a few more minutes to add a bit more. I thought that the next component should be the fuel tank and hydraulic fluid tank that sit just in front of the engine. These should help define the rest of the major parts. The tanks are pressed metal, with reinforcing grooves pressed into the end panels and side panels. I decided to start with the end panels and build two triangular section boxes. 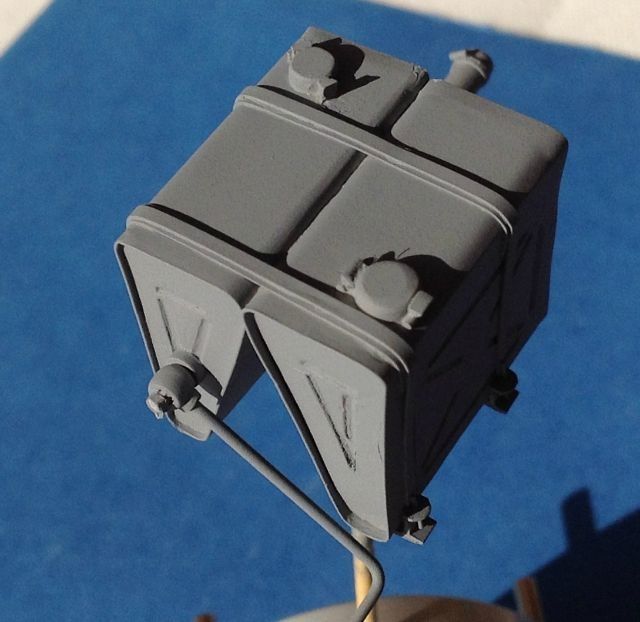 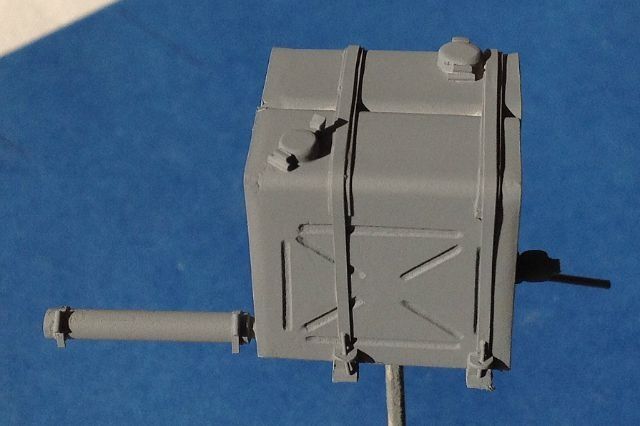 I'm not terribly happy with the finished product and will probably end up redoing these. The cover for the engine and radiator was the next part to be tackled, and I must admit that I hadn't been looking forward to it. The cover itself is fairly straightforwards, being formed from a flat piece of plasticard, which was then scored for the sides, which were then bent down at right angles to the top. Because the angle between the sides and top is rounded, I added some rectangular section rod as stiffening to the underside, as it won't be seen, and then sanded the rounded profile. 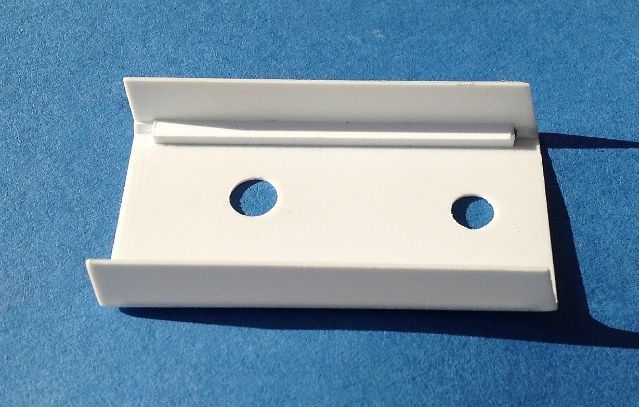  The bit that I hadn't been looking forward to was adding the rounded ribs to the top and sides. These were cut from 0.25mm card, which was fixed in place and the edges were then rounded using a mix of needle files and sanding sticks. 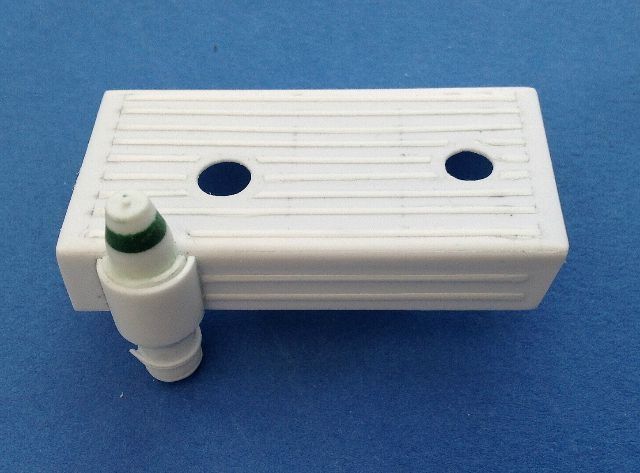 The last couple of evenings have been spent putting things right that I was not happy with, so progress has been a bit slow. However, I managed to get the frame for the radiator grille made and finished off the engine cover. 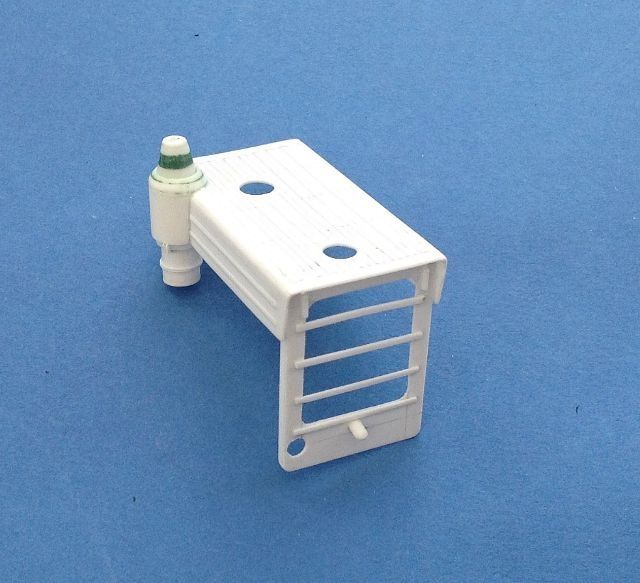 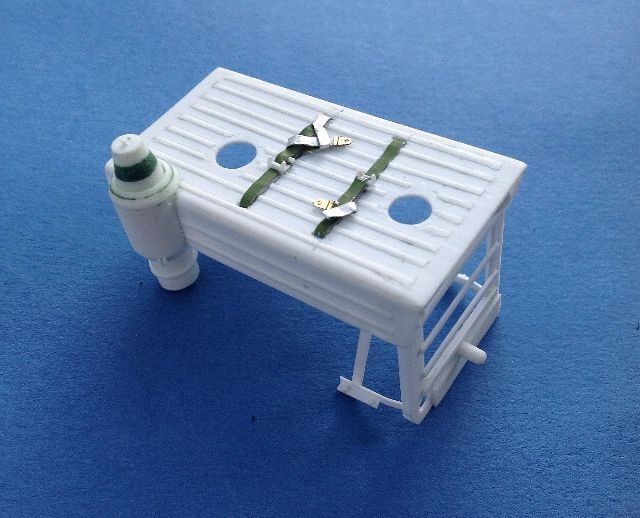 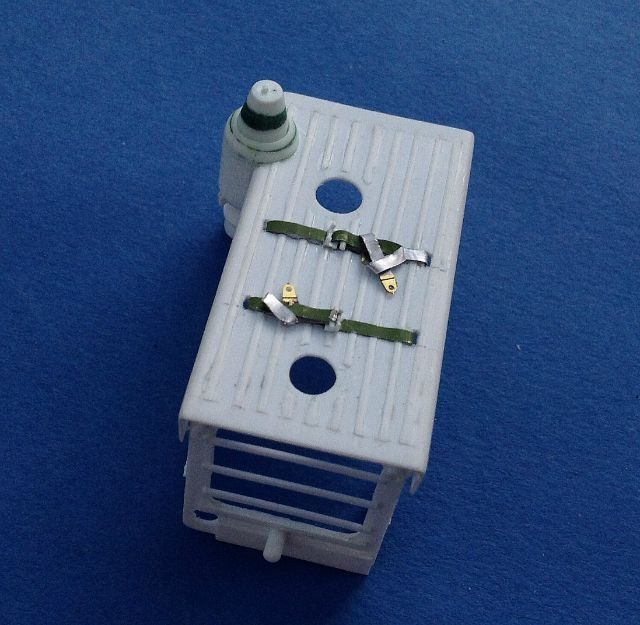 Cheers, Steve |
|
|
|
Post by bowman on Sept 12, 2013 15:53:50 GMT
Added the radiator grille, courtesy of Howard at KFS 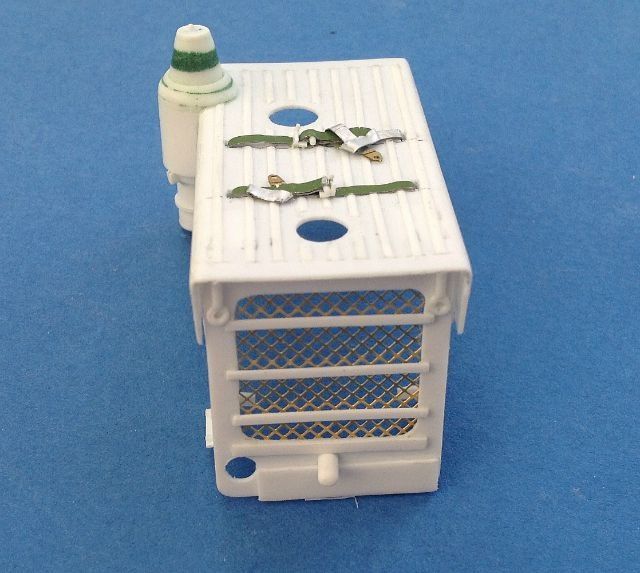 and then on to the radiator itself 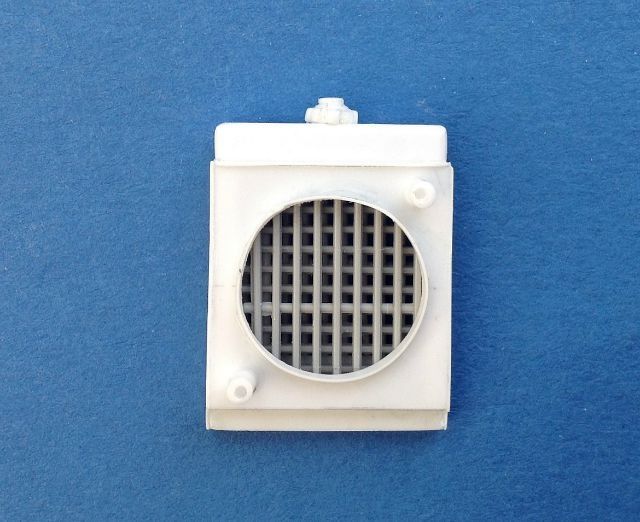 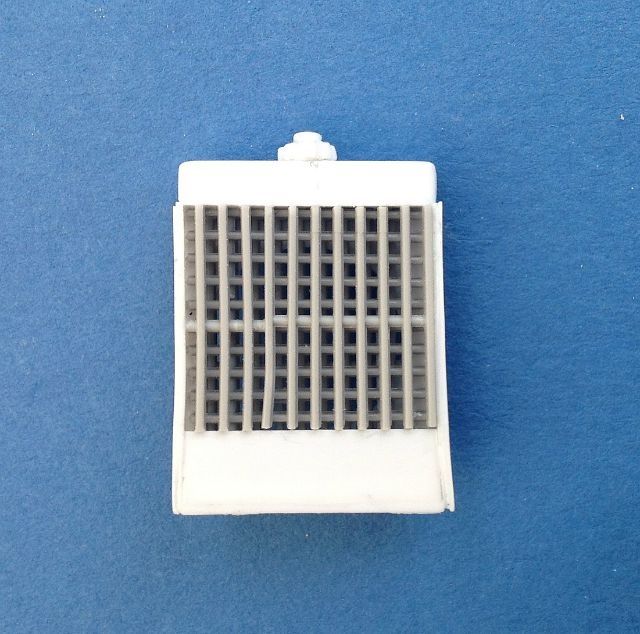 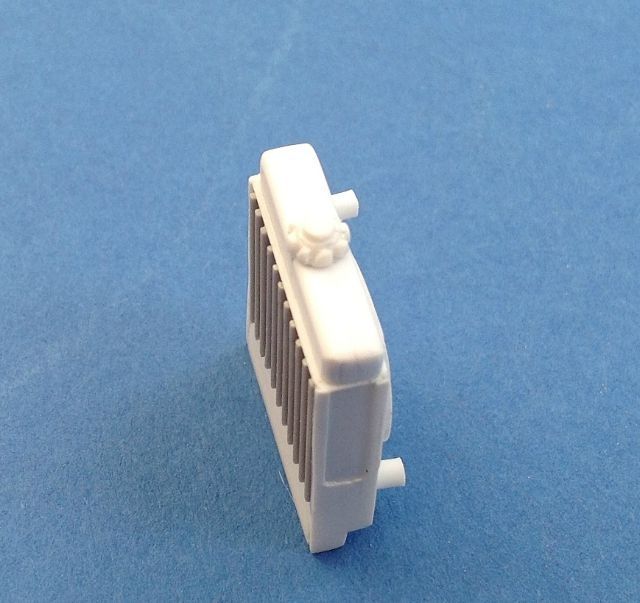 Having got the radiator done I wanted to have a go at the engine next, so I dug out the MOD parts manual for the EB and made a start. My very basic method for engines is to build the block by laminating up plasticard until it is roughly the right shape and then add things like the sump, rocker cover, starter motor and all the other ancillaries as separate components. 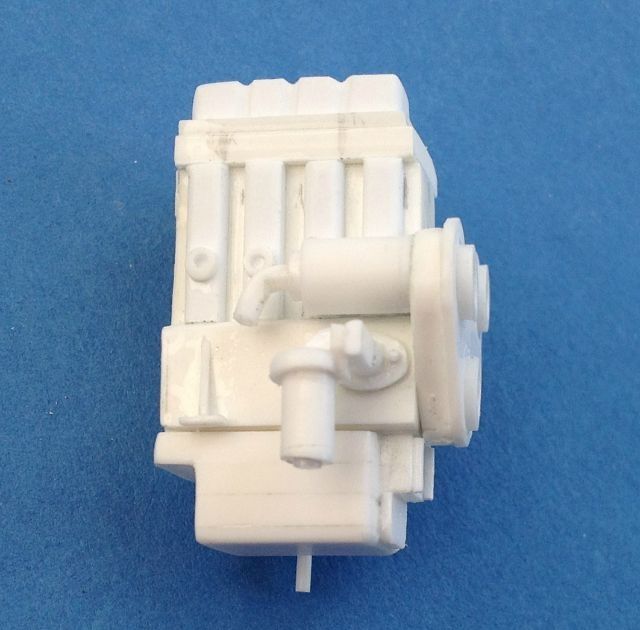 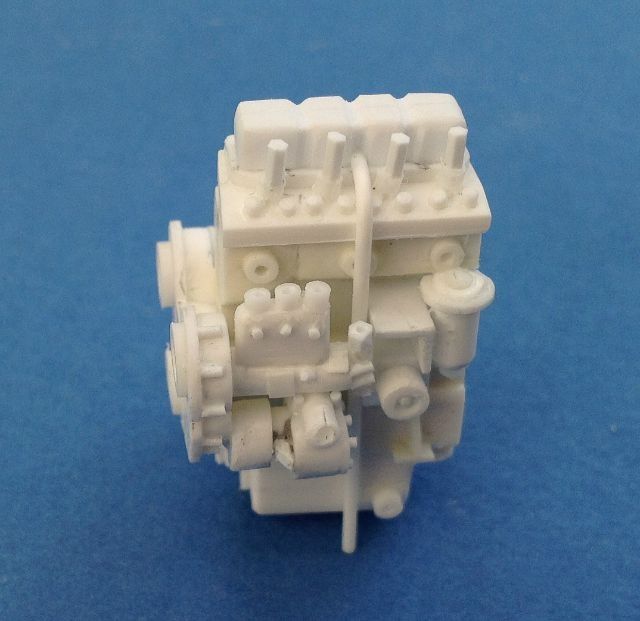 I've still got all the wiring to add and the fan and fan belt, the inlet/outlet valve from the radiator, the exhaust manifold, and the brackets for fixing it to the chassis, before I can start on the gearbox. 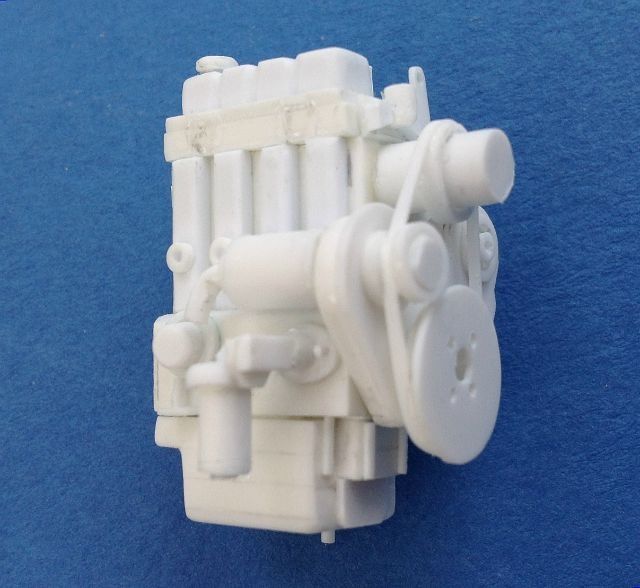 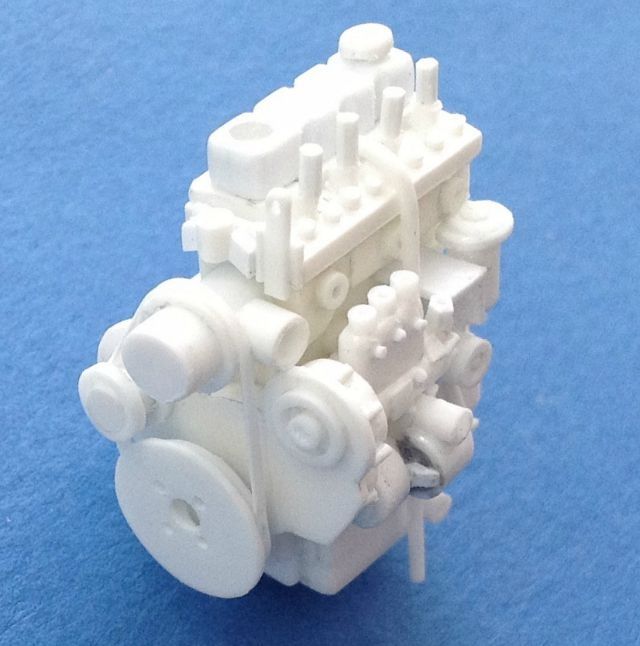 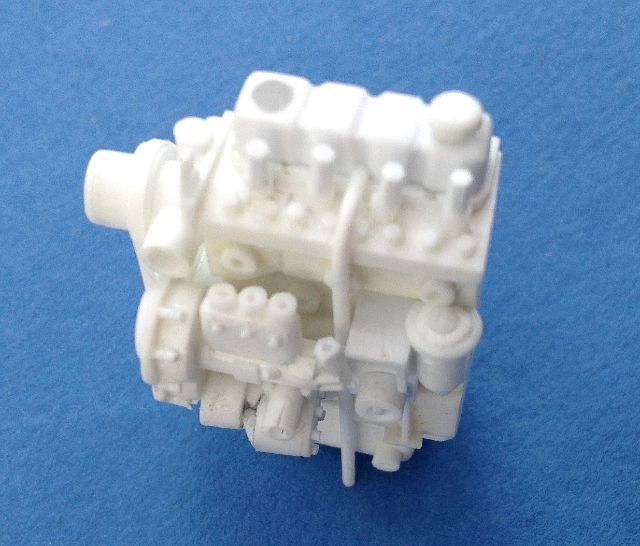 I had a bit of time to work on the finishing the engine/gearbox assembly 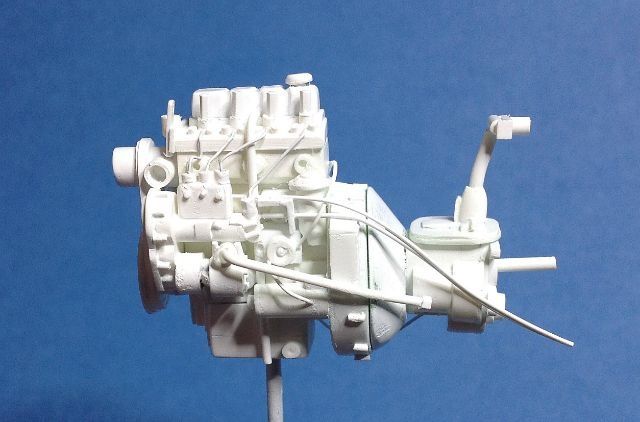 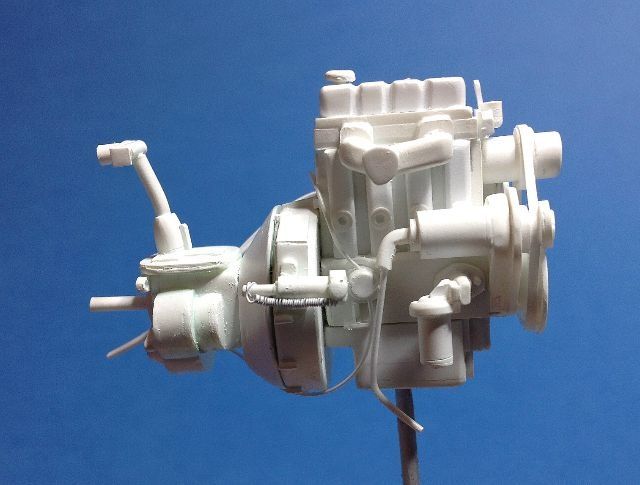 I added the exhaust to the engine  and I couldn't resist a a dry fit of the engine, radiator and engine cover, just to see that the spacing still worked 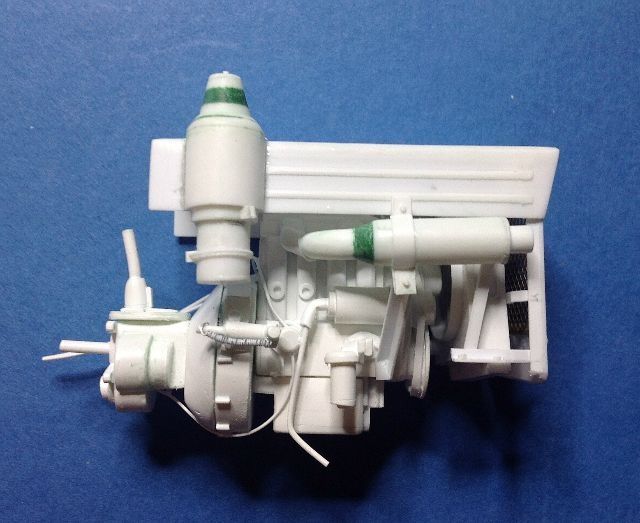 and that's it for the time being. I've got to get the space frame built next, so that I can then start hanging components off it. Cheers, Steve |
|
|
|
Post by Harriet on Sept 12, 2013 19:42:18 GMT
Fantastic as usual Steve.
|
|
|
|
Post by bowman on Sept 13, 2013 7:31:01 GMT
Thank you Harriet, hope you enjoy the rest of the build
|
|
ptcruiser
Moderator  Car & Motorcycle SIG Leader
Posts: 1,223
|
Post by ptcruiser on Sept 13, 2013 12:00:46 GMT
Superb as ever Steve. Stunning start. Saw the piece on the other beastie in TMW too.
Rich
|
|
|
|
Post by bowman on Sept 13, 2013 12:40:08 GMT
Cheers Rich. Glad you like it so far.
|
|
Deleted
Deleted Member
Posts: 0
|
Post by Deleted on Sept 13, 2013 22:56:35 GMT
Another build I'm looking forward to ...
|
|
|
|
Post by okdoky on Sept 14, 2013 18:20:12 GMT
Another show stopper Steve !!!!!
And I hear you have eyes on yet another piece of equipment after this !!!!! You better get the finger out if your are gonna get this green fleet growing !!!!
Nige
|
|
|
|
Post by bowman on Sept 15, 2013 9:11:31 GMT
Over the past couple of evenings I've been concentrating on trying to get the space-frame sorted out. 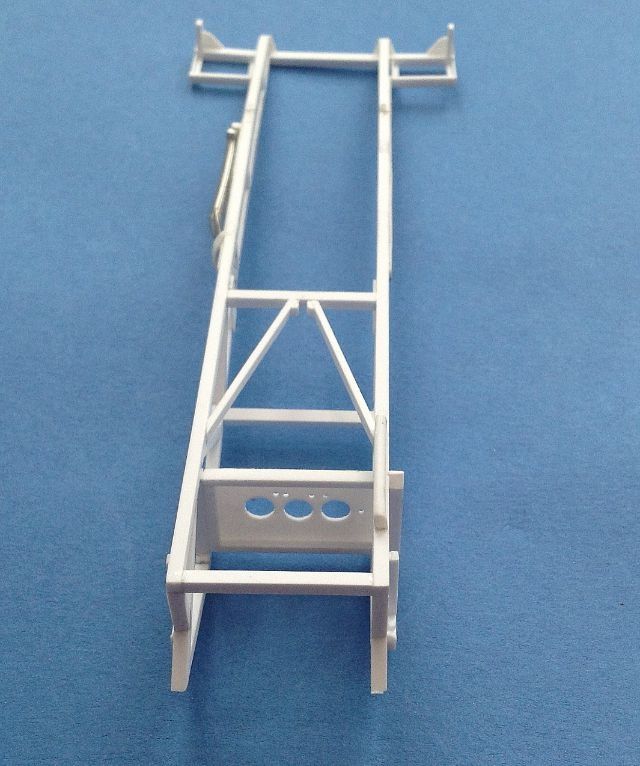 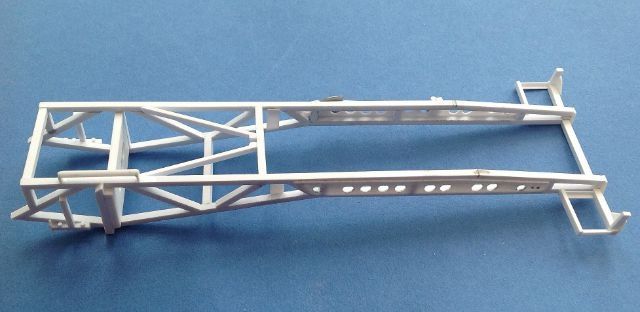 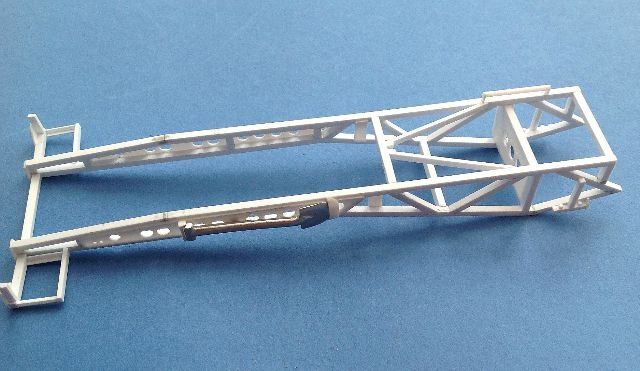 Having got the basic geometry sorted out and everything reasonably "square and true", the next task will be to add all the little brackets for attaching engine, fuel tanks, transmission etc. Cheers, Steve |
|
Deleted
Deleted Member
Posts: 0
|
Post by Deleted on Sept 15, 2013 13:03:43 GMT
Pure poetry in motion Steve, it'll be done for MW then?
|
|
|
|
Post by bowman on Sept 16, 2013 8:12:51 GMT
Thanks for the kind words Nick and Nige. I can't imagine that it will be finished for SMW, although maybe for 2014....
|
|
Deleted
Deleted Member
Posts: 0
|
Post by Deleted on Sept 16, 2013 9:18:01 GMT
Thanks for the kind words Nick and Nige. I can't imagine that it will be finished for SMW, although maybe for 2014.... The comment was a bit tongue in cheek Steve and I look forward to the progress and the finished model, hopefully on show at 'War and Peace' in 2014? |
|
|
|
Post by bowman on Sept 16, 2013 19:08:21 GMT
Ha ha ha ha ;-) I'm sure that it will be ready for War and Peace - I may even venture down there myself next year.
|
|
 Members' Forum")