|
|
Post by halifax on Apr 3, 2008 19:04:30 GMT
Hi All,
Which is the best way to tackle cockpit frames. I have the Matchbox Lysander1/32 and the cockpit frames are a bit like a greenhouse. They are quite raised but I don't have a steady enough hand to paint them freehand.
All best,
H.
|
|
|
|
Post by Paul Senter on Apr 5, 2008 11:37:27 GMT
H
I find the best way to do it is to follow these steps:
Dip the canopy in Kleer Floor Polish and let it drain onto a tissue, if you see it pool anywhere on the canopy, just lightly touch it with the tissue to wick it away.
Once fully dry, say overnight, then apply Tamiya Masking Tape using the edge of the tape to butt up against one of the 'frames'. Try not to over lap the tape too much as you wont see any of the frame underneath.
After applying the tape, rub it down on the edges with a cocktail stick or something similar and you should be able to see the outline of the frame through the tape.
Put a brand new blade in your hobby knife and very carefully cut the tape along the framework lines an area at a time. Again, very carefully pull the tape from the frame and you should be left with the 'glass' sections covered in tape.
Attach your canopy to the model either permanantly or temporarily but in the closed position and spray it with the interior colour of your cockpit.
Once that is dry you can the paint your aircraft with the canopy in place and the framework will be painted to match the rest of the aircraft.
Once you have finished and it is all dry, take your knife and again very carefully remove the tape from the windows and you should have some very clear windows surrounded by a sharp demarcation line of the framework.
If you find some paint has crept under the tape you may be able to gently scrape the paint away without damaging the canopy.
There are other masking tapes available, Tamiya is good as it is plentiful and low tack, some modellers use decorators masking film or bare metal foil. You should avoid the white paper masking tape you get from WH Smiths as it is not fine enough for canopy work. Its ok if you are masking off large areas and you need coverage.
Hope this helps.
Paul
|
|
|
|
Post by foxy on Apr 5, 2008 11:49:54 GMT
Thats great center104, thats exactly what I needed , but what if the canopy is open, say in three pieces, one back and one front with centerer over rear canopy, thats what I have set myself up for lol on a Yak7. I have sawed the canopy into this config, and now wish I had kept it intact.  Its not on the Aircraft yet though!! Is it the same as you have described but have to do it three times instead of once. |
|
|
|
Post by Paul Senter on Apr 5, 2008 11:58:15 GMT
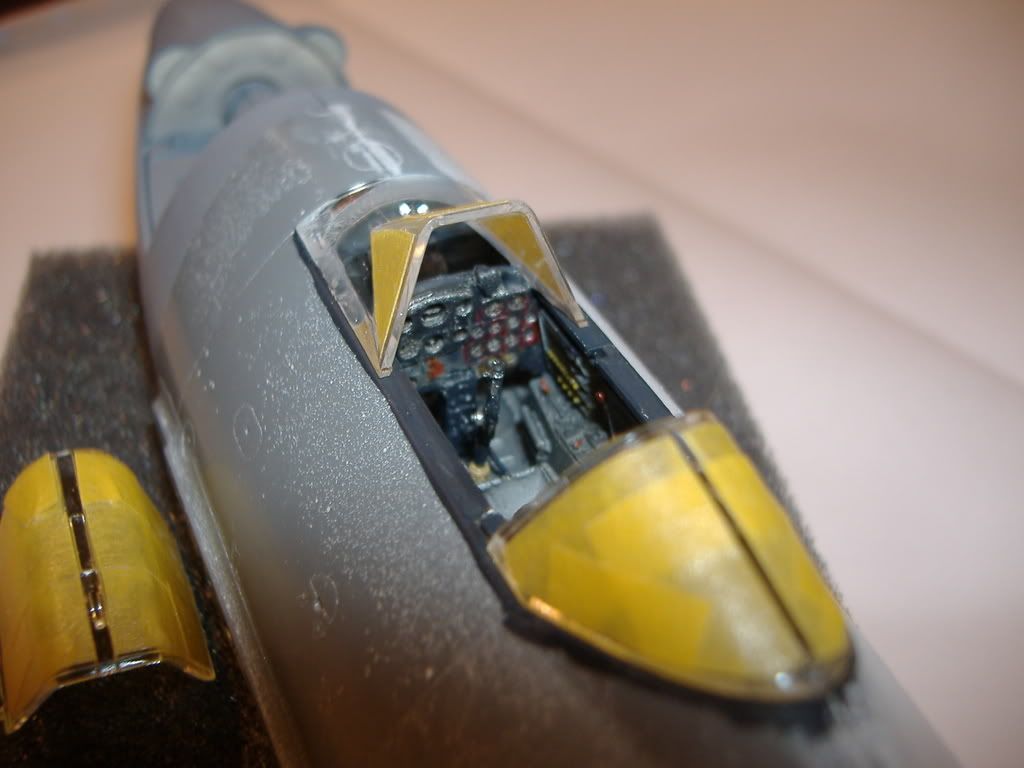
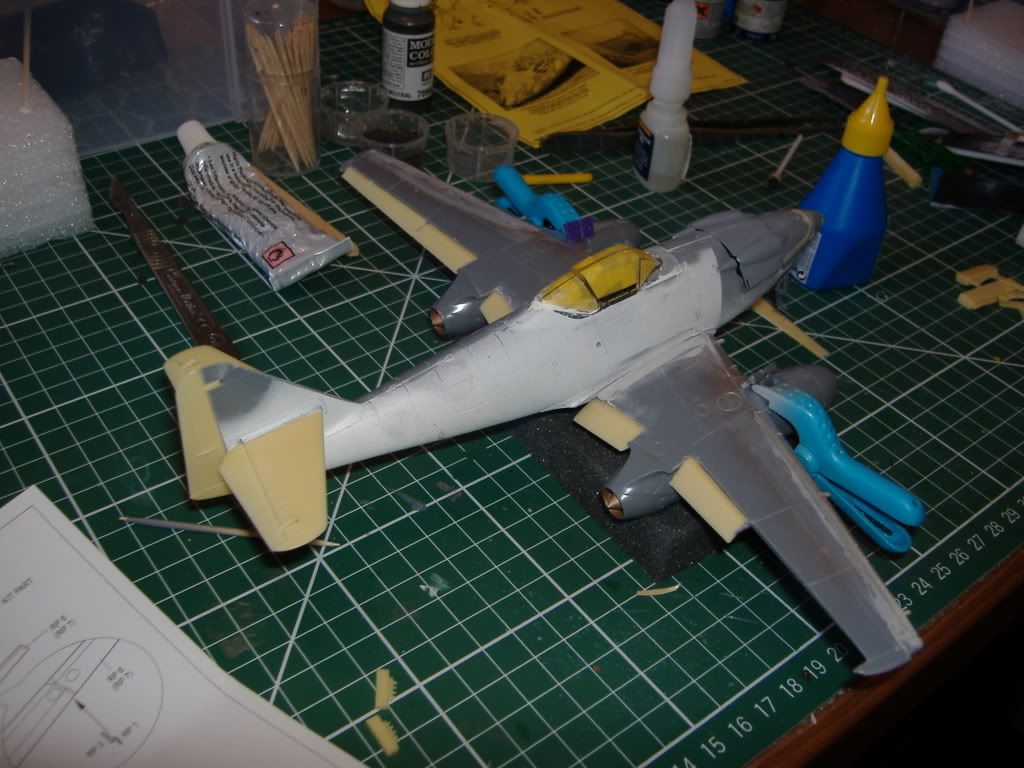
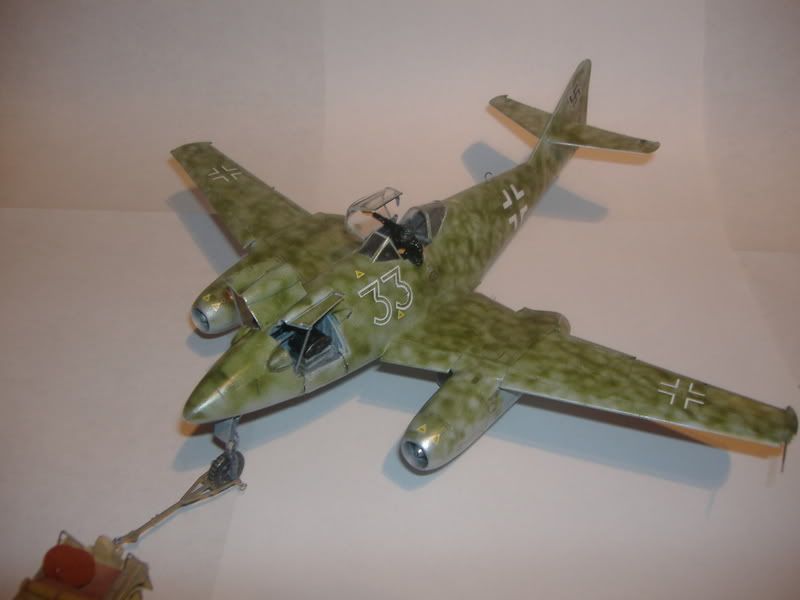
Foxy Just treat them as separate canopies. I am doing a 109 at teh moment with a front and rear portion of teh cockpit in place and the middle portion will be open. Masked and painted as described, permemnetly fixed the forward and rear portions and then temporarily fixed the middle section in the closed position to proted the cockpit from paint. Once all complete the middle portion can be removed, touch up the cocpit sills and then model now cleanly painted canopy in the open position. If you painted the canopy with the interiror colcours first you should see those through the plastic giving the impression of internal framework. Here is a 262 I completed last year - canopy prior to painting  Temporarily in place  And after  Hope thats clear. Paul |
|
|
|
Post by foxy on Apr 5, 2008 12:02:25 GMT
Thanks, clear as day light. 'phew', thats a load off my mind  At least I have not ruined it yet!!. |
|
|
|
Post by halifax on Apr 6, 2008 18:09:20 GMT
Great help. Thanks to everyone and the pics of the models were superb!
H
|
|
|
|
Post by oriel63 on Jan 5, 2009 20:40:33 GMT
Very helpful, many thanks.
|
|