Deleted
Deleted Member
Posts: 0
|
Post by Deleted on Feb 8, 2009 13:54:05 GMT
I've just had an hour or so in the workshop to clear up after the Jeep build, and to search for the table cloths so they can get a wash before Huddersfield. I'm in for a quick cuppa and then out for most of the day it seems as Mrs Gromit has just informed me that as our daughter has just had an operation on her hand and she's feeling in need if a little TLC, they would very much like to watch 'Mama Mia' if I didn't mind ...  ... well, I had decided on a day in the workshop anyway. Photos of what's inside the box and today's progress later on! |
|
Deleted
Deleted Member
Posts: 0
|
Post by Deleted on Feb 8, 2009 16:02:53 GMT
Warning!!! ... you could really enjoy building this kit! ... it's an absolute joy to put together. Here's the first shots ... 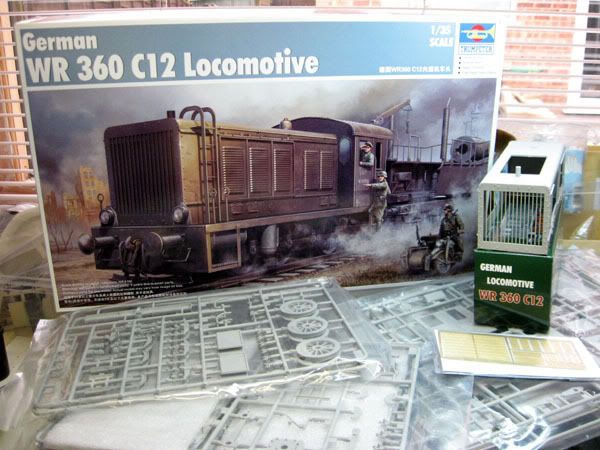 ... a box full of bits including a rail section with ballast base, although I doubt that the base will be used, I'll probably build the rails onto a wooden plinth. There's also a one piece top section for the loco and a few bits of photo etch. The kit parts are crisp and there's minimal flash which isn't really a problem, however, saying that, there are several sink marks on the inside of the frame rails ... 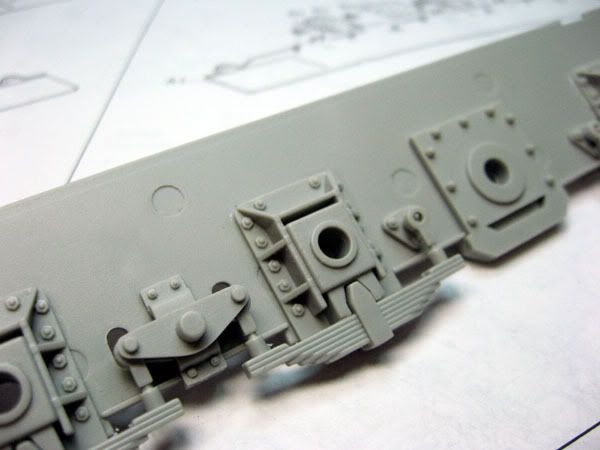 ... here's an inside view of the right frame rail and the sink marks may be seen quite clearly. Although they won't be seen on the finished model, and I chose not to bother filling them, those modellers who like to get every detail correct may wish to spend a couple of hours filling and filing. Here's a shot of the right frame rail just about complete as per stage 1 of the instruction sheet ... 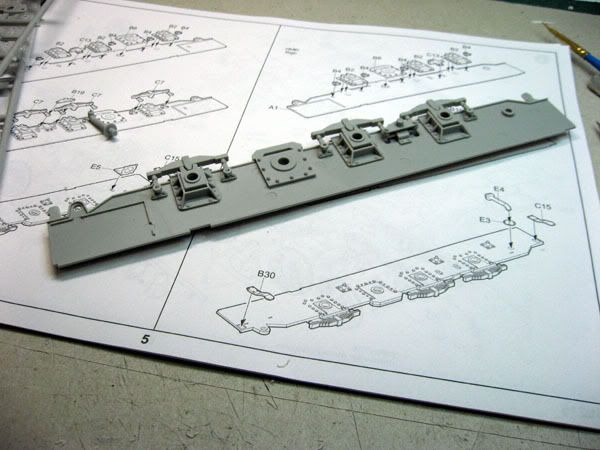 That's it for the moment, I'm off to glue a little more of the kit together, more photos later.
|
|
Deleted
Deleted Member
Posts: 0
|
Post by Deleted on Feb 8, 2009 21:06:11 GMT
The end of the first day's build ... 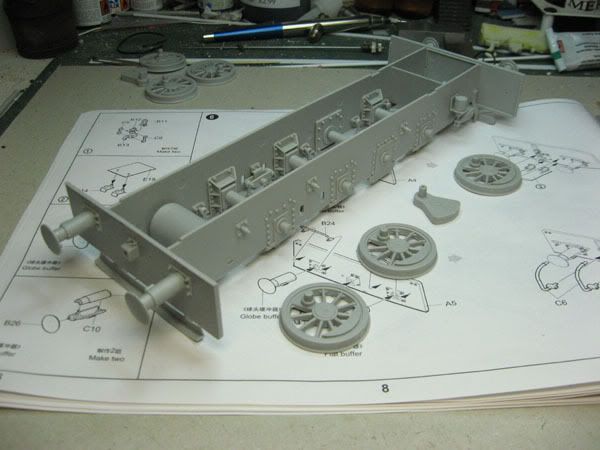 ... I've strayed from the build instructions as I want to put as much on the chassis before painting, which incidentally, won't be long. I'm leaving the wheels off for the moment which gives me a chance to paint them separately, I'll also paint the connecting rods at the same time before construction. |
|
Deleted
Deleted Member
Posts: 0
|
Post by Deleted on Feb 9, 2009 21:24:30 GMT
Another couple of hours in the workshop this evening, and I decided to shoot the first paint on the chassis ... 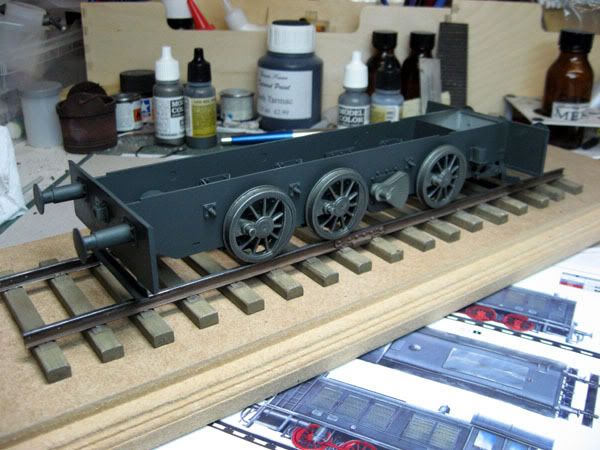 Having looked at the suggested colour on the chart supplied with the kit, (Vallejo 803 / Humbrol 111) which is a Blue / Grey, I had a quick firk through the paint stock and found a Black / Grey, Vallejo Model Air (71056), which seems a better colour to use for a shunter. The colour on the photo appears more of a blue than it really is. I'll weather the chassis with dust and dirt before fitting the wheels. I've painted the wheels with a thinned mixture of Vallejo (71056) Black / Grey and Vallejo (70865) Oily Steel, I'll give them a thinned wash of black ink once they are in place, simply to give a feeling of depth. |
|
|
|
Post by iansadler on Feb 10, 2009 18:57:50 GMT
Hi nick , it is looking very good cheers ian
|
|
|
|
Post by iansadler on Feb 13, 2009 19:14:40 GMT
Hi All, I got mine this afternoon , a little disapointed that there are no decals in the kit for Loco numbers or DR slogan on side of cab and safe working load traction pull sign in german . Also the ejector marks in the sides of the rails . Others wise very good cheers ian
|
|
|
|
Post by iansadler on Feb 16, 2009 12:12:54 GMT
|
|
|
|
Post by iansadler on Feb 16, 2009 12:15:30 GMT
|
|
Deleted
Deleted Member
Posts: 0
|
Post by Deleted on Feb 22, 2009 12:17:55 GMT
|
|
|
|
Post by NoelSmith on May 9, 2011 18:36:39 GMT
Trumpeter have certainly done their homework with regard to the best market for locomotive kits i.e 1/35th scale wartime locos.
It would be fantastic if they also looked at well known 'civvy' locos and we got 'The Mallard, Flying Scotsman or the Evening Star' plus to keep our American friends happy some of the steam streamliners of the 30's or the 'Big Boy'. Now wouldn't that be impressive in 1'35th.
|
|