ptcruiser
Moderator   Car & Motorcycle SIG Leader
Posts: 1,223
|
Post by ptcruiser on Jul 15, 2009 14:22:37 GMT
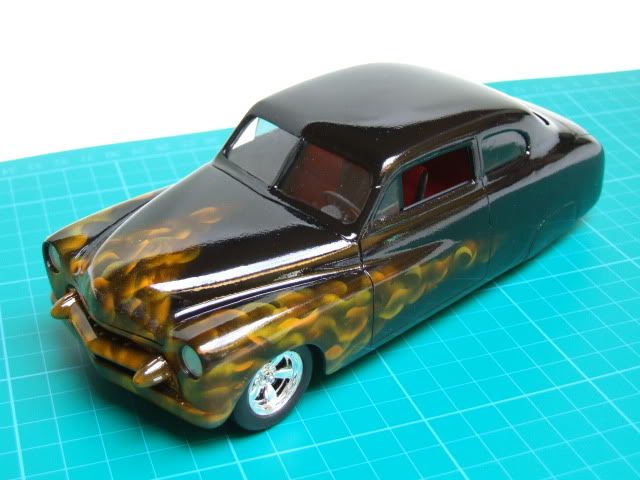
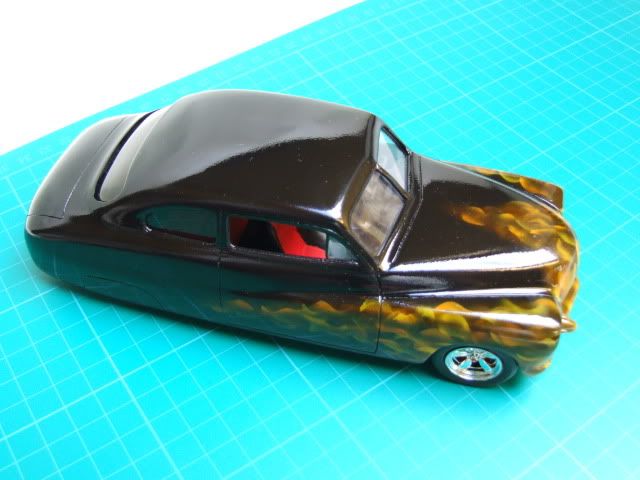
I've been playing with my airbrush and thought I'd have a go at some 'real' flames.... Used Humbrol gloss black as a base and then used a combination of Tamiya lemon yellow, orange, clear orange and clear yellow. Everything overcoated with Hiro/Zero two pack clear gloss. No rubbing out. (as you can probably see). I'm quite pleased for a first attempt... Enjoy    The car itself was a 'gimme' from a fellow Rutlander, which was stripped back to bare plastic to start again. Rich |
|
|
|
Post by The Hooded Claw on Jul 15, 2009 17:15:41 GMT
Nice
I've often thought about doing something similar. You'll have to tell me how sometime.
H
|
|
|
|
Post by seangb on Jul 15, 2009 19:20:01 GMT
d**n I'm impressed Rich that has to be one lovely looking paint job
|
|
alfadriver
Kit Basher
   'It's a Triumph!'
Posts: 125
|
Post by alfadriver on Jul 15, 2009 20:42:37 GMT
Rich,
nice paint job and an interesting effect. Would you mind telling what airbrush you used and a bit of descriptive on the method.
Cheers, Steve.
|
|
ptcruiser
Moderator   Car & Motorcycle SIG Leader
Posts: 1,223
|
Post by ptcruiser on Jul 16, 2009 9:22:50 GMT
Hi Steve Here’s a brief run down. I use a Harder & Steenbeck Evolution airbrush. My compressor is set at 20psi, but the brush has finite adjustment on both airflow and paint flow. I used both the 0.15mm and 0.4mm needles that came with the brush at some point. For these flames I found that the air and paint had to be wound down to get the tight pattern. Next thing I did was to try and find some instruction on the www and it seems ‘the’ expert is Chuck Bauman (search on True Fire). He has produced DVD’s and importantly full size templates for use on 1:1 subjects. I tried to copy the templates into 1:24/5 but to be honest they are way too small to handle, so I produced something for myself using plastic card (20 thou?), trying to incorporate various curves and flows. In hind site I should have had more concave shapes, maybe this will be the next evolution. One useful aspect was that despite being a mirror image the reversibility aspect was very useful.  Firstly, after the black base coat, I laid down clear orange and then clear yellow flames but on consultation with my expert (critical teenage daughter!!*) the decision was reached that the flames were not opaque enough, so moved on to the solid yellow and solid orange, whilst not obliterating all the clear flames underneath. I decided another thin clear orange on top of that just toned the yellow down a touch. To give the flames a bit better ‘edge’ I went back to the Humbrol gloss black to redo the edges and knock out some of the overspray. I did try to spray on a Tamiya spray stand, but it moves too much so it’s best to tape it to prevent it rotating. Brief but I hope it helps. I will try it again sometime, but the learning curve is steep and I know what I want to try next time… Rich * I must add it was constructive  |
|
alfadriver
Kit Basher
   'It's a Triumph!'
Posts: 125
|
Post by alfadriver on Jul 19, 2009 16:56:17 GMT
Thanks for the info Rich. I have only tried flames once, did it on a '66 Buick lowrider. Front of car was sprayed with orange gold nail polish and then masked off, I cut the flame pattern with a scalpel then lightened the remaining nail polish colour with silver.
It came out OK but very subtle - more subtle than I wanted.
Down side was the knife marks stayed in the paint job.
Pre-cut mask is the only way to go, thanks for posting the pics it is a great help. I have the Revell chopped Mercury and will probably go for a similar affect as yours on that. Love playing with the airbrush, mine is only a cheap ebay bought copy of an Iawata but it performs quite well. Perhaps I would change my mind if I ever get to use a 'real' airbrush?
Regards, Steve.
|
|
|
|
Post by voyager on Jul 19, 2009 21:11:14 GMT
Rich, if you want true flames, see the master (and originator!) Mike Lavallee of killer Paint www.killerpaint.com/gallery.htmlas seen on Overhaulin' Monster Garage etc. His DVD's and stencils are expensive but don't look too difficult to copy, obviously need to be quite small for models. Mike's technique seems to be to paint layers with white paint then go over these with transparent colour, first layer red, then orange then yellow (unless you want blue flames!), finishing with white highlights. A very good first effort though ;D |
|
dingo
Moderator   Dog Day Afternoon
Posts: 559
|
Post by dingo on Jul 21, 2009 7:18:01 GMT
Nice paint job luv the flames and the polish .
Dingo
|
|
ptcruiser
Moderator   Car & Motorcycle SIG Leader
Posts: 1,223
|
Post by ptcruiser on Jul 21, 2009 15:41:02 GMT
Thanks Dingo, no polish tho, just Zero Paints 2-pack clear coat. Voyager, I think I may have stumbled across the Lavalee's work at some point. I did try with the clear coats first, but I didn't feel that I was getting the depth I was looking for, I may well have taken far more paint than something this size could get away with?? I am tempted totry blue flames in the future tho...  Rich |
|
dingo
Moderator   Dog Day Afternoon
Posts: 559
|
Post by dingo on Jul 25, 2009 1:21:05 GMT
Rich, that's great then I must give that 2 pack stuff a try but I do know you've got to get it right otherwise it turns out a complete bomb job , thanks for that info tho. Dingo  |
|