|
|
Post by iansadler on Nov 27, 2011 19:06:21 GMT
Hi all , I am building a new T 55 T arv at the moment . I had to replicate the cargo sides to the rear deck . If I made them from thin plastic , the inside would be smooth not like the real item. So I made masters to the long and short sides out of plastic sheet and rod and then replicated them with aluminium sheets bent over and burnished with a cocktail stick as per my workshop demmos at the nationals . All I had to do then was add the braces from plastic strip . I also added damage to the sheet so as to look like the ref photo I was using . I am sorry I unable to scan as it is copyrighted to English russia .com see Scan for the results . cheers ian 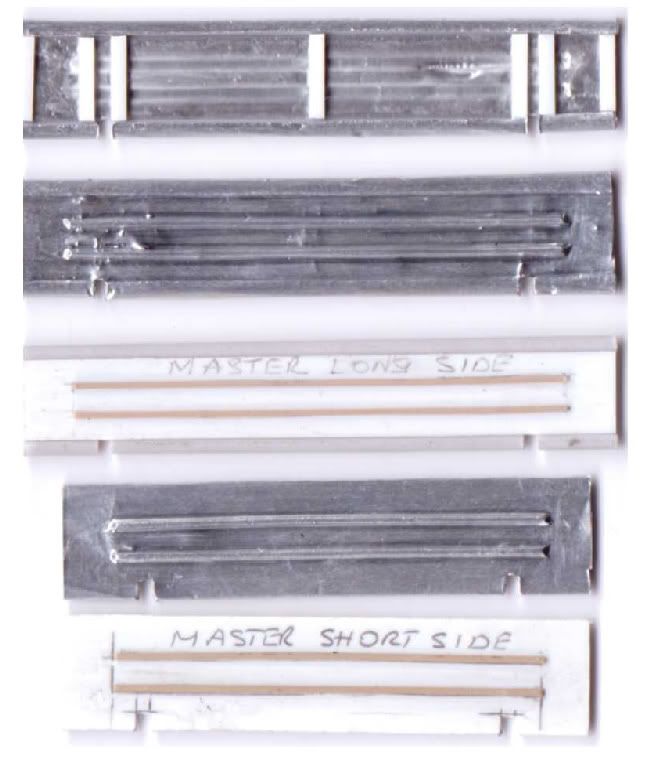 |
|
|
|
Post by iansadler on Nov 29, 2011 9:51:32 GMT
Hi all , while waiting for the t 55 Arv mods to dy out . I built the pedistals x 4 they are made as per the ref photographs. The second layer of tanks are stored on huge pedistals made from steel tube with a base plate at top and bottom . The base plates are stiffened by welding in triangular fillets at the corners . All my welding was done with slaters plastic rod glued on and then when dry pyrograved to replicate welding . The painting was by acrylics and I used chocolate brown , red leather , glossy black , prussian blue and silver . It was by using wet on wet , next dry brushing and lastly dotting with and old brush in a stipple maner . I ended up with the result in the photos . Only 3 more to do and like real life they will all be different . 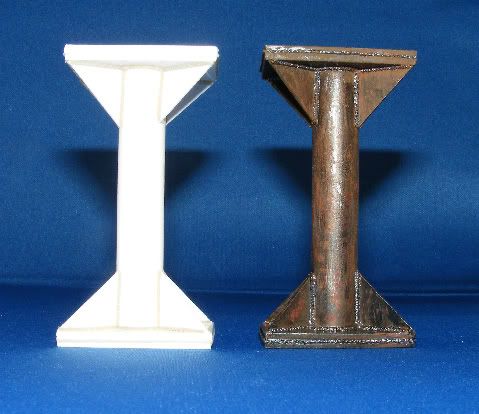 |
|
|
|
Post by iansadler on Nov 29, 2011 9:59:22 GMT
Hi all a better close up of the weathered pedistal cheers ian 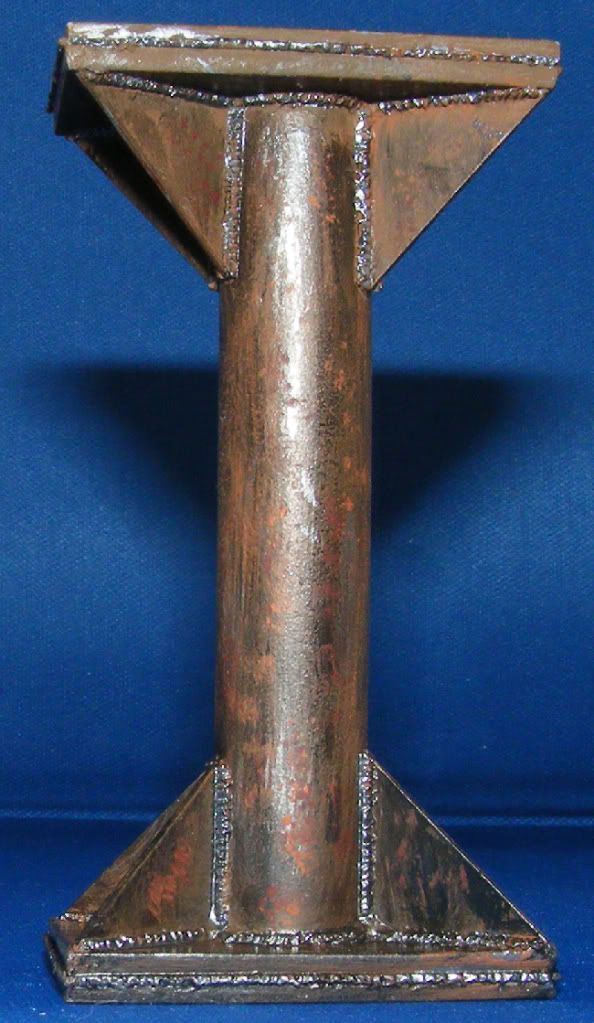 |
|
ptcruiser
Moderator   Car & Motorcycle SIG Leader
Posts: 1,223
|
Post by ptcruiser on Dec 1, 2011 22:18:01 GMT
Now that Ian, looks the part indeed. Superb.
Rich
|
|
|
|
Post by iansadler on Dec 2, 2011 19:55:26 GMT
Hi rich , many thanks for the comments , now onto the next part scratchbuilding the rear spade . i am lucky as i have 5 original t 55 Arv manuals . So all i need to do is scan the page for ref work . i have done this in two parts for anyone who wants to build one . part 1 cheers ian 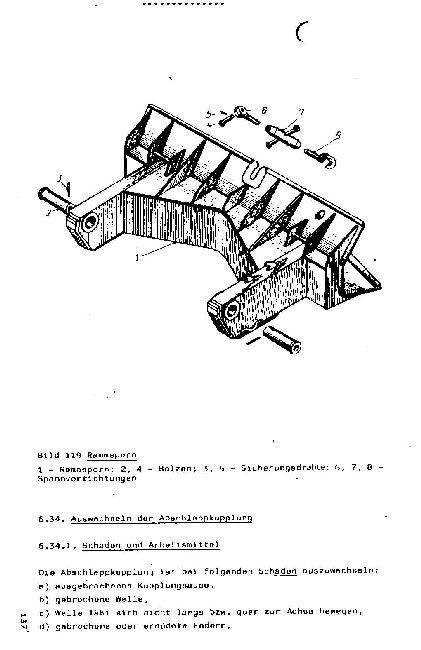 |
|
|
|
Post by iansadler on Dec 3, 2011 11:39:33 GMT
Hi part two , if anyone wants a full sized scan , email me at ian.sadler3@ntlworld.com and title it arv spade , cheers ian 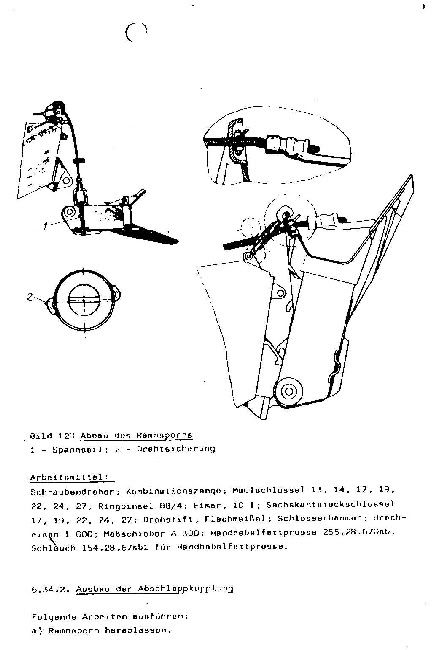 |
|
|
|
Post by iansadler on Dec 10, 2011 11:32:19 GMT
Hi all . I am sorry for lack of updates but this due to the rear spade taking 20 hours work spread on 10 days . This was to allow drying time before the next stage . In all 170 seperate parts have been made . The red rod is slaters and it will represent welding when completed . I still have the underside to add the ribs and welding . cheers ian 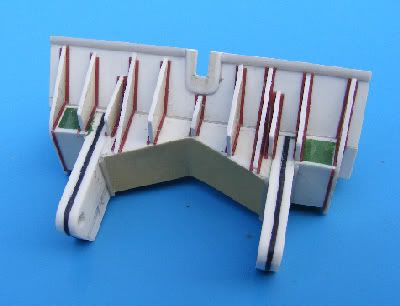 |
|
|
|
Post by iansadler on Dec 10, 2011 11:38:35 GMT
hi all , this is the underside ready for the next stage , ribs and welding . cheers ian 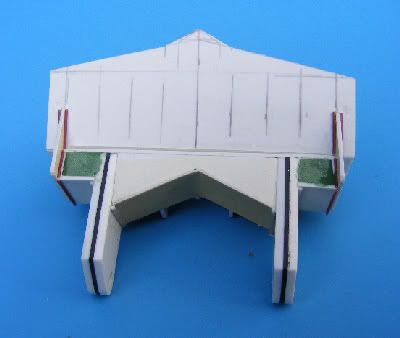 |
|
|
|
Post by milanvopelak on Dec 12, 2011 11:28:13 GMT
|
|
|
|
Post by milanvopelak on Dec 12, 2011 12:02:50 GMT
|
|
Deleted
Deleted Member
Posts: 0
|
Post by Deleted on Dec 12, 2011 12:05:50 GMT
Superb information Milan, many thanks for sharing.
|
|
|
|
Post by iansadler on Dec 12, 2011 19:04:09 GMT
Hi milan , many thanks for the info . it looks like the drawings are from the same set of manuals I have on hand all 5 ex NVA dated 1983 -5 .
i am still sorting out the info for you on the churchill arvs , little busy at the moment but should be in contact by the end of the week . cheers ian
|
|
|
|
Post by iansadler on Dec 16, 2011 19:12:37 GMT
Hi all , i managed to complete the rear spade today , so this is the top view . cheers ian 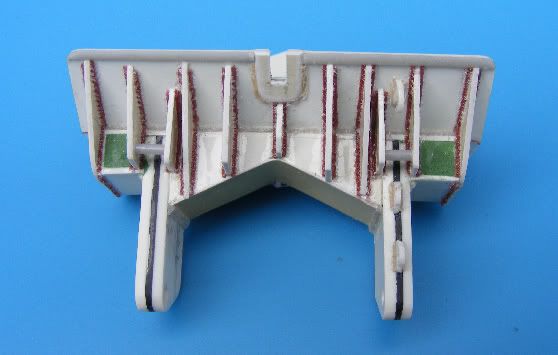 |
|
|
|
Post by iansadler on Dec 16, 2011 19:17:27 GMT
Hi all , this is the underside of the rear spade . I now think I have wasted my time as it may not be visable on the finished model . 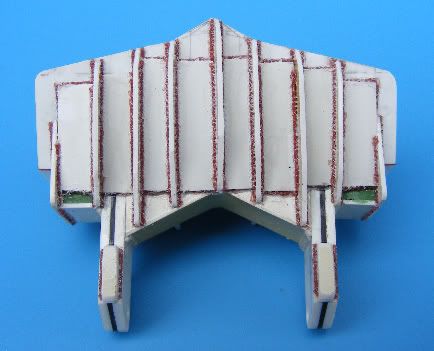 |
|
ptcruiser
Moderator   Car & Motorcycle SIG Leader
Posts: 1,223
|
Post by ptcruiser on Dec 16, 2011 19:44:36 GMT
But YOU (and now we) know it's there Ian  Rich |
|