|
|
Post by sandbagger on Apr 20, 2019 16:27:52 GMT
Hi all, A few more things added: Fuel lines from the underside of the fuel tank to the fuel gallery behind the instrument panel. Grease line from the pilot's 'screw down' pump to the engine mounted water pump. Fuel drain line from the underside of the fuel tank to outside of the fuselage bottom. Oil line from the oil tank (in the fuel tank) to the engine driven oil pump. Now it's onto the wiring up the magnetos and adding the throttle and spark advance (ignition timing) controls, Mike 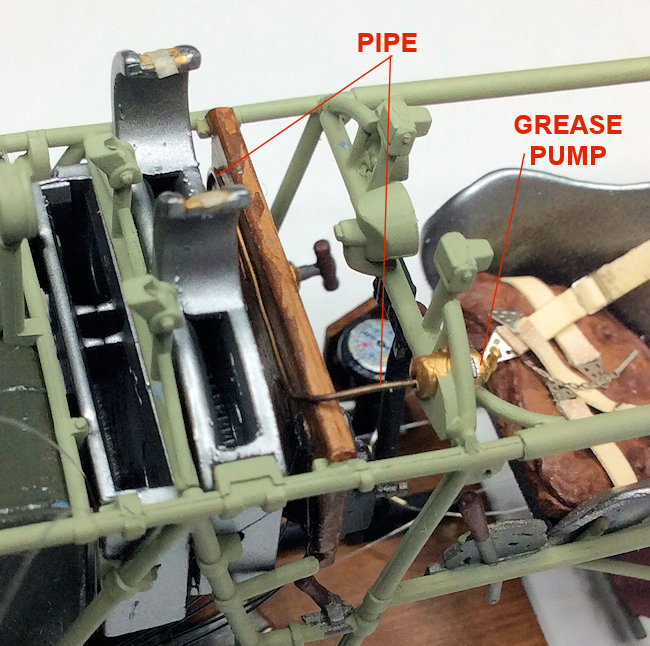 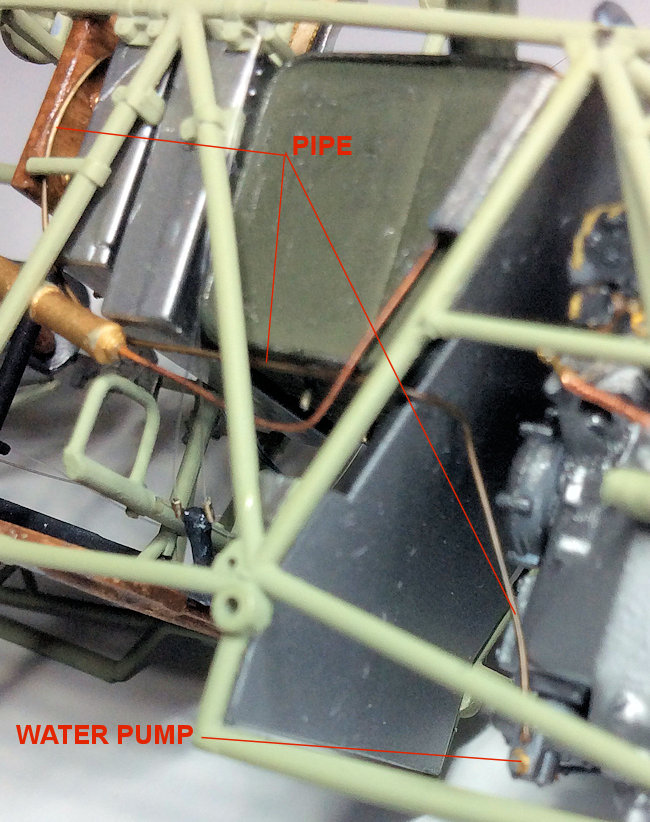 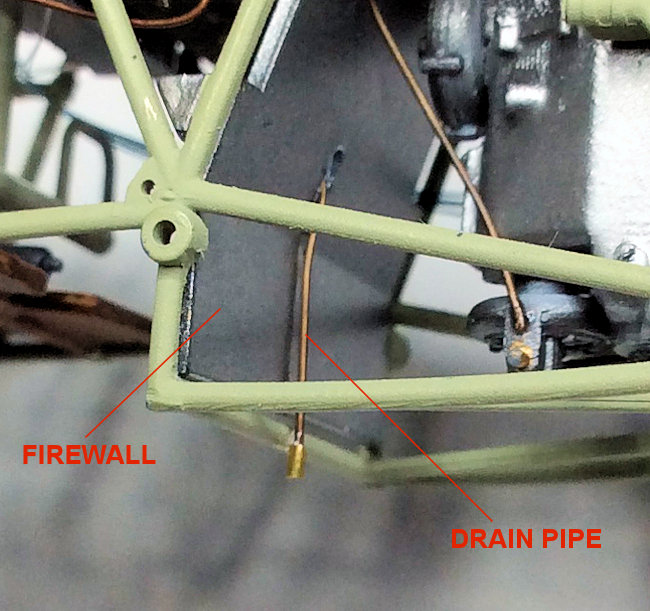  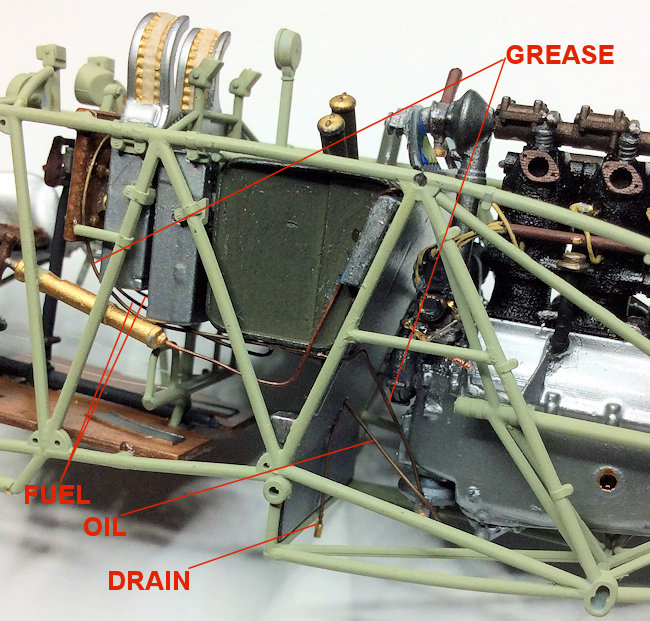 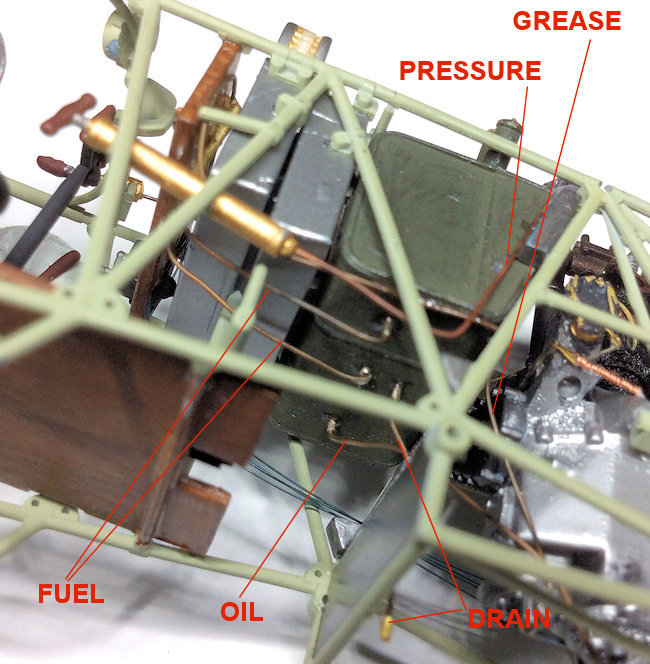 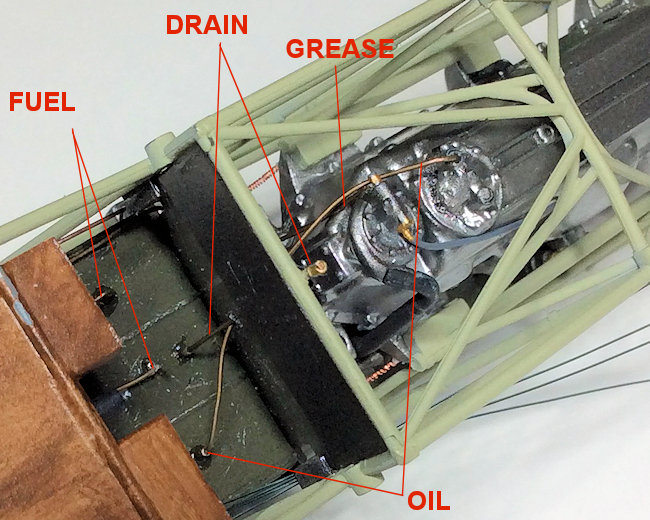 |
|
|
|
Post by sandbagger on Apr 21, 2019 16:40:09 GMT
Hi all, Tachometer drive added from gun synchronization mechanism. The two carburetor fuel feed pipes from the gallery behind the instrument panel, The two machine gun trigger cables from the control column to the gun synchronization mechanism, Mike 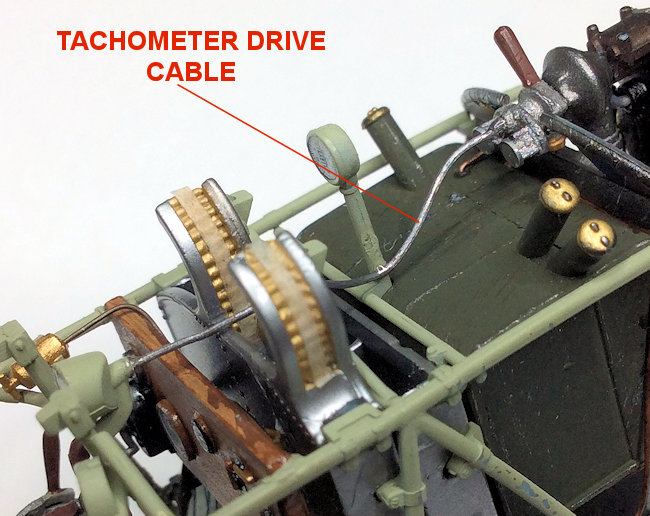 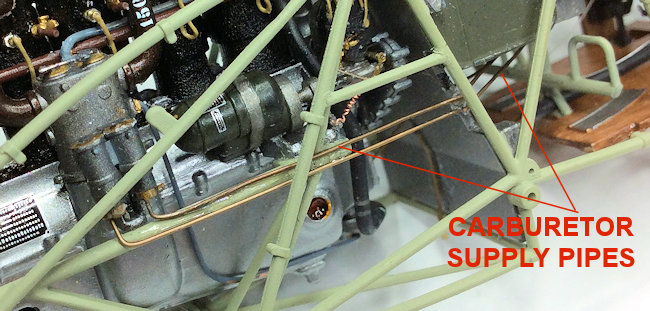 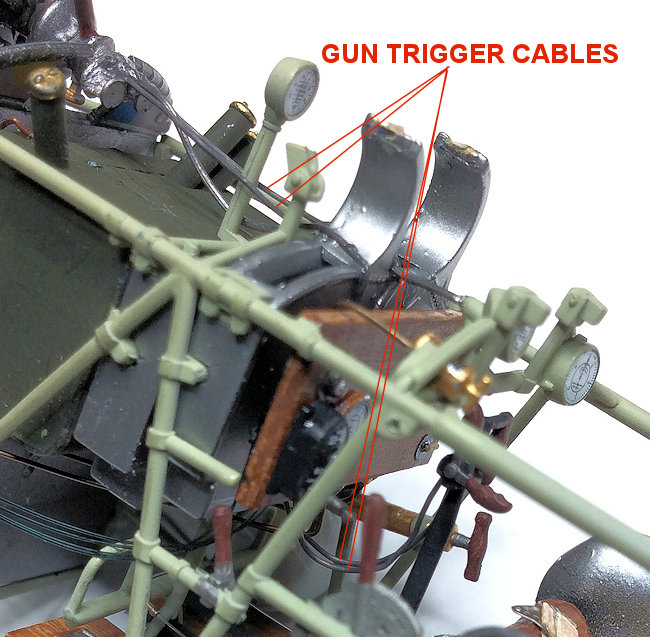 |
|
|
|
Post by sandbagger on Apr 22, 2019 12:50:03 GMT
Hi all, Leads fitted from the magneto starter behind the instrument panel to both engine driven magnetos, Mike 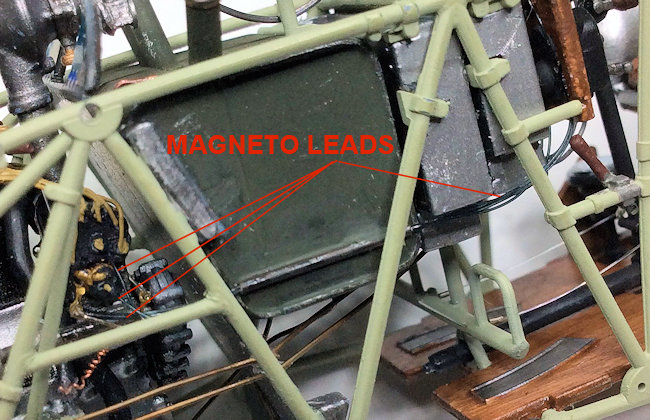 |
|
|
|
Post by sandbagger on Apr 22, 2019 17:58:20 GMT
Hi all, 'Spark Advance' control (Ignition Timing) fitted from cockpit lever to engine magnetos linkage rod. Made from 0.3 mm brass tube, 0.1 mm Nickel-Silver rod and scratch link. Mike 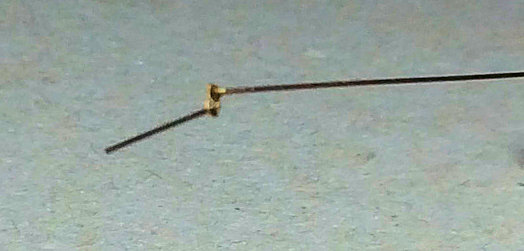 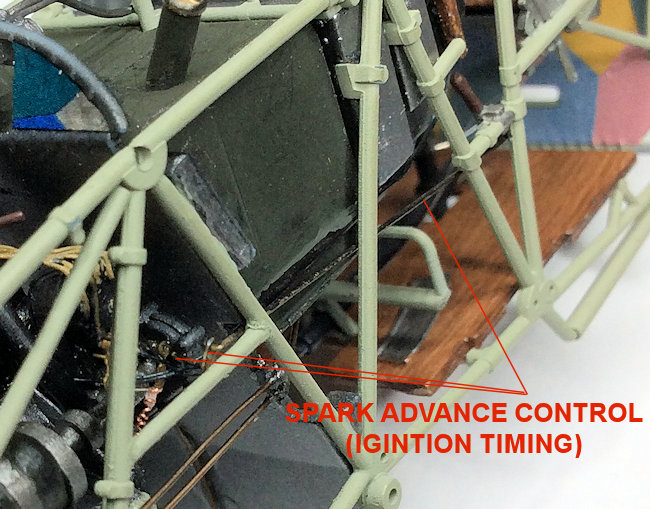 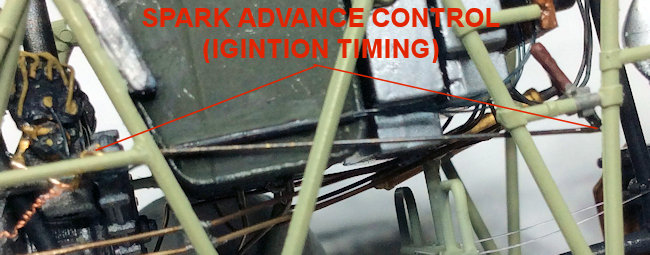 |
|
|
|
Post by sandbagger on Apr 23, 2019 17:11:12 GMT
Hi all, Throttle control run added from pilot's throttle lever to the linkage on the dual carburettors. Scratch made from 0.1 mm Nickel-Silver rod and 0.3 mm brass tube with the pivot lever created from 'spare' photo-etch, Mike 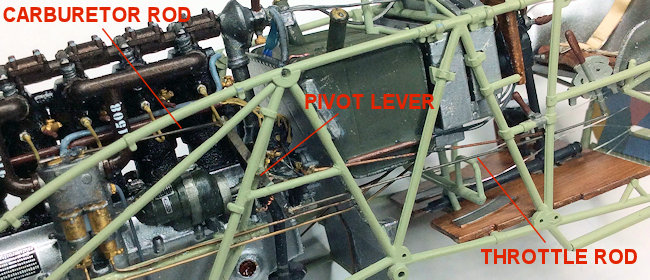 |
|
|
|
Post by sandbagger on Apr 23, 2019 19:34:29 GMT
Hi all, Control cable for the hand operated throttle added. Lead wire 0.2 mm diameter, from hand throttle on the control column, down and under the floor, up side frames and across the throttle quadrant. Then down the other side, under the floor and back up to the hand throttle. Mike 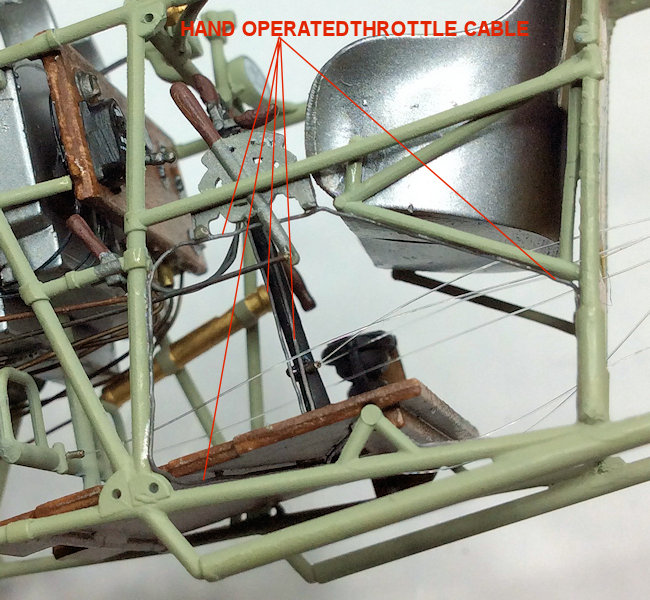 |
|
|
|
Post by sandbagger on Apr 24, 2019 18:00:27 GMT
Hi all, Generator lead and seat connector fitted. Generators were not standard fit, but were installed to some aircraft to power heated flying suits later in WW1 and if carried, wireless transmitters. Made from 0.4 mm diameter Nickel-Silver micro-tube and 0.148 mm diameter match line. Mike 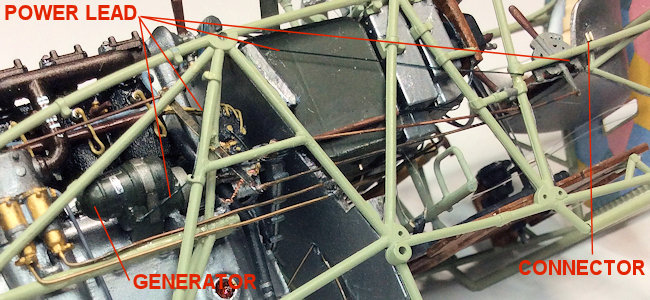 |
|
|
|
Post by sandbagger on Apr 26, 2019 13:13:38 GMT
Hi all, Radiator with photo-etch front and rear cooling core and scratch made pilot operated flap (to control engine cooling), Mike 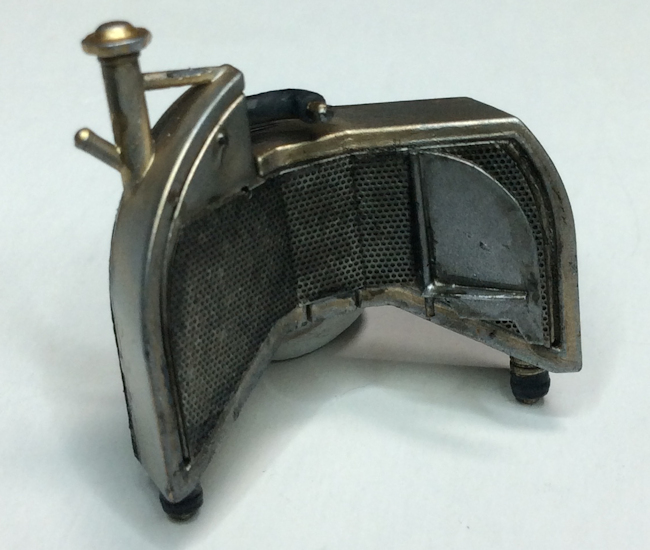 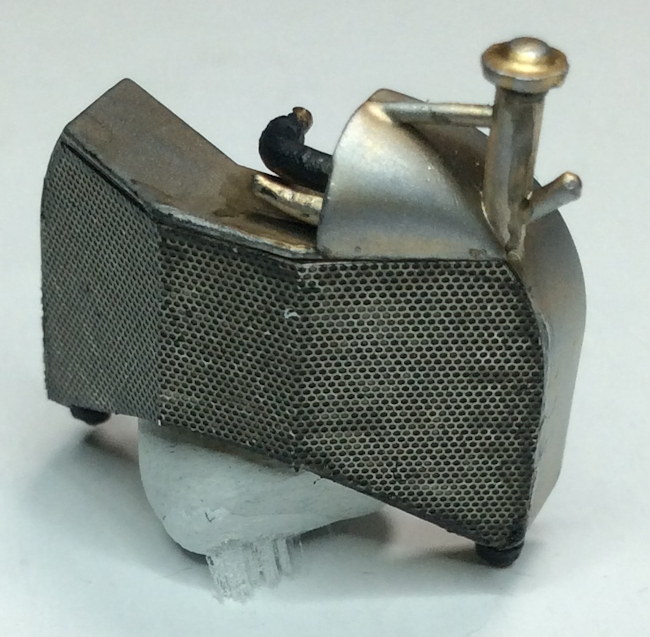 |
|
|
|
Post by sandbagger on Apr 27, 2019 12:58:16 GMT
Hi all, Radiator flap control now fitted. Made from micro-tube (0.4 mm and 0.1 mm diameter), photo-etch pulley and 0.125 mm copper wire for the loop handle, Mike   |
|
|
|
Post by sandbagger on Apr 27, 2019 22:03:23 GMT
Hi all, Radiator side stays fitted, Mike 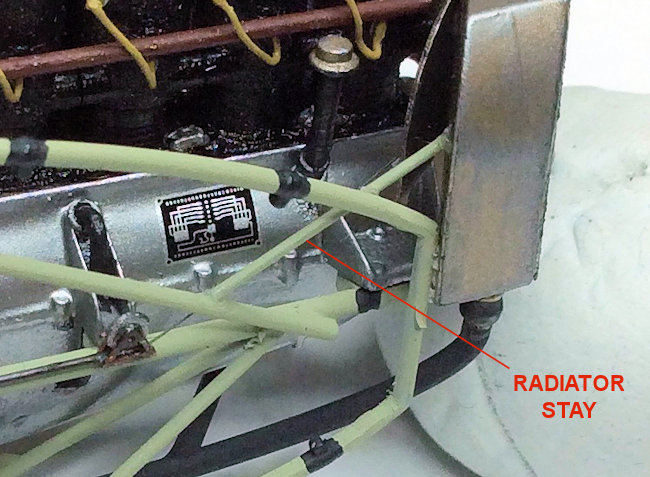 |
|
|
|
Post by sandbagger on Apr 29, 2019 19:01:47 GMT
Hi all, The front end gas been weathered up a bit to keep it aligned with the associated Fokker D.VII model. It's ready now for cross brace rigging and the fitting of the twp machine guns with their synchronization drive cables, Mike 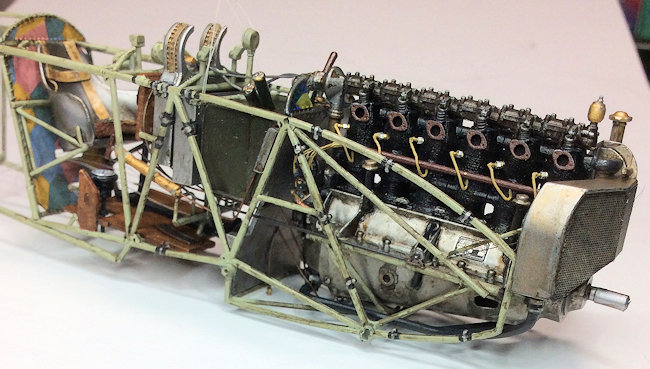 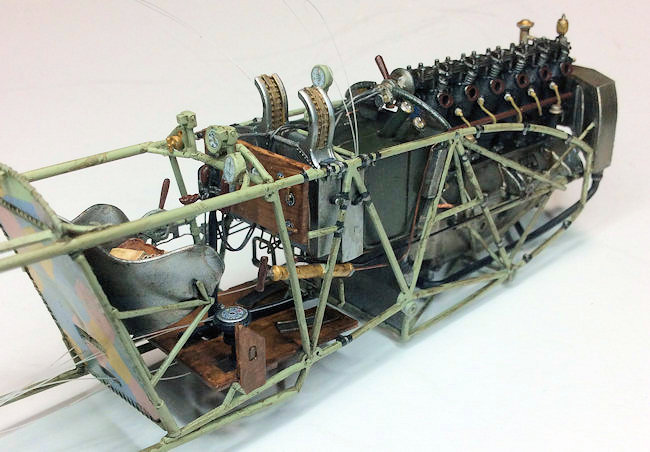 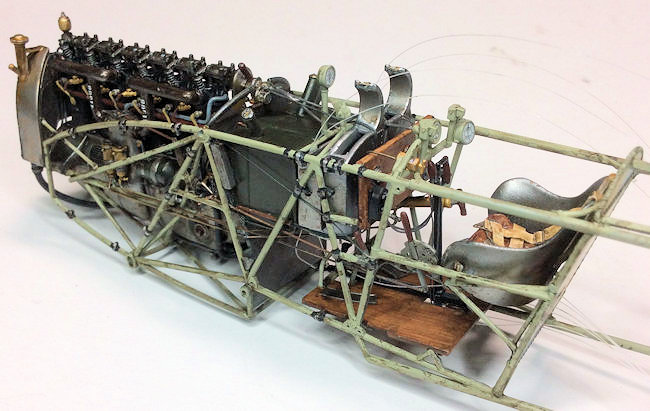 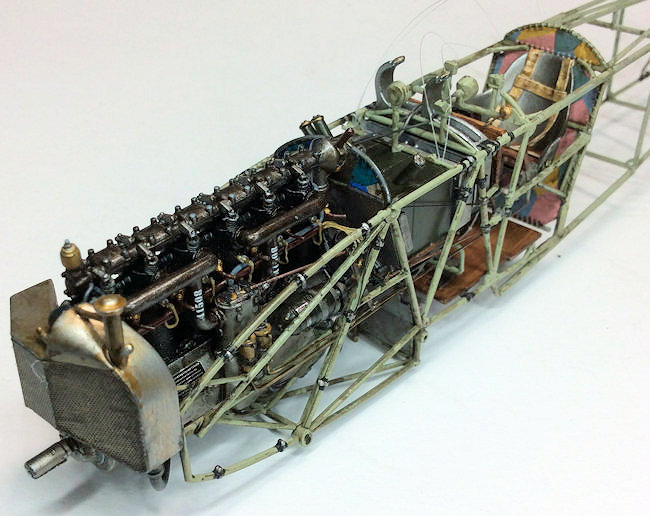 |
|
|
|
Post by sandbagger on May 1, 2019 19:28:57 GMT
Hi all, Rigging has started now. Difficult to make out some of the rigging as I had to tie back the flight control lines as they were getting in the way. So far: Double bracing across the top of the fuel tank. Double bracing across the underside of the cockpit floor (2 sets). Double bracing across the frame bays adjacent to the pilot's seat. Double bracing across the rear of the pilot's seat support frame. Double bracing across each vertical fuselage frame. Done with 0.08 mm Mono-filament, 0.4 mm Nickel-Silver tube and 1:48th scale turnbuckles ('Gaspatch'). The same needs to done on each of the frame bays on each side of the fuselage as well as those under and on top of the fuselage. Mike 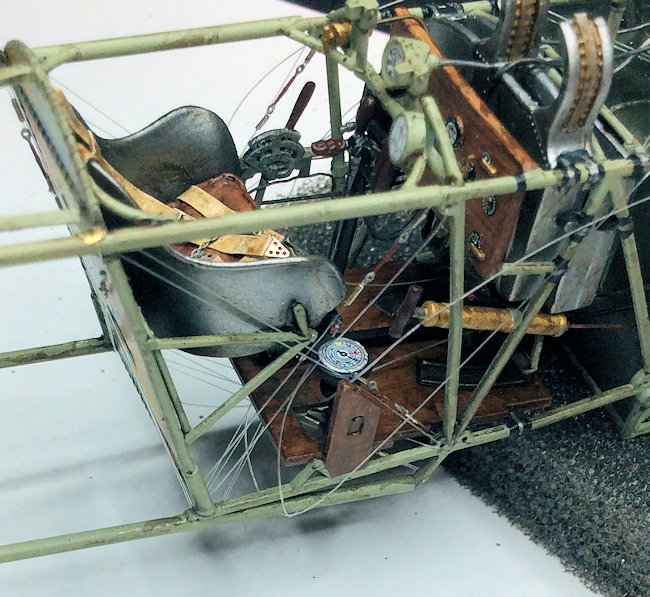 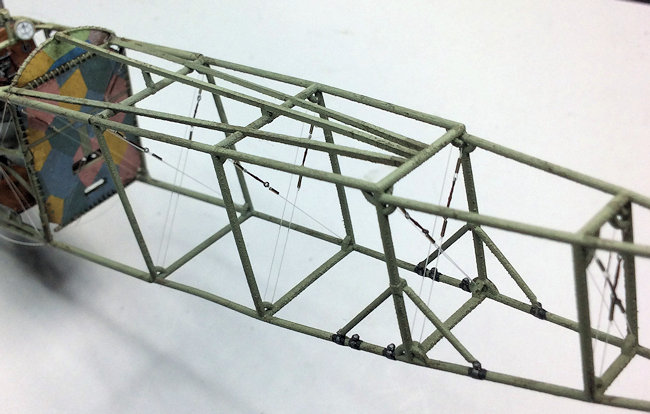 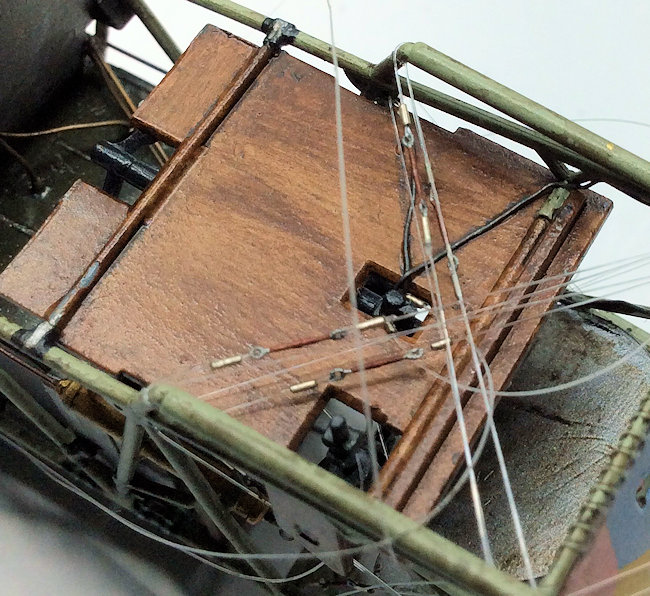 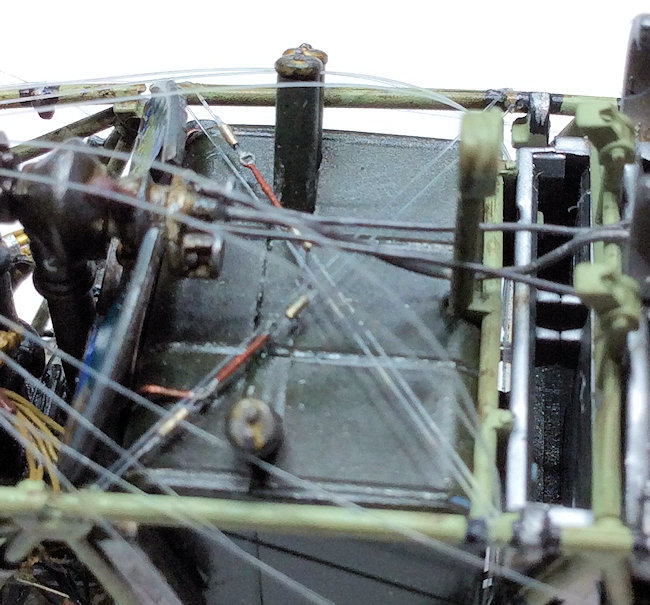 |
|
|
|
Post by sandbagger on May 2, 2019 16:38:11 GMT
Hi all, The top fuselage frames are cross braced. Onto the sides now, then the make and fit the top decking panel and finally cross brace the bottom fuselage frames, Mike 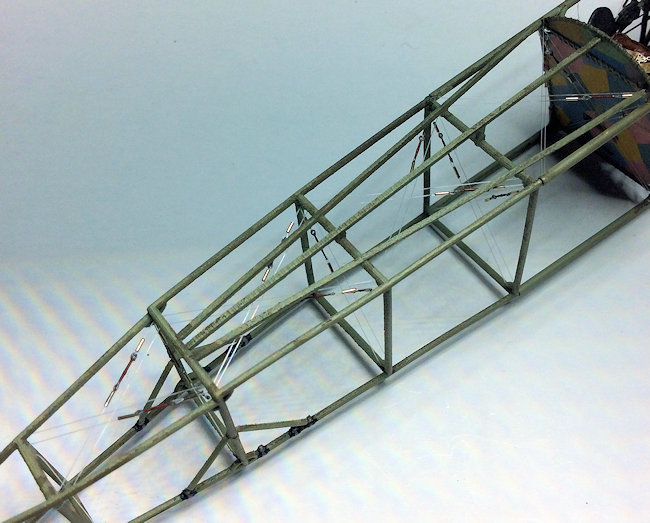 |
|
|
|
Post by sandbagger on May 3, 2019 23:24:48 GMT
Hi all, The fuselage side frame bays are now cross braced. Now to make and fit the top decking panel and finally cross brace the bottom fuselage frames, Mike  |
|
|
|
Post by sandbagger on May 4, 2019 14:28:52 GMT
Hi all, The fuselage rear decking panel fitted. Now to cross brace the bottom fuselage frames, then it's onto the tail skid assembly, Mike  |
|
 Members' Forum")


