|
|
Post by sandbagger on May 7, 2019 12:58:27 GMT
Hi all, The fuselage bottom cross bracing is done, which completes the fuselage bracing. Also the tail skis has been fitted, with 0.125 mm copper wire suspension springs and 0.2 mm lead wire retention cable. Now it's onto making the cockpit surround padding and fit the two modified 'Gaspatch' machine guns with their synchronization cables, Mike 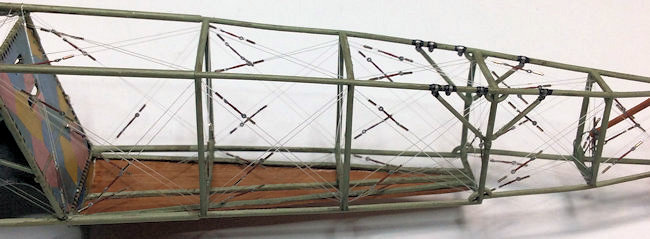 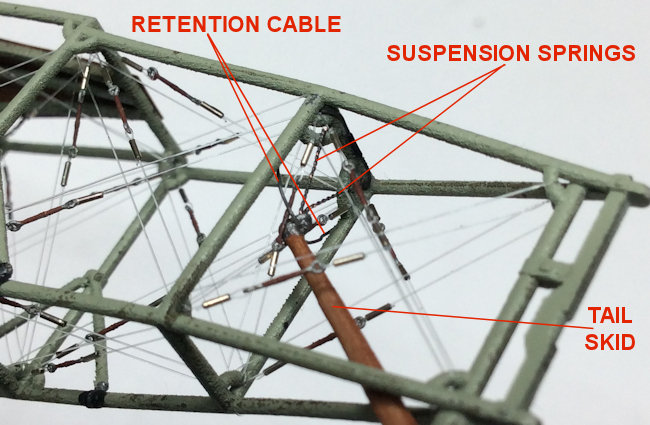 |
|
|
|
Post by sandbagger on May 8, 2019 20:11:57 GMT
Hi all, I realized that the fuselage rear decking panel was incorrect. I made it such that the front edge butted up against the rear of the pilot's seat support frame. In fact the decking seems to have passed over the seat frame, forming the rear cockpit surround, then onto the top of the cockpit side frames. After several tries and five broken bracing wires, I think it's just about there now. Now onto making the padded rim to fit around the cockpit rear decking and after that, the machine guns, Mike 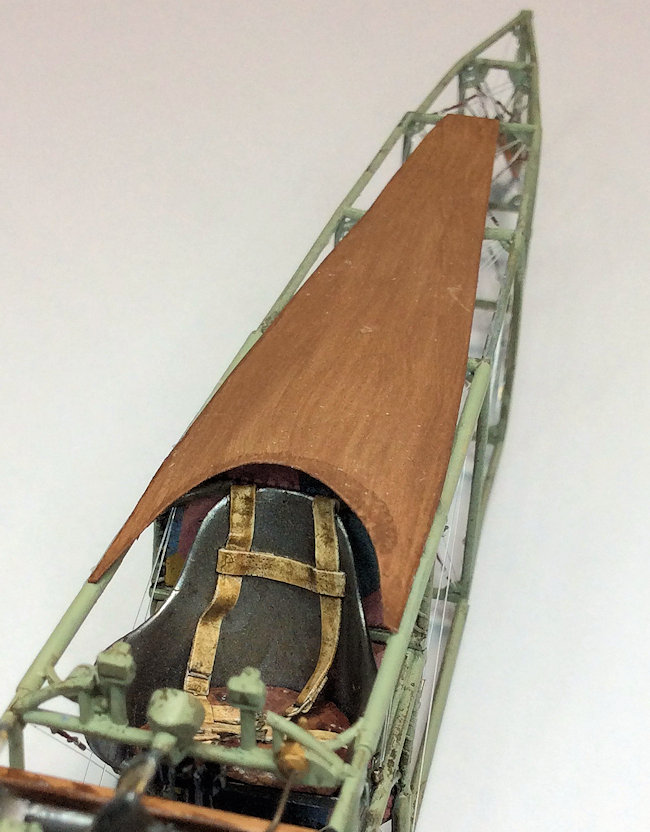 |
|
|
|
Post by sandbagger on May 10, 2019 18:25:36 GMT
Hi all, Both machine guns are now fitted along with their synchronization flexible drives. These drives are connected between the bottom of the gun breech blocks and the gun synchronization mechanism, fitted to the rear of the engine cam shaft, Mike  |
|
|
|
Post by sandbagger on May 13, 2019 16:58:43 GMT
Hi all, I've added the padding rim around the fuselage decking panel and onto the top of the cockpit side frames. This was done using 2.0 mm diameter plastic tube which was sanded to form a grip for painting. Then it was slit along one side and located over the decking and secured in position with thin CA adhesive. Finally it was primed, painted 'Humbrol' leather (62) and 'Tamiya' Hull Red (XF9), sealed then given a clay wash and finally sealed with 'Alclad' Light Sheen (ALC-311). Mike 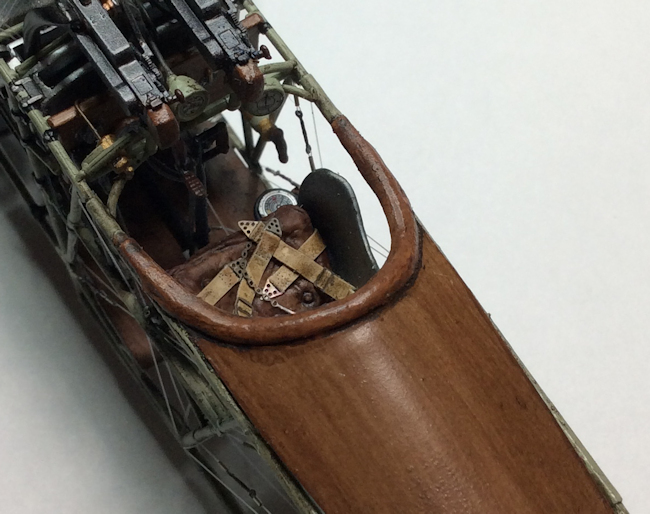 |
|
|
|
Post by sandbagger on May 13, 2019 20:06:13 GMT
Hi all, Tail unit assembled from the 3D printed parts. Very fragile once separated from the support frame, so should prove interesting. The elevator was missing the inboard trailing edge profile, presumably missed during printing process. Therefore I had to make the profiles using 0.8 mm brass tube. Mike 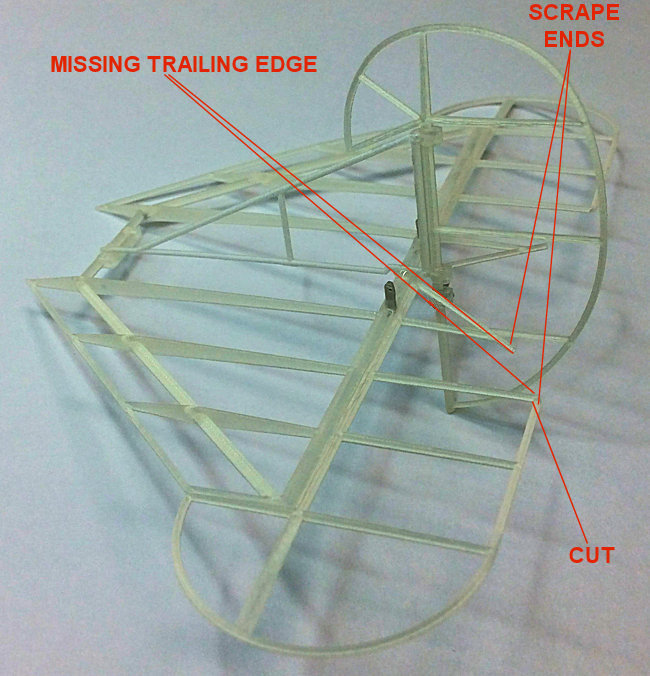 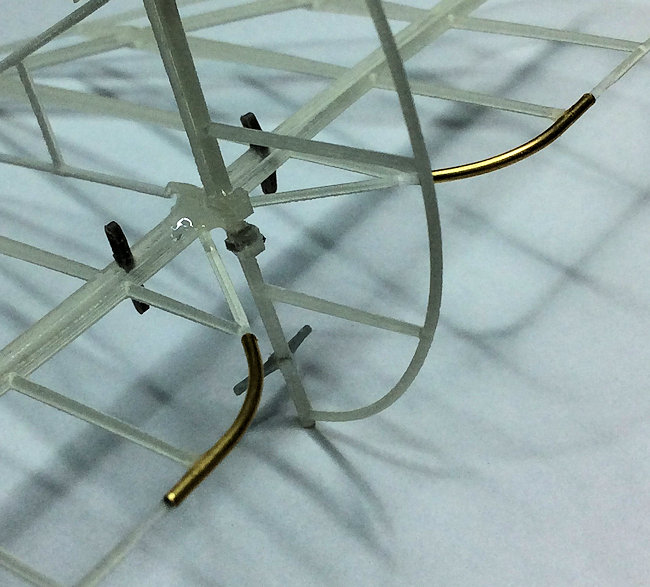 |
|
|
|
Post by sandbagger on May 16, 2019 16:19:35 GMT
Hi all, Well the fuselage is completed, apart from fitting the engine exhaust and the propeller. The Rudder and Elevator control runs have been connected with the turnbuckles under the pilot's seat. Also the tail plane to fin bracing cable. The entire fuselage has been weathered and sealed. So now it's on to the lower wing, followed by scratch building the skeletal undercarriage assembly, which unfortunately is not available as a 3D printed part. 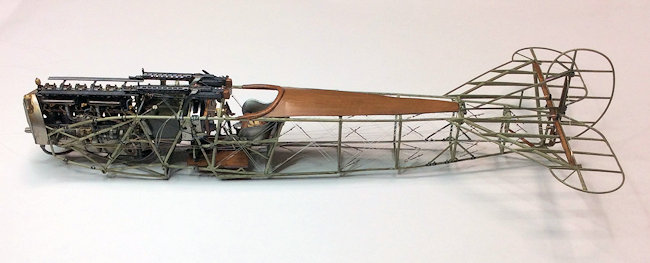 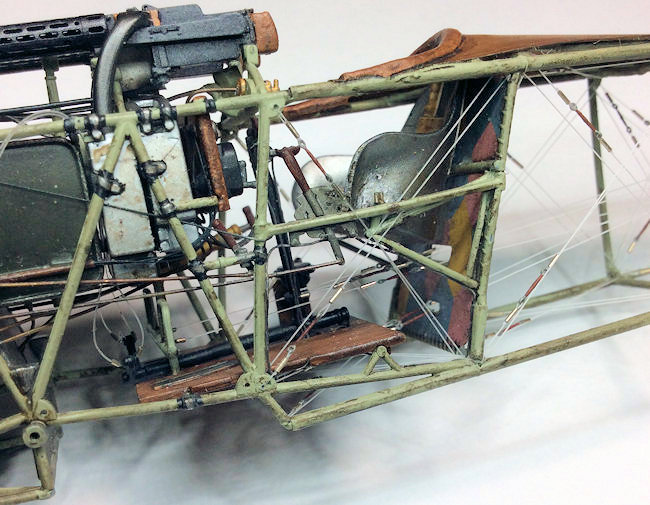 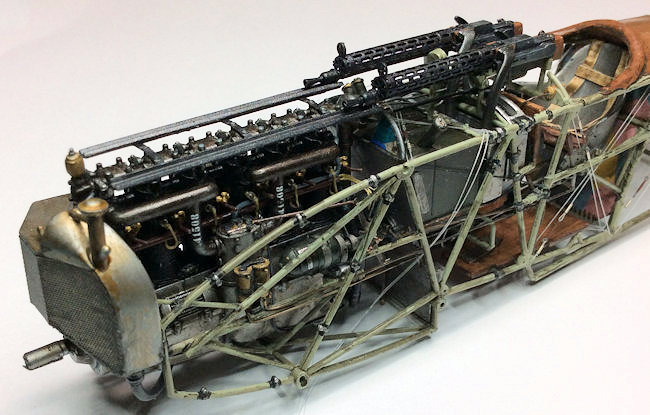 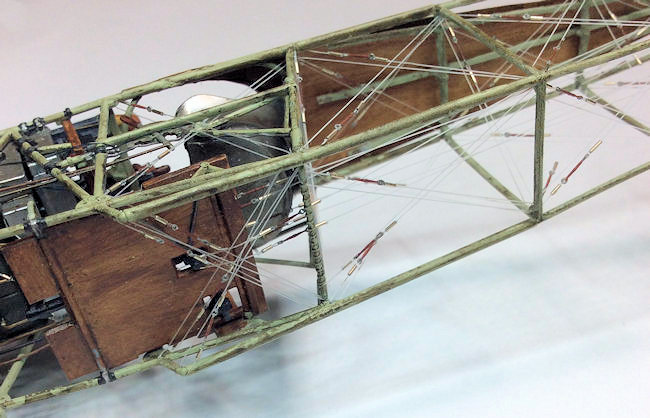 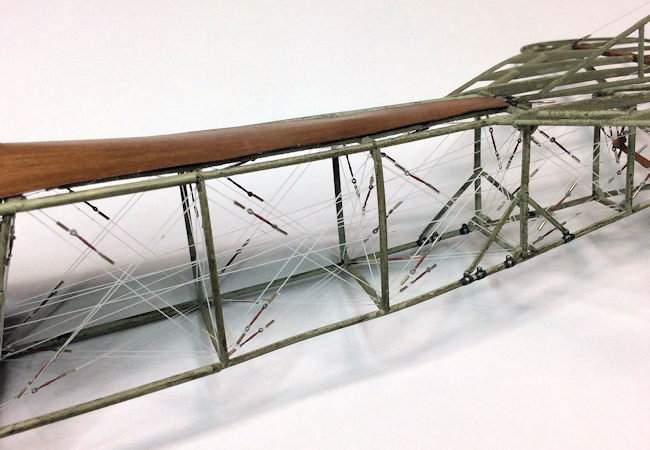 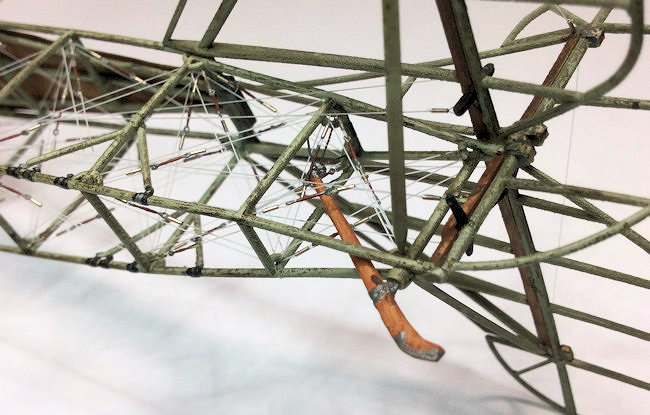 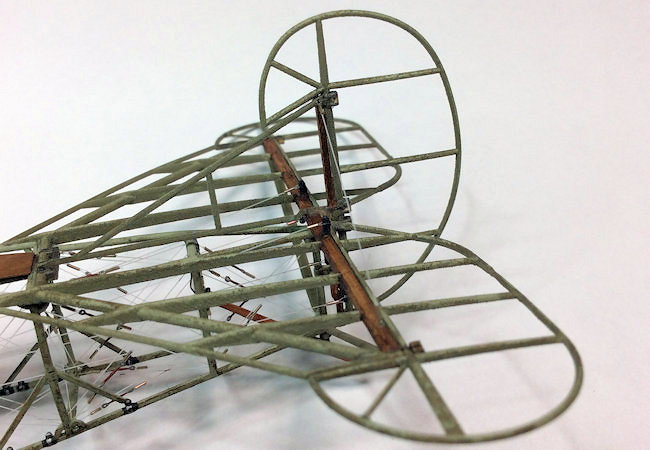 |
|
|
|
Post by sandbagger on May 17, 2019 16:59:04 GMT
Hi all, The 3D printed lower wing is detailed enough, but as normal there are details that can be added to make it more authentic. Early production Fokker D.VII aircraft were fitted with bracing tapes that were routed across the wings between the front and rear wing spars and between the rear wing spar and the wing trailing edge. These tapes were routed in a diagonal ‘zig-zag’ form, up and over each wing rib. However later production aircraft were fitted with 10 mm square strip wood as replacements for the earlier tapes. The 3D printed wings represent the later, strip wood version. Although these strip wood struts can be left to make the model build easier, I've chosen to remove the wings strip wood struts and represent the earlier bracing tapes. In addition, the two wing halves, when test joined at the centre section spars, showed a higher than expected dihedral angle. Therefore I had to shave away material from the spars to achieve the correct angle. Finally the leading edges of both wings were fitted with 'saw tooth' plywood fairings, which will need to be scratch made, as will the trailing edge support wire for attaching the linen covering. So far: Spars adjusted. Strip wood bracing removed. Diagonal bracing struts added to inner and outer trailing edges. Holes drilled at the wing strut attachment points for attaching the wings internal cross bracing cables. Wings scrapped clean of wax support material, assembled and primed. The upper wing, which is in three sections, will require similar treatment. Mike 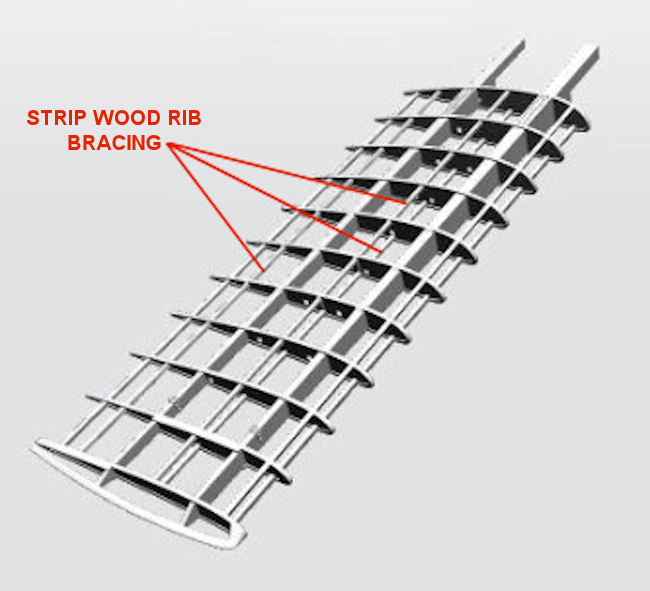 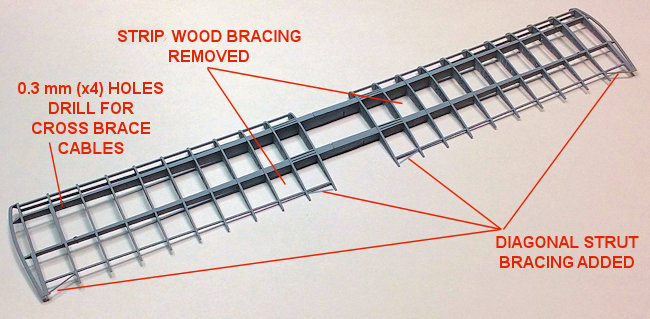 |
|
|
|
Post by sandbagger on May 18, 2019 16:05:22 GMT
Hi all, The leading edge plywood 'saw tooth' fairing is tricky to do, but can be done. Structure drawing of 1/72 scale resized by 160%, then printed, cut out and used as a template on 0.2 mm thick plastic card. The fairing is test fitted and adjusted where necessary then secured in position using thin CA adhesive. Starting on the top of the front wing spar then once set, rolling the wing over the fairing and applying adhesive at the same time., Mike 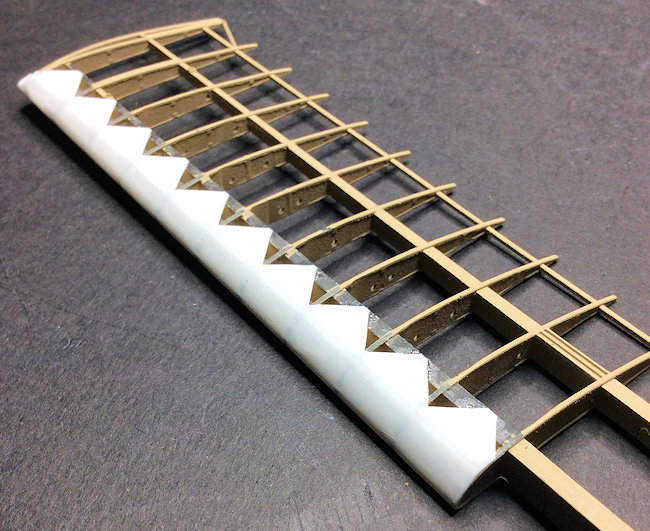 |
|
|
|
Post by sandbagger on May 20, 2019 21:16:36 GMT
Hi all, The lower wing is nearing completion. It's been painted with 'Tamiya' base coat then oils for wood effect. Internal wing bracing with turnbuckles added. Leading edge 'transportation 'bump stops' added. Internal double bracing 'zig-zag' tapes installed (instead of the original 'strip wood' struts, which were removed). I still have the trailing edge wire to install (for attaching the wings linen covering). Also the final weathering will need to be added Mike 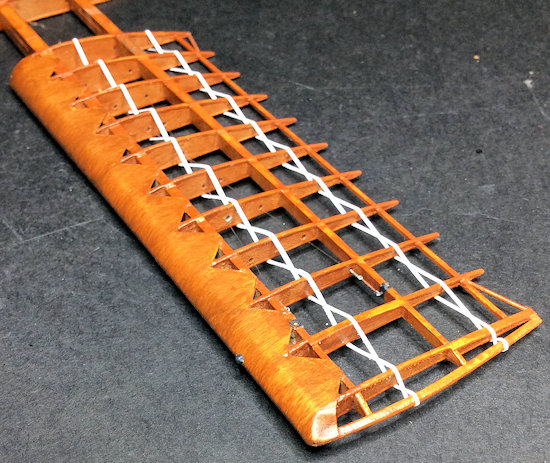 |
|
|
|
Post by sandbagger on May 21, 2019 17:05:49 GMT
Hi all, The lower wing is finished now, with the trailing edge wire fitted and overall 'dumbing down' carried out using 'Alclad' Light Sheen lacquer mixed with 'Tamiya' Smoke (X19). So now it's on to scratch making the undercarriage fairing and axle assembly (not available as a 3D printed part), Mike 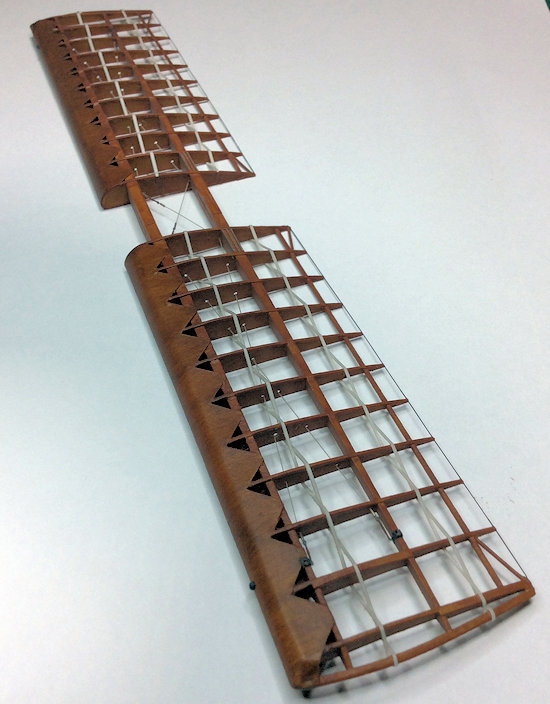 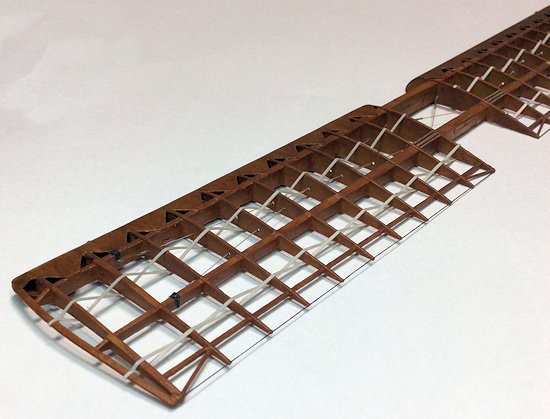 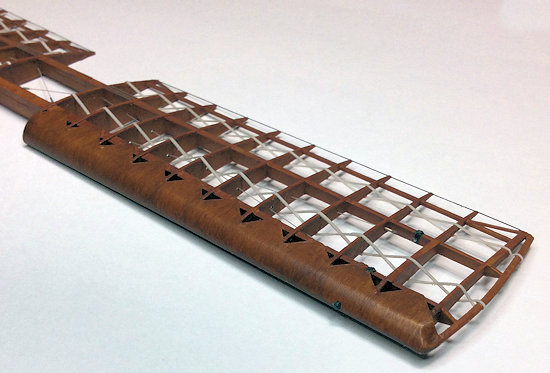 |
|
|
|
Post by sandbagger on May 24, 2019 19:40:18 GMT
Hi all, The undercarriage fairing assembly is basically built. Made from 0.8 mm and 1.0 mm thick plastic card, 1.2mm, 0.8 mm and 0.5 mm brass rod and tube. The wheels are hand made by 'Steve Robson' out in Australia. It's still to be finalized and painted etc. I'll also need to make the struts as the kit supplied items fit into the kit fairing and therefore are not long enough to attach to the angled support blocks on each side of the exposed axle box ends, Mike 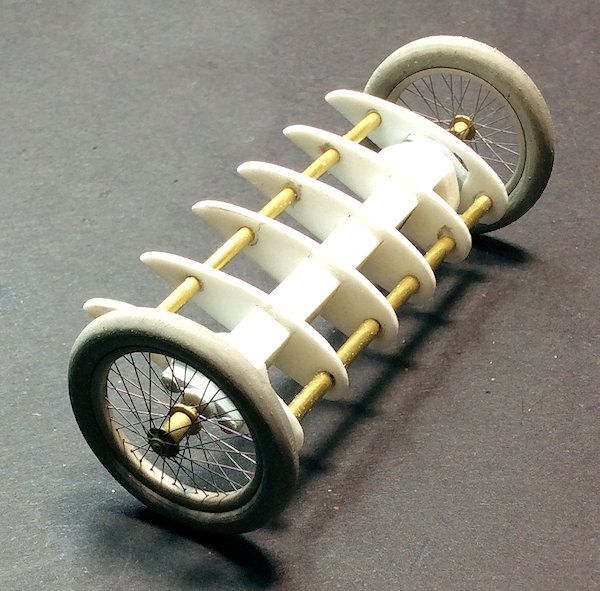 |
|
|
|
Post by sandbagger on May 27, 2019 13:12:50 GMT
Hi all, The basic undercarriage assembly is done now. I still have the undercarriage struts to make and attach before I can fit the assembly to the fuselage frames, Mike 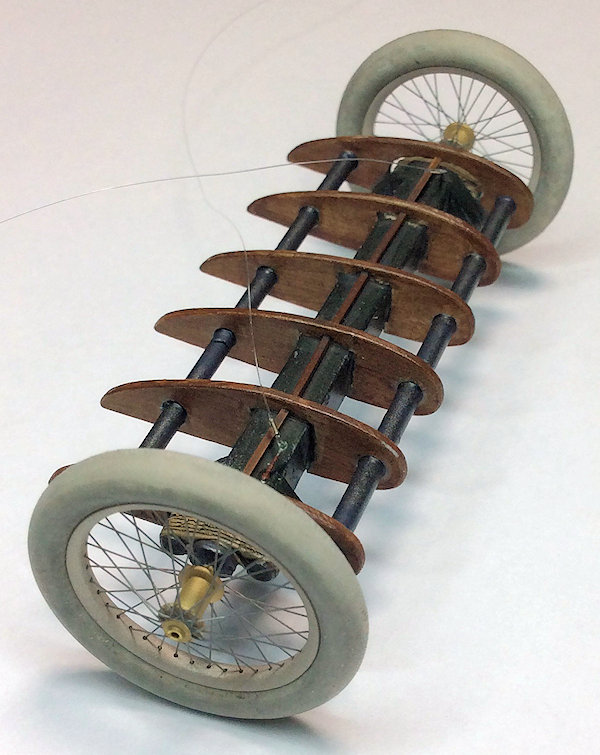 |
|
|
|
Post by sandbagger on May 28, 2019 19:03:13 GMT
Hi all, The lower wing is now installed, with some slight adjustments to clear the fuselage side frames and to give adequate access to the single wing strut mounting location. Next is the undercarriage, once I've completed making the undercarriage struts from brass tube and rod, Mike 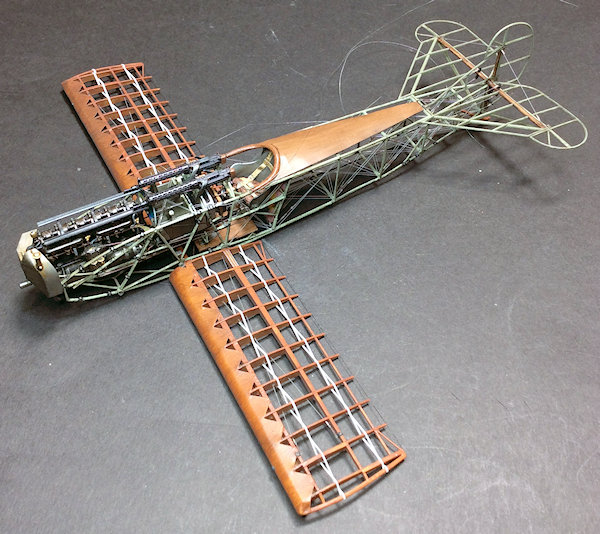 |
|
|
|
Post by sandbagger on May 28, 2019 21:32:42 GMT
Hi all, Front undercarriage struts made using 1.4 mm brass tube and 0.5 mm brass rod, soft soldered for strength, Mike 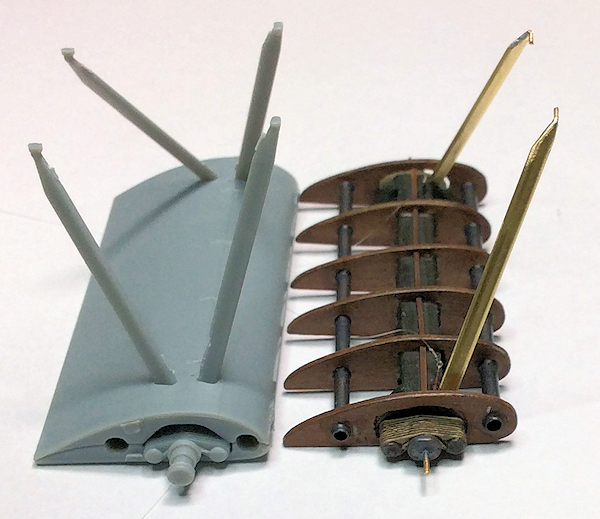 |
|
|
|
Post by sandbagger on May 29, 2019 14:31:47 GMT
Hi all, Just a lick of paint on the struts and cross bracing to attach and the undercarriage is done, Mike 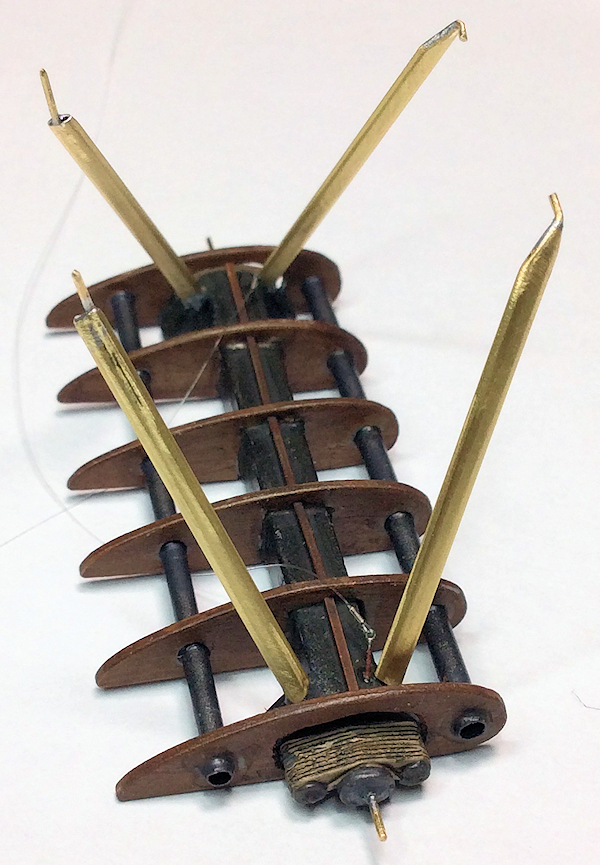 |
|
 Members' Forum")


