|
|
Post by sandbagger on Apr 3, 2019 15:00:11 GMT
Hi all, The first of the Fokker D.VII pair is completed. So now I'm starting the second of the models, the 'skeletal' model. This will be a full view model with 3D printed parts from 'Shapeways'. The donor engine is from the 'Wingnut Wings' Fokker D.VII (OAW) built with the following replacement 3D printed components: Created by Bob Monroe ('Flugzeugwerke') and available from ‘Shapeways’. Mercedes D.III Oil Pump, Mercedes D.IIIa Cylinders (hollow), Mercedes D.IIIa Crankcase, German Aircraft Magneto, Mercedes Cylinder clamps, Gun synchro mechanism, The aircraft structure will be the 3D printed Fokker D.VII structure. Created by Richard Andrews ('Aviattic') and available from ‘Shapeways’. ShapewaysThere will be other after market parts used. I thought I'd start with the engine, which had to modify slightly as the internal mountings in the 3D sump and block are too small to accept the kit supplied propeller shaft. Instead I've made one from brass micro-tube to fit not only the 3D engine but also the 'Proper Plane' Heine propeller. Mike 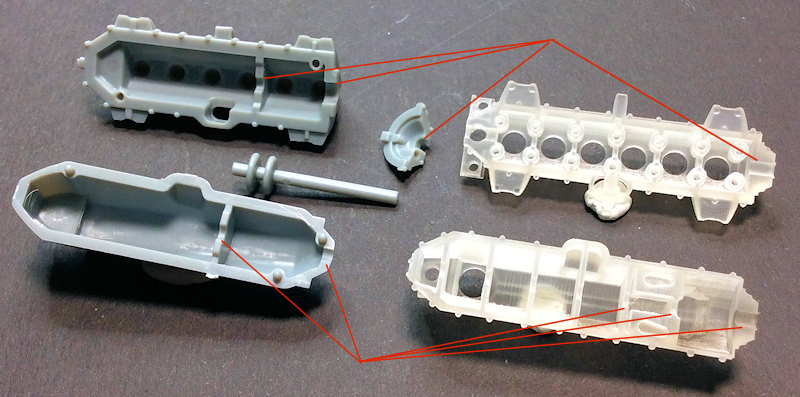 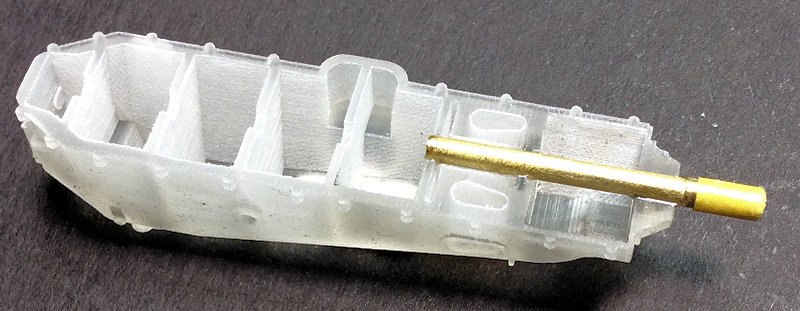 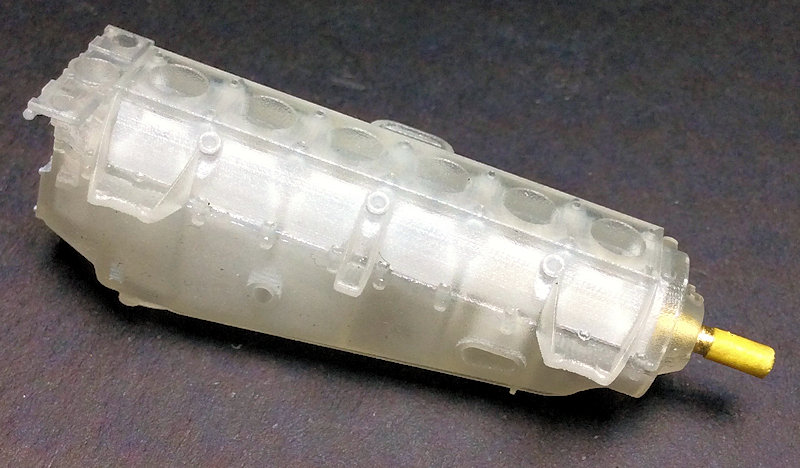 |
|
|
|
Post by sandbagger on Apr 4, 2019 19:37:19 GMT
Hi all, A few more engine bits prepared. Spark plugs made from micro-tube and 'RB Motion' aluminium nuts. 'Taurus' manifold locking rings - cut and sanded to fit the 3D printed engine, Mike   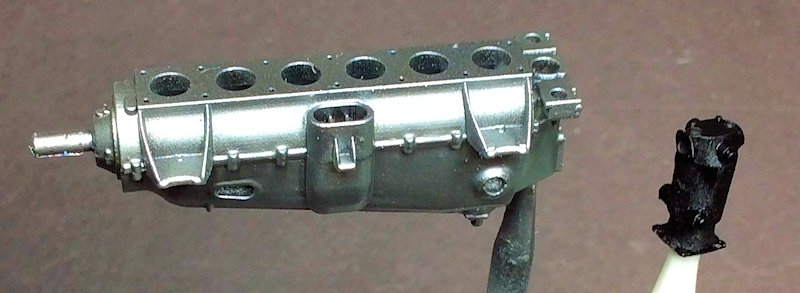 |
|
|
|
Post by sandbagger on Apr 5, 2019 16:24:21 GMT
Hi all, A couple of magnetos each made of four separate 3D printed parts. The ignition leads support tube made from micro-tube. The magneto drive modified to fit the 3D engine with a brass rod for the magneto drives. Also the cylinders are mounted onto the engine block, Mike  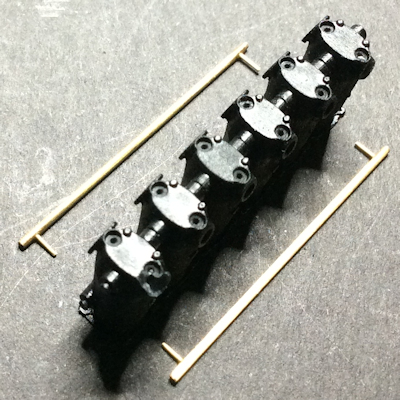  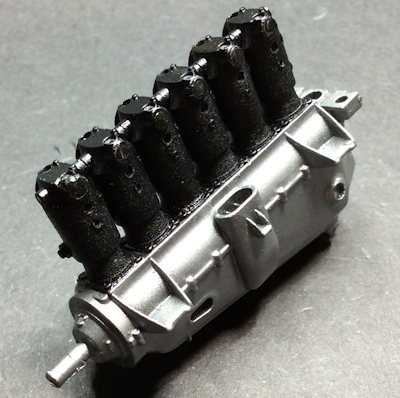 |
|
|
|
Post by sandbagger on Apr 6, 2019 17:29:36 GMT
Hi all, Starting to assemble the engine accessories now. So far the spark plugs, ignition lead support tubes, camshaft, air pump, coolant drain tap and cylinder base bridging clamps. Still plenty more to do, Mike 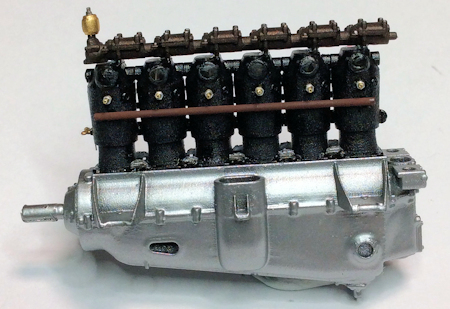 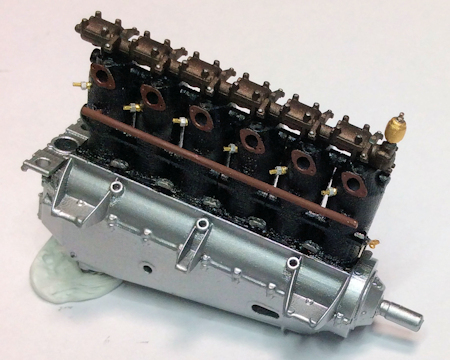 |
|
|
|
Post by sandbagger on Apr 7, 2019 16:44:14 GMT
Hi all, The engine has progressed a bit more now with the addition: The conical valve springs Crankcase breather pipe Magneto drive assembly with two 3D printed magnetos Two air pump to crankcase pipes Decompression valve. Still have to add ignition leads, intake manifold with locking rings, water pump, coolant pipes, oil filler pipes, sump oil sight glass. There's also a couple of other pipes plus engine controls. Mike 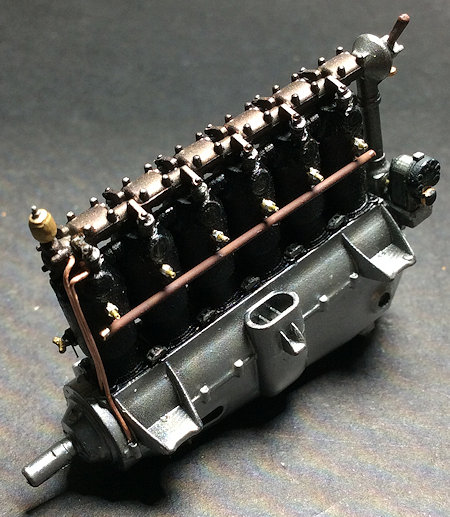 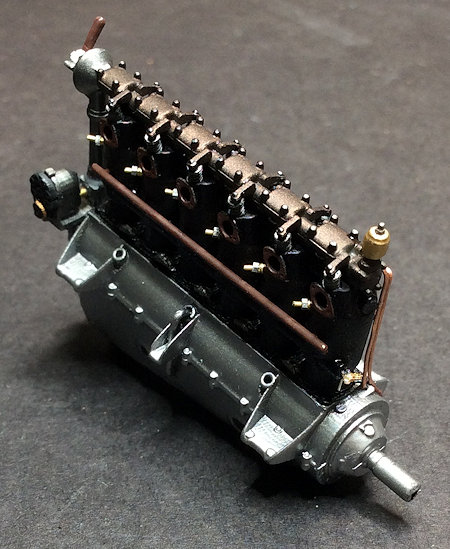 |
|
|
|
Post by sandbagger on Apr 10, 2019 20:09:11 GMT
Hi all, The end is in sight for this engine build. I've added the decals, ignition leads, gun synchronization mechanism, oil sight glass, generator and drive, cylinder fuel primers, water pump, intake manifold with locking rings, crankcase breather pipe and additional pipes. All that's left is to add the engine mounted throttle and spark advance (ignition timing) controls - the remainder of the control runs can't be added until the engine is fitted into the fuselage (with the cockpit), Mike 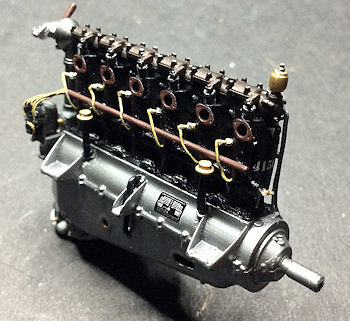 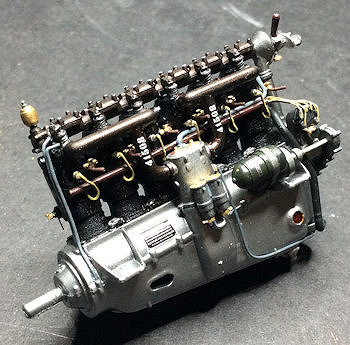 |
|
|
|
Post by sandbagger on Apr 12, 2019 17:47:49 GMT
Hi all, I've added the control linkage to the top of the twin carburettors, which consist two levers, connecting rod and cable pulley. Also the connected levers on the top of the attached 'speed controllers;. I also created the frame mounted throttle bell-crank and the two cross bars on the forward fuselage frames, which are missing from the kit parts, Mike  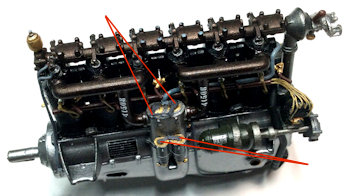  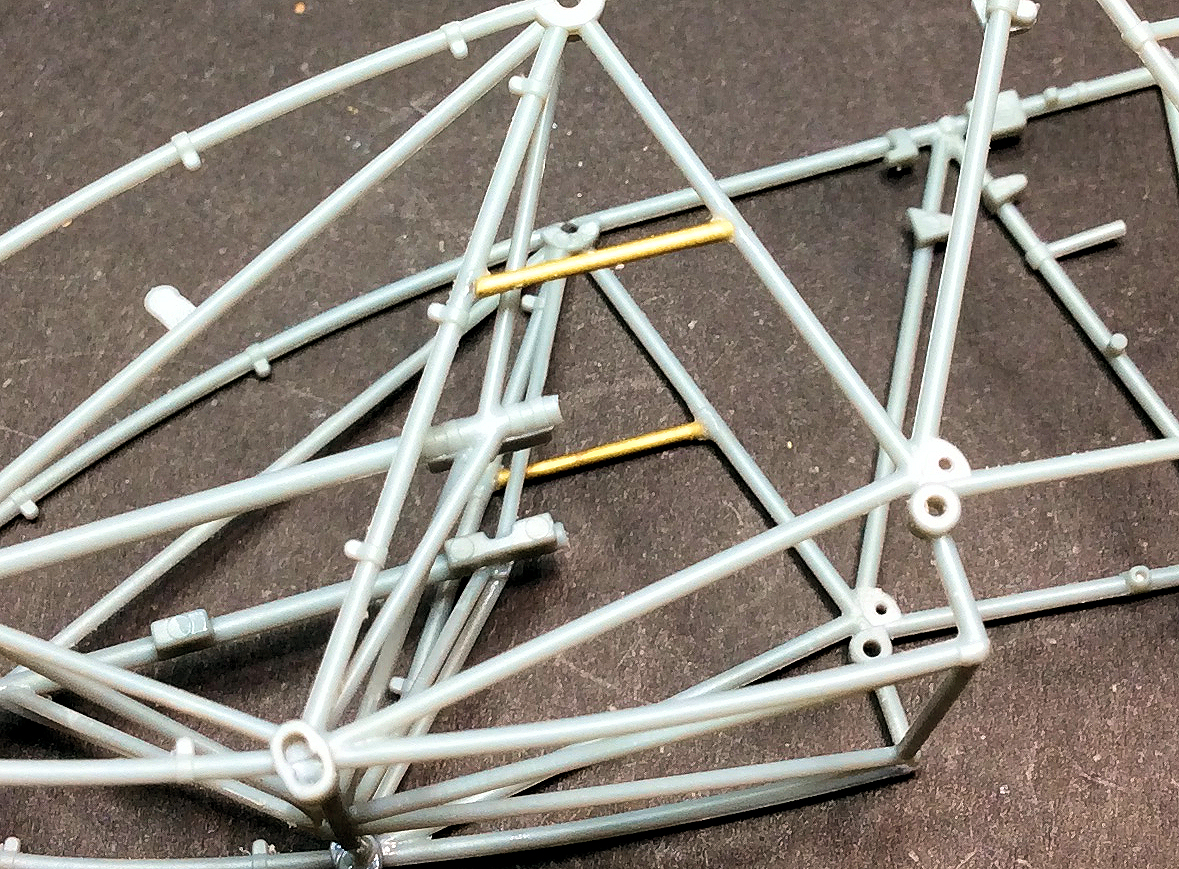 |
|
|
|
Post by sandbagger on Apr 13, 2019 13:42:14 GMT
Hi all, The final on-engine control linkage has been added, which is the spark advance (ignition timing) for bottom magnetos. For now the engine will be put to one side so I can make a start on the cockpit, Mike 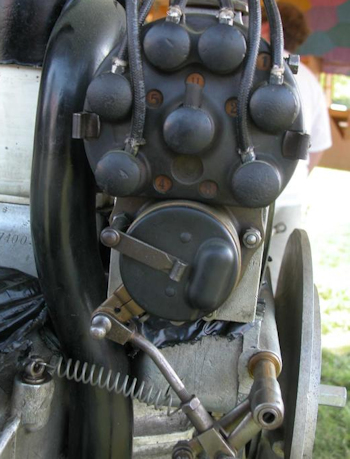 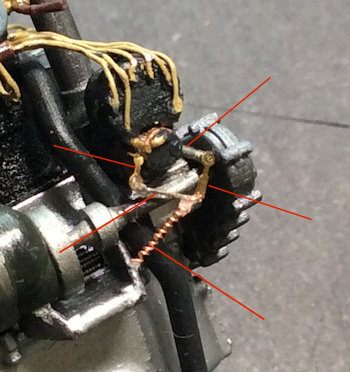 |
|
|
|
Post by sandbagger on Apr 13, 2019 21:08:06 GMT
Hi all, The kit supplied fuselage side frames married to the 3D printed fuselage. This required cutting both, as both have a pilots seat frame and only one can be used of course. As the join between the two could be a weak area, I chose to fit them together using brass micro-tube. This gives more rigidity to the join of the fuselage and allows the fitting of the pilots seat frame from the kit (part A26), Mike 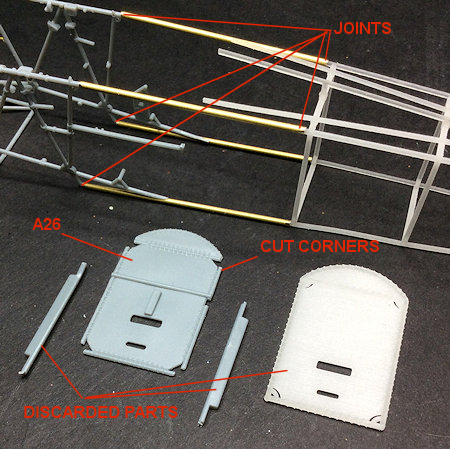 |
|
|
|
Post by sandbagger on Apr 15, 2019 21:09:55 GMT
Hi all, Well time to start the fuselage build with controls, pipework etc, Mike 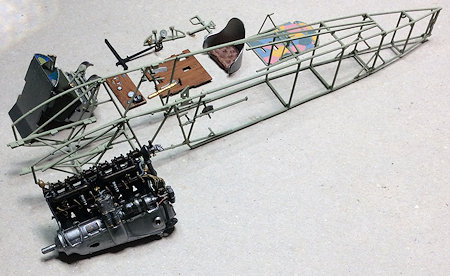 |
|
|
|
Post by sandbagger on Apr 16, 2019 20:57:27 GMT
Hi all, Cockpit floor with controls and seat done, Mike 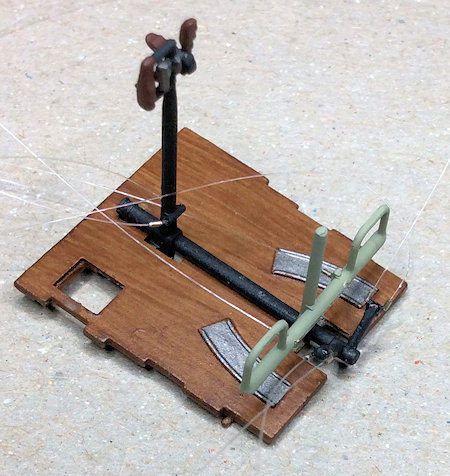 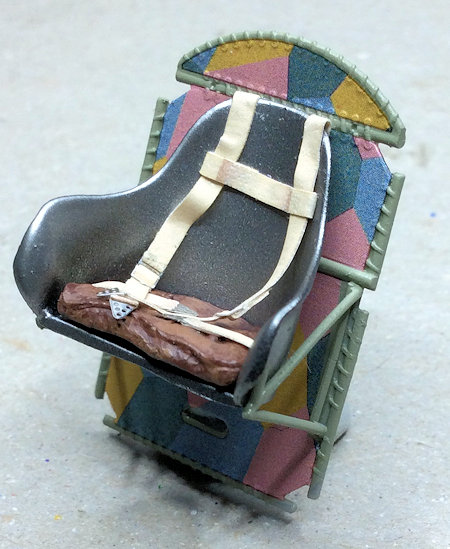 |
|
|
|
Post by sandbagger on Apr 18, 2019 17:13:46 GMT
Hi all, I've started on the cockpit pipework. The pipe connections under the fuel tank. Behind the instrument panel is the fuel valve manifold (made of micro-tube) connected to the pilot's four selectors. Two pipes out are for connecting the supply from the main and auxiliary fuel tanks. From the bottom of the manifold will be the two supply pipes to the engines duel carburetor. Electrical cables added to the rear faces of the starter magneto and ignition switch. Mike 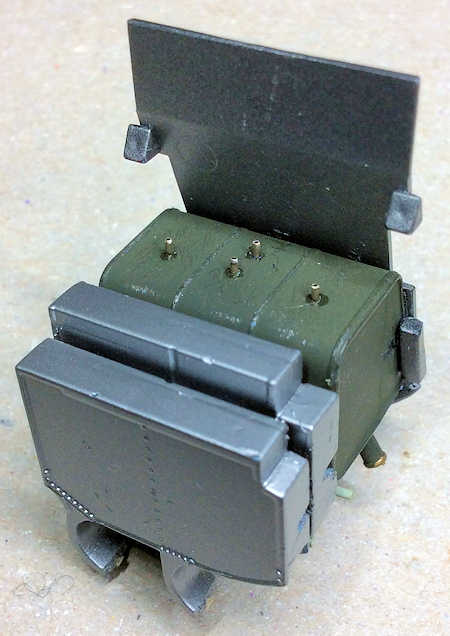 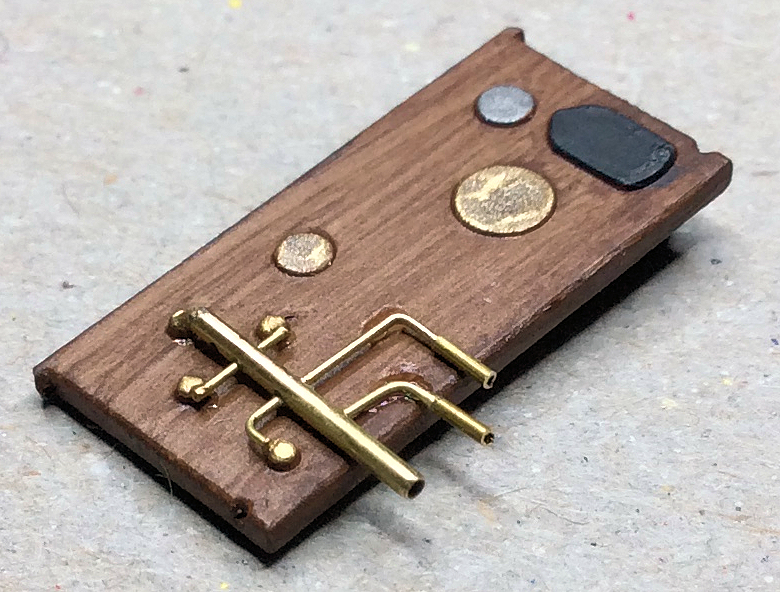 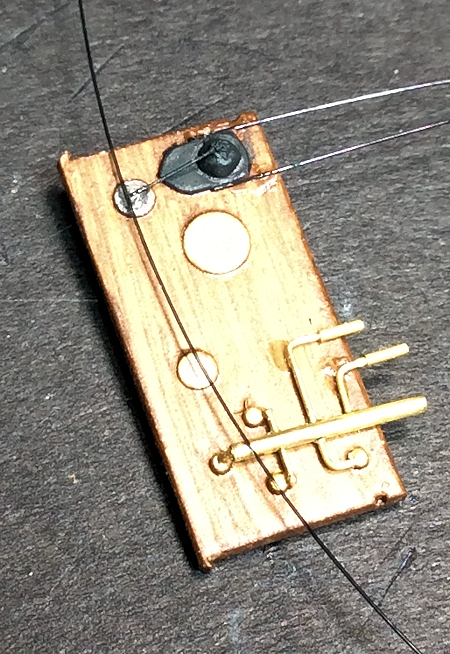 |
|
|
|
Post by sandbagger on Apr 18, 2019 21:05:56 GMT
Hi all, Now things start to get complicated, Mike 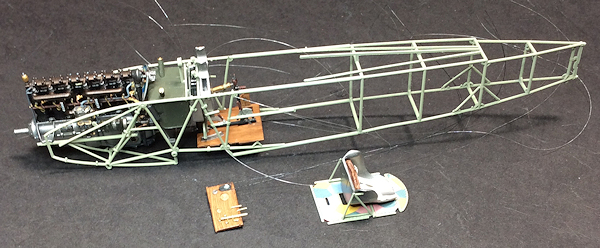 |
|
|
|
Post by sandbagger on Apr 19, 2019 13:45:17 GMT
Hi all, The pilot's seat and support frame now fitted, Mike  |
|
|
|
Post by sandbagger on Apr 19, 2019 18:54:14 GMT
Hi all, The pilot's hand operated fuel pressure pump pipe is done. Also the rear gun support frame and the instrument panel are fitted, Mike 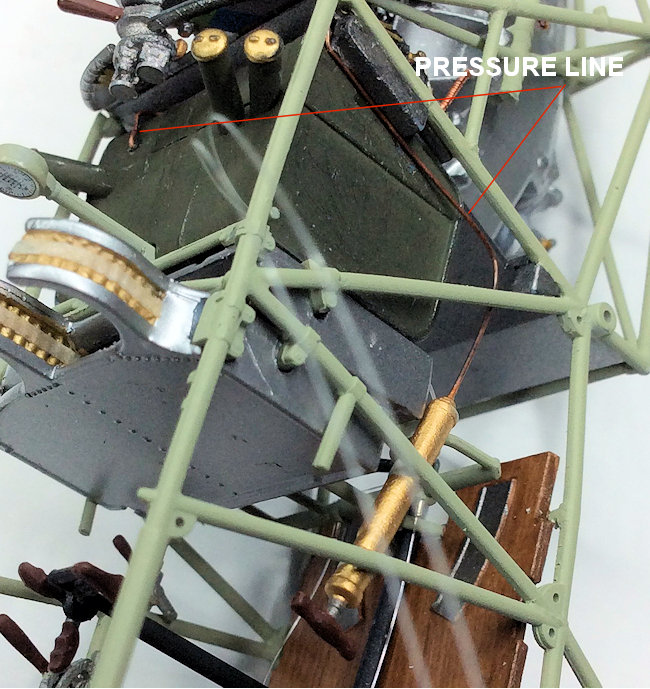 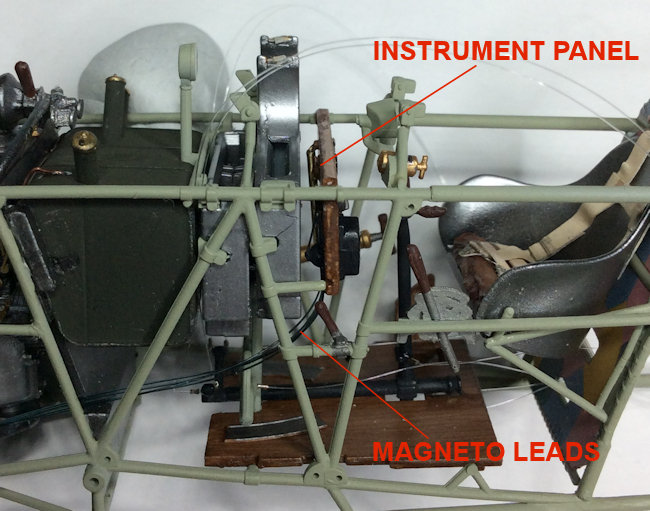 |
|
 Members' Forum")


